


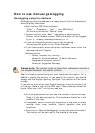


• Start the locr GPS Photo software.
• Open the respective photos and the associated GPS file/files.
• If your photos already contain GPS information in the EXIF
header (Flag = “x”), that seem to be “wrong”, use the “Clear
EXIF location tags…” button to delete these information.
Caution: The information will be deleted for all photos, not only
for the selected one/s!
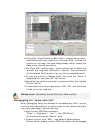
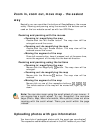
• Select the “Time Adjust” tab.
“System time” displays the current system time of your
computer.
• Use “Days”, “Hours”, etc. to set the “Camera time” according to
the time displayed on the camera, with which your photos were
taken.
Based on this time correction an exact positioning can be made.
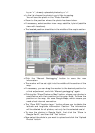
• Click the “Automatic Geotagging” button.
The calculated position will be taken over. It will be written into
the EXIF header automatically, and will be saved on your hard
disk as a part of the photo.
Important note: For an exact calculation of the position during
the automatic geotagging you should always set and keep the
camera time set according to the system time of your computer —
regardless, where you are driving or flying to!
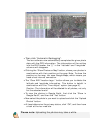
The locr GPS Photo software and Google
Earth
To be able to view locr photos in Google Earth, Google Earth has to be
installed on your computer.
No matter whether you use the locr website, or the free locr GPS
Photo software for geotagging, the information on the position
(longitude and latitude) is saved. In order to position the photos
correctly Google Earth needs exactly this information.
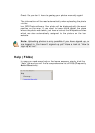
For data transfer with Google Earth locr uses the KML file format.
To view the photos on Google Earth, first click the “Export to Google
Earth”, and then the “Yes” button.