


5
Chapter 3: Installation
Chapter 3: Installation
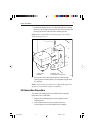
This chapter describes how to install the Heading Sensor, using
everyday hand tools.
3.1 Before you Begin
Before you begin, make sure that you have the all the required
components and tools (listed below) to hand.
Note: Before attempting any installation, you should read the
Electromagnetic Compatibility (EMC) installation and service
guidelines provided under EMC Installation Guidelines.
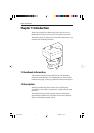
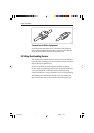
Components
The Raymarine Heading Sensor includes the following standard
components:
• Heading Sensor
•“Swing” bracket
• Self tapping screws (4)
• 6ft (2m) cable, with molded Heading Sensor plug on one end
If you are installing the Heading Sensor at a distance from an NMEA
instrument or system, you may also need a 16.25ft (5m) NMEA
accessory cable.
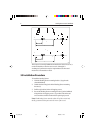
Basic Installation Tools
• Cross head screwdriver
• Electric/hand drill
• 1mm (0.39in) drill bit
EMC Installation Guidelines
All Raymarine equipment and accessories are designed to the best
industry standards for use in the recreational marine environment.
Their design and manufacture conforms to the appropriate
Electromagnetic Compatibility (EMC) standards, but correct
installation is required to ensure that performance is not compromised.
124_3c03.p65 09/05/01, 11:305