4 © 1999 Directed Electronics, Inc. Vista, CA
installation points to remember
This system has been designed to provide the ultimate in convenience to both the dealer and the end user. The
microprocessor at the heart of the system utilizes a sophisticated “Learn Routine” to program transmitters as
well as configure operation settings. Transmitter codes and operations settings are stored in “EEPROM” and will
remain in memory even if the system’s main power is disconnected for extended periods of time. Please take the
time to read this guide thoroughly prior to installing the system.
Do not disconnect the battery if the vehicle has an anti-theft coded radio. If equipped with an airbag, avoid dis-
connecting the battery if possible.
IMPORTANT! Many airbag systems will display a diagnostic code through their warning light after
they lose power. Disconnecting the battery requires this code to be erased, a procedure that can
require a trip to the dealer.
Before beginning the installation:
■ Check with the customer on status LED location.
■ Remove the domelight fuse. This prevents accidentally draining the battery.
■ Roll down a window to avoid being locked out of the car.
After the installation:
■ Test all functions. The “Using Your System” section of the Owner’s Guide is very helpful when testing.
wiring the control unit
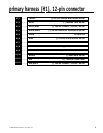
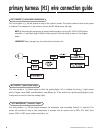
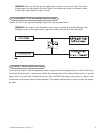
The wiring harness supplied with this unit is the standard 12 pin harness used by DEI security systems. Two wires
in the plug are not used. The functions of all the wires that are used in the primary harness are outlined in the
following Primary Harness (H1), 12-Pin Connector section. The wire connections are described in the Primary
Harness (H1) Wire Connection Guide section.


