


GETTING STARTED > INSTALLATION
12 Fishfinder 250/250C Owner’s Manual
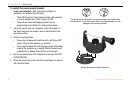
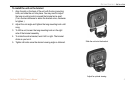
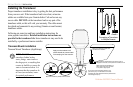
To permanently install the transducer:
1. Lightly sand the surface of the hull and face of the transducer
with 400-grit wet or dry sandpaper.
2. Build a dam using strip caulk about 1/4” (6mm) tall. Pour
about 1/8” (3mm) of two part, slow cure epoxy in the dam.
3. Place the transducer in the epoxy, turning the transducer to
work out any air bubbles.
4. Weight the transducer in place and allow to cure for 24
hours.
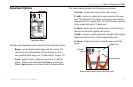
Testing the Installation
Though it is possible to perform some checks with the boat trailered,
the boat should be in the water to properly test the sonar installation.
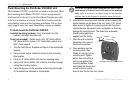
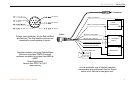
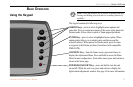
Press the POWER/BACKLIGHT key (page 13) and the Fishfinder
250/250C should power on. If the unit fails to power on, verify that
the power/data cable is seated properly in the back of the unit, the
Red and Black wires are connected to the correct polarity, and the
2-Amp fuse is installed and not blown. If the unit is connected to a
power supply that exceeds 35 Volts DC, a “Battery Voltage High”
warning is displayed and the unit turns off. If the unit does not detect
a transducer, it automatically enters Simulator mode.
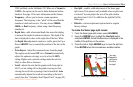
When the unit detects a transducer on initial power up, a “Please set
up transducer” message is displayed. Press the ENTER key (page 13)
to select the transducer type. Highlight your transducer type with the
ARROW keys and press ENTER. Press ADJ/MENU to return to the
Sonar display.
Since water is necessary to carry the sounder’s sonar signal, the
transducer must be in the water to work properly. It is not possible
to get a depth/distance reading when out of the water. As the unit
powers on, it should immediately start showing the bottom. Verify
that the unit is not in the Simulator mode. If the unit is in the
Simulator mode, make sure that the transducer is connected properly
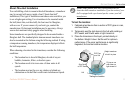
to the unit. When you place your boat in the water, CHECK FOR
LEAKS around any screw holes that have been added below the
water line. DO NOT leave your boat in the water for an extended
period of time without checking for leaks.
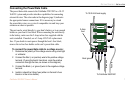
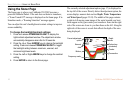
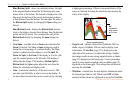
Begin testing the installation at a slow speed. If the sonar appears
to be working properly, gradually increase the boat’s speed while
observing the sonar’s operation. If the sonar signal suddenly is lost
or the bottom return is severely degraded, note the speed at which
this occurs. Return the boat to the speed the signal was lost. Make
moderate turns in both directions and see if the signal improves. If
the signal strength improves while turning, adjust the transducer so
that it extends another 1/8" (3mm) below the transom of the boat.
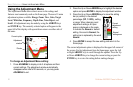
It may take several adjustments to eliminate the degradation. If the
signal does not improve, it may be necessary to move the transducer
to a different location.
NOTE: When adjusting the depth of the transducer, make the
adjustments in small increments. Placing the transducer too
deep can adversely affect the boat’s performance and put the
transducer at greater risk of striking underwater objects.