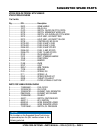
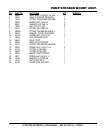
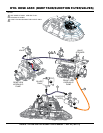
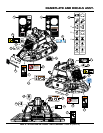
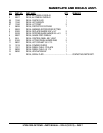
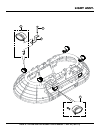
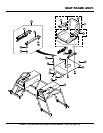
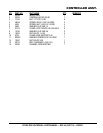
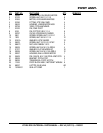
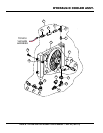
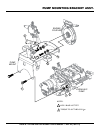
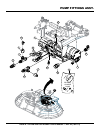
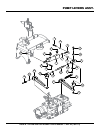
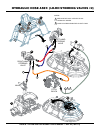
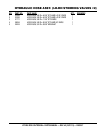
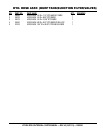
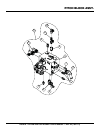
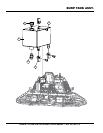
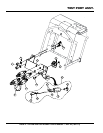
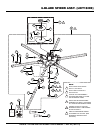
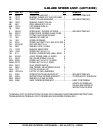
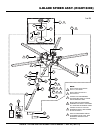
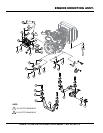
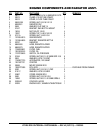
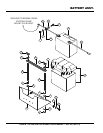
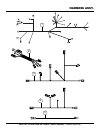
Multiquip HTXD6i Automobile Parts User Manual


HTXD6i RIDE-ON TROWEL • OPERATION MANUAL —REV. #0 (03/23/12) — PAGE 27
1. The foot pedal (Figure 17) solely controls blade
speed. The position of the foot pedal determines
the blade speed. Slow blade speed is obtained by
slightly depressing the pedal. Maximum blade speed
is obtained by fully depressing the pedal.
Figure 17. Blade Speed Control Foot Pedal
Table 4. Joystick Directional Positioning
Move
FORWARD
LEFT Joystick
Move Joystick
BACKWARD
LEFT
Move Joystick
FORWARD
RIGHT
Move Joystick
BACWARD
RIGHT
Move Joysticks
FORWARD
BOTH
Move Joysticks
BACKWARD
BOTH
Move Joystick
to the RIGHT
RIGHT
Move Joystick
to the LEFT
RIGHT
CONTROL JOYSTICK
& DIRECTION
RESULT
Causes only the
left side of the
ride-on trowel to
move forward.
Causes only the
left side of the
ride-on trowel to
move backward.
Causes only the
right side of the
ride-on trowel to
move forward.
Causes only the
right side of the
ride-on trowel to
move backward.
Causes the ride-on trowel
to move backard in
a straight line.
Causes the ride-on trowel
to move to the right.
Causes the ride-on trowel
to move to the left.
Causes the ride-on trowel
to move forward in
a straight line.
OPERATION
2. Push both the left and right joysticks forward (Figure 18).
Figure 18. Joystick Control Forward Direction
3. With your right foot, slowly depress the foot pedal
halfway. Notice that the ride-on trowel begins to move
in a forward direction. Release both joystick controls
to stop forward movement then remove your right foot
from the foot pedal.
4. Practice holding the machine in one place as you
increase blade speed. When about 75% of maximum
blade speed has been reached, the blade will be
moving at proper finishing speed. The machine may be
difficult to keep in one place. Trying to keep the ride-on
trowel stationary is a good practice for operation.
5. Practice maneuvering the ride-on trowel using the
information listed in Table 4. Try to practice controlled
motions as if you were finishing a slab of concrete.
Practice edging and covering a large area.
6. Try adjusting the pitch of the blades. This can be done
with the ride-on trowel stopped or while the trowel is
moving. Test the operation of optional equipment like
retardant spray and lights.
7. Pull both the left and right joysticks backward
(Figure 19) and repeat steps 3 through 6 while
substituting the word reverse for forward.
Figure 19. Joystick Control Reverse Direction
LEFT
JOYSTICK
CONTROL
RIGHT
JOYSTICK
CONTROL
PUSH
FORWARD
LEFT
JOYSTICK
CONTROL
RIGHT
JOYSTICK
CONTROL
PULL
BACKWARDS