


119
Tip:
Another quick way to stop recording one trail and begin a new one
is to use the New Trail command: Press
MENU|MENU|↓ to MY
TRAILS|ENT|ENT.
Caution:
You also have the option of completely turning off trail
recording, under the Trail Options command. However, if the
Update Active Trail option is left off, it will cancel the automatic
trail creation feature.
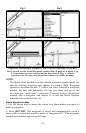
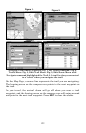
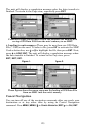
Displaying a Saved Trail
The active trail is automatically displayed on the map (the "Visible"
option) with the factory default settings. You can selectively turn the
trail display off and on for any saved or active trail. In the Saved Trails
List, visible trails have a check mark in front of the trail name.
To turn off trail display:
1. Press
MENU|MENU|↓ to MY TRAILS|ENT.
2. Press ↓ to enter the Saved Trail list, then use ↑ or ↓ to select the
desired Trail Name|
ENT.
3. Press ↓ → to
VISIBLE|ENT. To return to the previous page, press
EXIT|EXIT|EXIT|EXIT.
To turn on trail display:
1. Press
MENU|MENU|↓ to MY TRAILS|ENT.
2. Press ↓ to enter the Saved Trail list, then use ↑ or ↓ to select the
desired Trail Name|
ENT.
3. Press ↓ → to
VISIBLE|ENT. To return to the previous page, press
EXIT|EXIT|EXIT|EXIT.
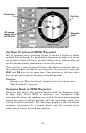
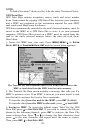
Navigating Trails
There are three methods for following a trail: visual trailing, navigating
a trail (forward) and backtracking a trail (backward). Try each method
to see which you prefer.
Visual trailing is the simplest method. It uses only the Map Page and
requires no menu commands at all. The technique works the same if
you are running a trail forward (from start to end) or backward (from
end to start.) Visual trailing, however, provides no navigation
information during the trip, such as the time to your destination.