Service
10 306674V
Air Motor and Throat Service
Before starting:
• Be sure to have all necessary parts on hand. Air
Motor Repair kit, 207385, includes repair parts for
the motor. Pump Repair Kit, 239320, includes repair
parts for the pump and the air motor throat area.
Use all the parts in the kits for the best results.
• Two accessory tools should be used. Padded Pliers,
207579, is used to grip the trip rod without damag-
ing its surface. Gauge, 171818, is used to ensure
the proper clearance between the poppets and seat
of the transfer valve.
Disassembly
1. Flush the pump. Follow the Pressure Relief Proce-
dure, page 6.
2. Disconnect the air hose from the motor. If neces-
sary, disconnect the motor from the pump. Clamp
the air motor base in a vise.
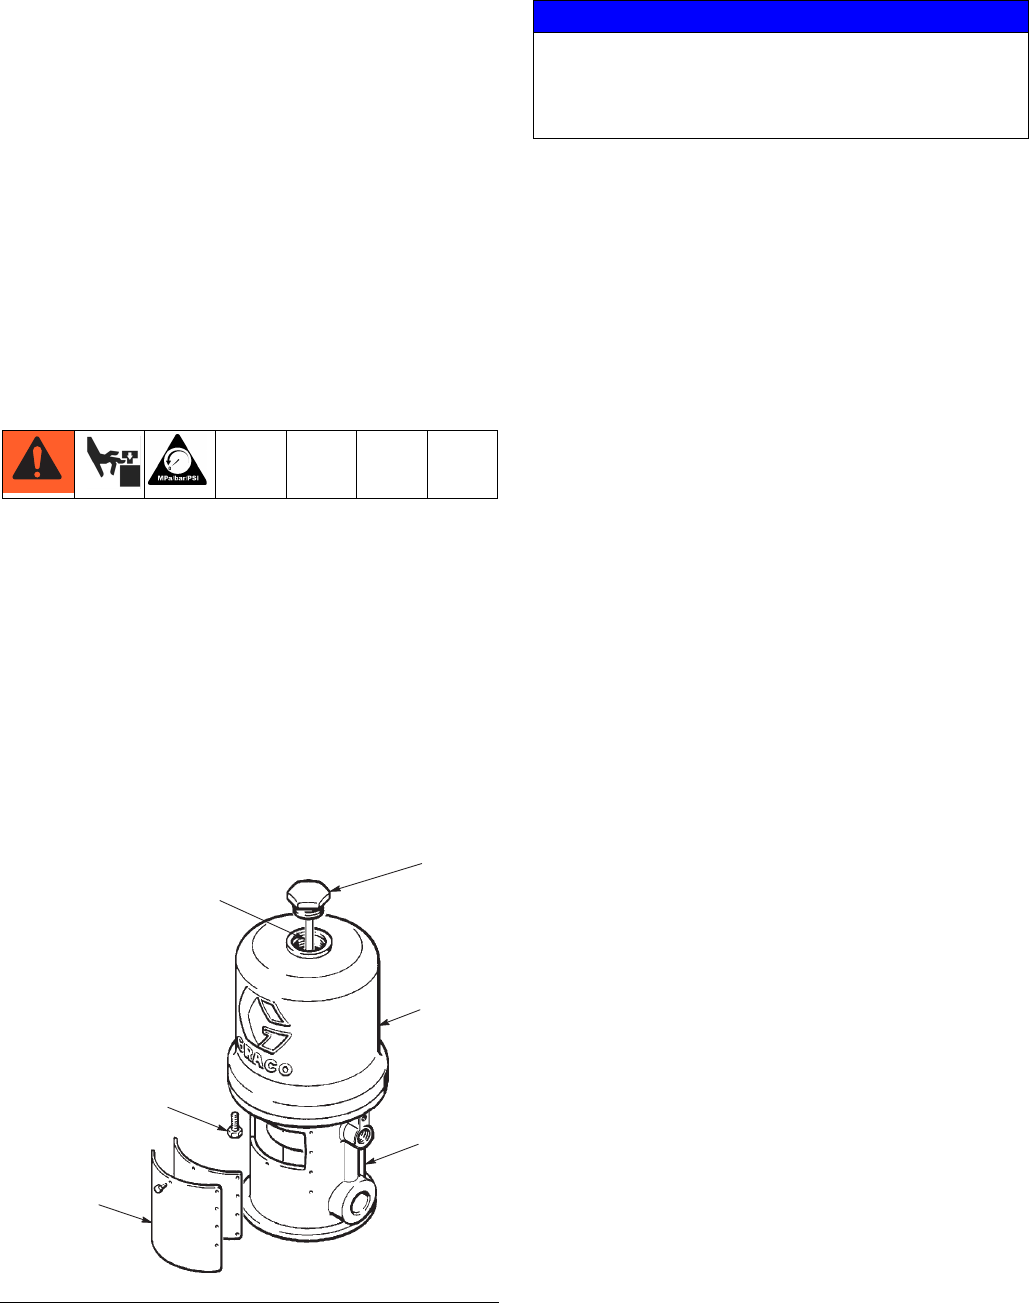
3. Manually push on the piston rod to move the piston
assembly to the top of its stroke. Unscrew the cylin-
der cap nut (31) from the cylinder (32). Pull up on
the cap nut. Grip the trip rod (1) with a padded pli-
ers, 207579, and screw the cap nut off the trip rod.
(F
IG. 4)
4. Remove the eight screws (7) holding the cylinder
(32) to the base (56). Carefully pull the cylinder
straight up off the piston. (F
IG. 4)
5. Use a screw driver to push down on the trip rod
yoke (14) and snap the toggle assemblies (k) down.
Remove the lockwires (28) from the adjusting nuts
(27) of the transfer valves (M). Screw the top adjust-
ing nuts (27) off. Screw the valve stems (30) out of
the grommets (18) and lower adjusting nuts (27).
Take the valve poppets (37) off the stems and
squeeze them firmly to check for cracks. (F
IG. 5)
6. Grip the toggle rockers (16) with a pliers. Compress
the springs (17) and swing the toggle assembly (K)
up and away from the piston lugs (L), and remove
the parts. Check that the valve actuator (13) is sup-
ported by the spring clips (4), but slides easily into
them. (F
IG. 5)
7. Remove the trip rod yoke (14), valve actuator (13)
and trip rod (1). Check the exhaust valve poppets
(38) for cracks.
NOTE: To remove the exhaust valve poppets (38),
stretch them out and cut with a sharp knife.
8. Pull the piston (5) up and out of the base (56) and
inspect the piston o-ring (20) and the o-ring base
casting.
FIG. 4
32
7
56
36
1
Hold trip rod with
padded pliers
207579, to prevent
damage to rod
31
NOTICE
Do not damage the plated surface of the trip rod.
Damaging the surface of the trip rod can result in
erratic air motor operation. Use the special padded
pliers, 207579, to grasp the rod.


