


Quick Start
9
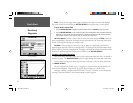
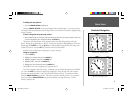
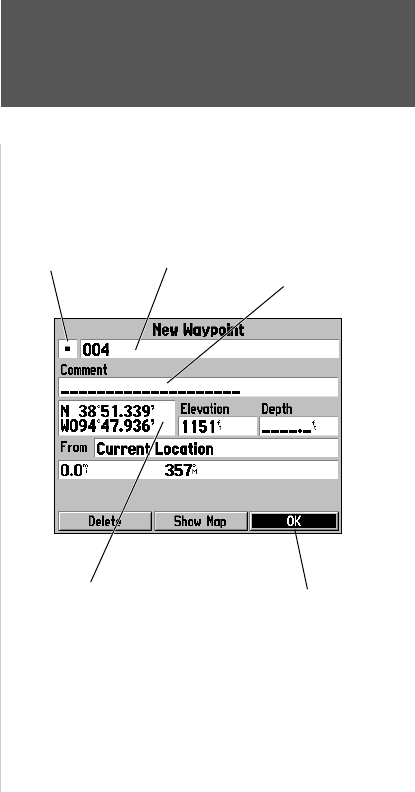
Creating a Waypoint
“Marking” a waypoint:
1. Press and hold the ENTER key.
When the ENTER key is held, the ‘Mark’ function of the key is activated and the GPSMAP 176
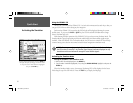
captures its current location, and displays the New Waypoint Page. Notice that the unit assigned a
square as the default symbol and a number as the default name. The ‘OK’ Button along the lower right
is highlighted, pressing the ENTER key will save the new waypoint using the default settings for the
symbol and name, but for practice we will change them.
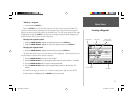
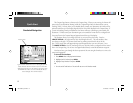
Changing the waypoint symbol:
1. Using the ARROW KEYPAD, highlight the Symbol fi eld, then press the ENTER key.
2. Using the ARROW KEYPAD, highlight the ‘Scenic Area’ symbol, then press the ENTER key.
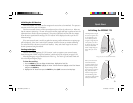
Changing the waypoint name:
1. Using the ARROW KEYPAD, highlight the Name fi eld, then press the ENTER key.
The Name fi eld will become active and the fi rst zero will be highlighted. Notice that there are now
ten placeholders for alpha-numeric characters displayed.
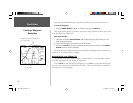
2. Press the ARROW KEYPAD to the LEFT to clear the fi eld.
3. Press the ARROW KEYPAD UP, scroll through the alpha-numeric list until the letter ‘C’ is selected.
4. Press the ARROW KEYPAD RIGHT to move to the next placeholder.
5. Press the ARROW KEYPAD DOWN, scroll through the alpha-numeric list until the letter ‘R’ is
selected.
You should be starting to get the feel of it. Continue entering letters to spell the word CREEK.
6. With the letter ‘K’ highlighted, press the ENTER key to accept the name.
Symbol Field Name Field Comment Field
up to 20 characters
Current Location
‘OK’ Button
190-00185-02_0A.indd 9 6/17/2002, 1:17:34 PM