


4 GPSMAP 4000/5000 Series Installation Instructions
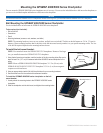
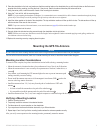
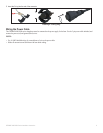
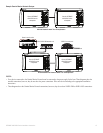
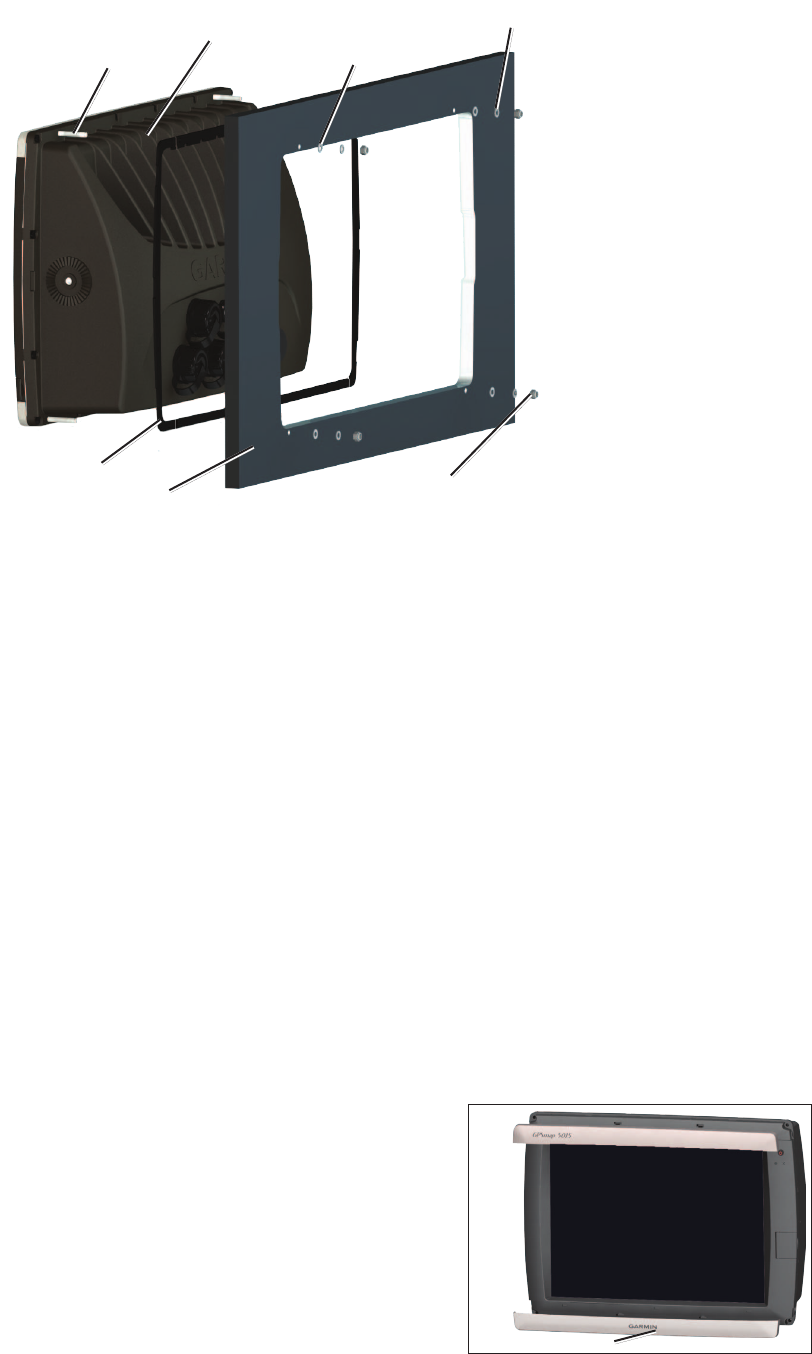
Mounting covers 2
Chartplotter
Mounting studs ×4
Rubber gasket
Flat washers ×4
Lock washers ×4
Hex nuts ×4
Mounting surface
• Flush-mounttemplate
• Rubbergasket
• Mountingscrews(4.2×1.4DIN7981/number8ANSI)
• Jigsaw
• Maskingtape
• Scissors
• Drill
• Drillbits—
3
/
8
in.(10mm)
• Centerpunchandhammer
• Anti-seizelubricant(optional)
1. Theush-mounttemplateisincludedintheproductbox.Trimthetemplateandensureitwilltinthelocationwhereyouwanttoushmount
thechartplotter.
NOTES:
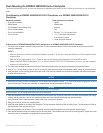
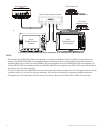
• Make sure the surface on which you mount the chartplotter has at least 7 in. (18 cm) of open space behind it to t the chartplotter and the
connected wires, and make sure to leave approximately 1/2 in. (13 mm) of space on the right side of the chartplotter to access the SD card
door.
• Mount a 4010/4210 chartplotter 31 1/2 in. (80 cm), and a 5015/5215 chartplotter 23 5/8 in. (60 cm), from a magnetic compass to avoid
interference.
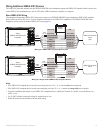
2. Theush-mounttemplatehasadhesiveontheback.Removetheprotectivelinerandapply
thetemplatetothelocationatwhichyouwanttomountthechartplotter.
3. Usinga
3
/
8
in.(10mm)drillbit,drillapilotholeinsidethecornerofthetemplatetobegin
cuttingthemountingsurface.
4. Usingthejigsaw,cutthemountingsurfacealongtheinsideofthesolidlineindicatedonthe
ush-mounttemplate.Usealeandsandpapertorenethesizeofthehole.
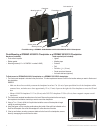
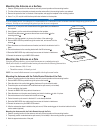
5. Ifthetopandbottommountingcoversareattachedtothefrontofthechartplotter,remove
thembyunsnappingthecoversfromthesides.