


X9218pr-0720
12
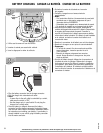
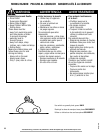
Troubleshooting • Solución de problemas • Guide de dépannage Î service. sher-price.com
ASSEMBLY MONTAJE ASSEMBLAGE
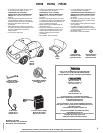
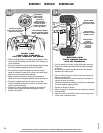
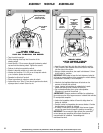
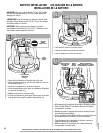
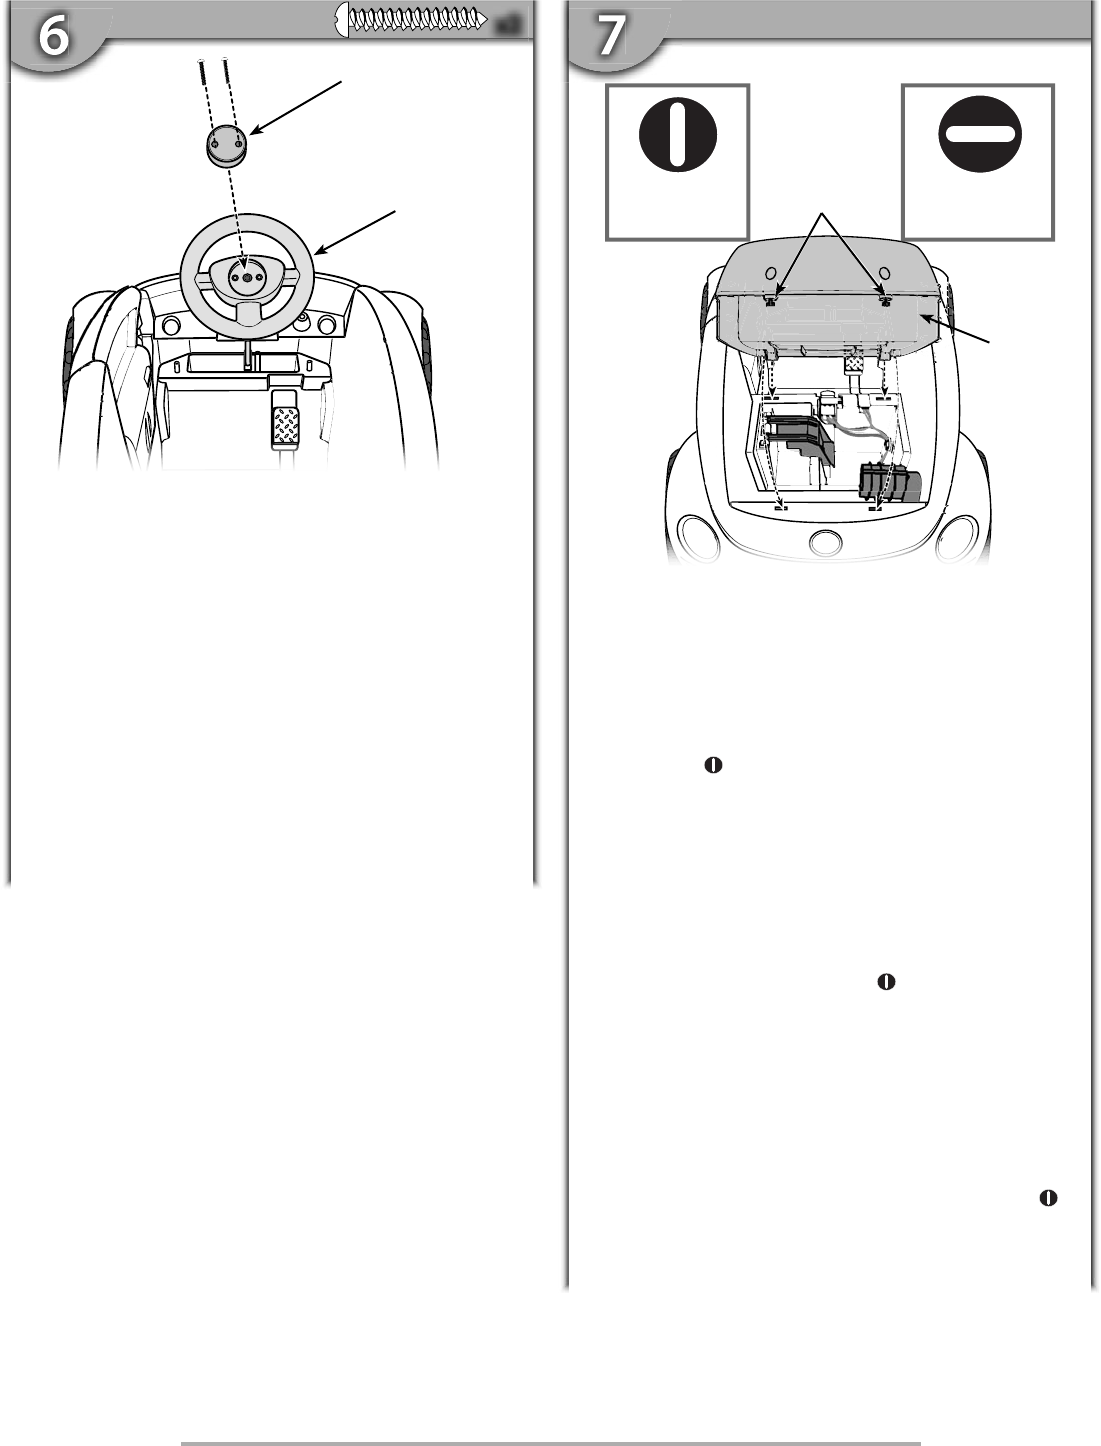
• Turn the vehicle upright.
• Fit the steering wheel cap into the centre of the
steering wheel.
• Insert two #6 x 2,5 cm screws through the steering wheel
cap and into the steering wheel. Tighten the screws.
• Colocar el vehículo en posición vertical.
• Ajustar la tapa del volante en el centro del volante.
• Insertar dos tornillos n° 6 x 2,5 cm en la tapa del volante
y en el volante. Apretar los tornillos.
• Remettre le véhicule à l’endroit.
• Placer la garniture du volant au centre du volant.
• Insérer deux vis nº 6 de 2,5 cm dans la garniture du volant,
et jusque dans le volant. Serrer les vis.
Steering Wheel Cap
Steering Wheel Cap
Tapa del volante
Tapa del volante
Garniture du volant
Garniture du volant
Steering Wheel
Steering Wheel
Volante
Volante
Volant
Volant
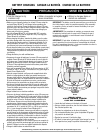
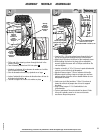
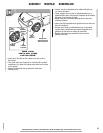
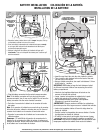
• Insert the seat front tabs into the slots inside the vehicle.
• Then, insert the lock fastener tabs on the back of the seat
into the slots in the vehicle.
• Using a slotted screwdriver, turn each lock fastener
1
/4 turn
to the locked position.
IMPORTANT! Remember to keep the lock fasteners locked at
all times to prevent children from accessing the vehicle battery
compartment. Assembly is now complete.
• Introducir las lengüetas delanteras del asiento en las
ranuras del interior del vehículo.
• Luego, insertar las lengüetas de sujetador de la parte
trasera del asiento en las ranuras del vehículo.
• Con un desatornillador plano, girar cada sujetador
90 grados a la posición de cerrado .
¡IMPORTANTE! Siempre mantener cerrados los sujetadores
para evitar que los niños logren acceso a la batería del vehículo.
El montaje está completo.
• Insérer les languettes situées à l’avant du siège dans les
fentes du véhicule.
• Ensuite, insérer les languettes des verrous situées à l’arrière
du siège dans les fentes du véhicule.
• À l’aide d’un tournevis à pointe plate, faire tourner chaque
verrou d’un quart de tour jusqu’à la position verrouillée .
IMPORTANT! Les verrous du siège doivent être verrouillés
en tout temps pour empêcher les enfants d’accéder au
compartiment de la batterie. L’assemblage est
maintenant terminé.
Locked
Locked
Cerrado
Cerrado
Verrouillé
Verrouillé
Unlocked
Unlocked
Abierto
Abierto
Déverrouillé
Déverrouillé
Seat
Seat
Asiento
Asiento
Siège
Siège
Lock Fastener
Lock Fastener
Tabs
Tabs
Lengüetas de
Lengüetas de
sujetador
sujetador
Languettes des
Languettes des
verrous
verrous
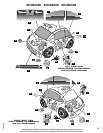
REAR VIEW
VISTA DESDE ATRÁS
VUE DE L’ARRIÈRE
x2
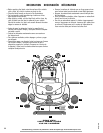
DASH VIEW
VISTA DEL TABLERO
VUE DU TABLEAU DE BORD