


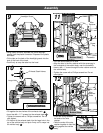
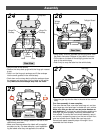

24
25
26
27
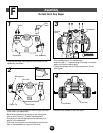
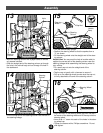
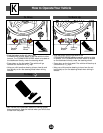
Hole Hole
Hinge Pin
Endcap
Hinge Pin
Hinge Pin
Endcap
Dump Bed
Small
Groove
• Face the rear of the vehicle.
• Position the dump bed upright with the hinge pin nearest
to you.
• Push in on the hinge pin endcaps and fit the endcaps
into the small grooves in the vehicle body.
• Push down on the dump bed to slide the endcaps down
the grooves and snap them into the holes in the vehicle
body. Make sure the endcaps snap into the holes.
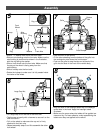
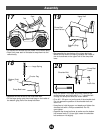
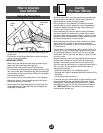
Taillight Guard
Taillight
Guard
Slots
Slots
Gas Cap
• Apply labels #9 to the taillight areas on the rear of the
vehicle body as shown.
• Make sure the areas where the labels will be applied
are clean and dry. For best adhesion, avoid reposition-
ing the labels once they are applied to the vehicle.
• Snap the gas cap into the hole in the side of the vehicle
body.
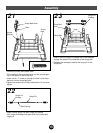
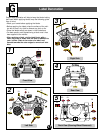
One time assembly is now complete.
One extra thermal fuse, one extra small cap nut, and two
extra large cap nuts have been included with your vehicle.
Make sure that you do not have any extra washers or
axle bushings. If you have any extra washers and/or axle
bushings, you have probably incorrectly assembled the
front wheels. To correct the front wheel assembly, use pli-
ers to firmly squeeze the cap nut on the end of each front
axle and remove them. Discard the used cap nuts.
Reread and repeat assembly steps 4 through 6 to re-
assemble the front wheels.
• Using safety scissors, separate the taillight guards from
the plastic connector. Dispose of the plastic connector.
• Fit the tabs on the back of the taillight guards into the
slots in the vehicle body.
• Push firmly to snap the tabs into the vehicle body.
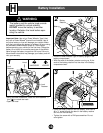
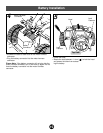
16
Assembly
Rear View
Rear View
Rear View
9
9