


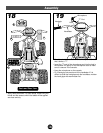
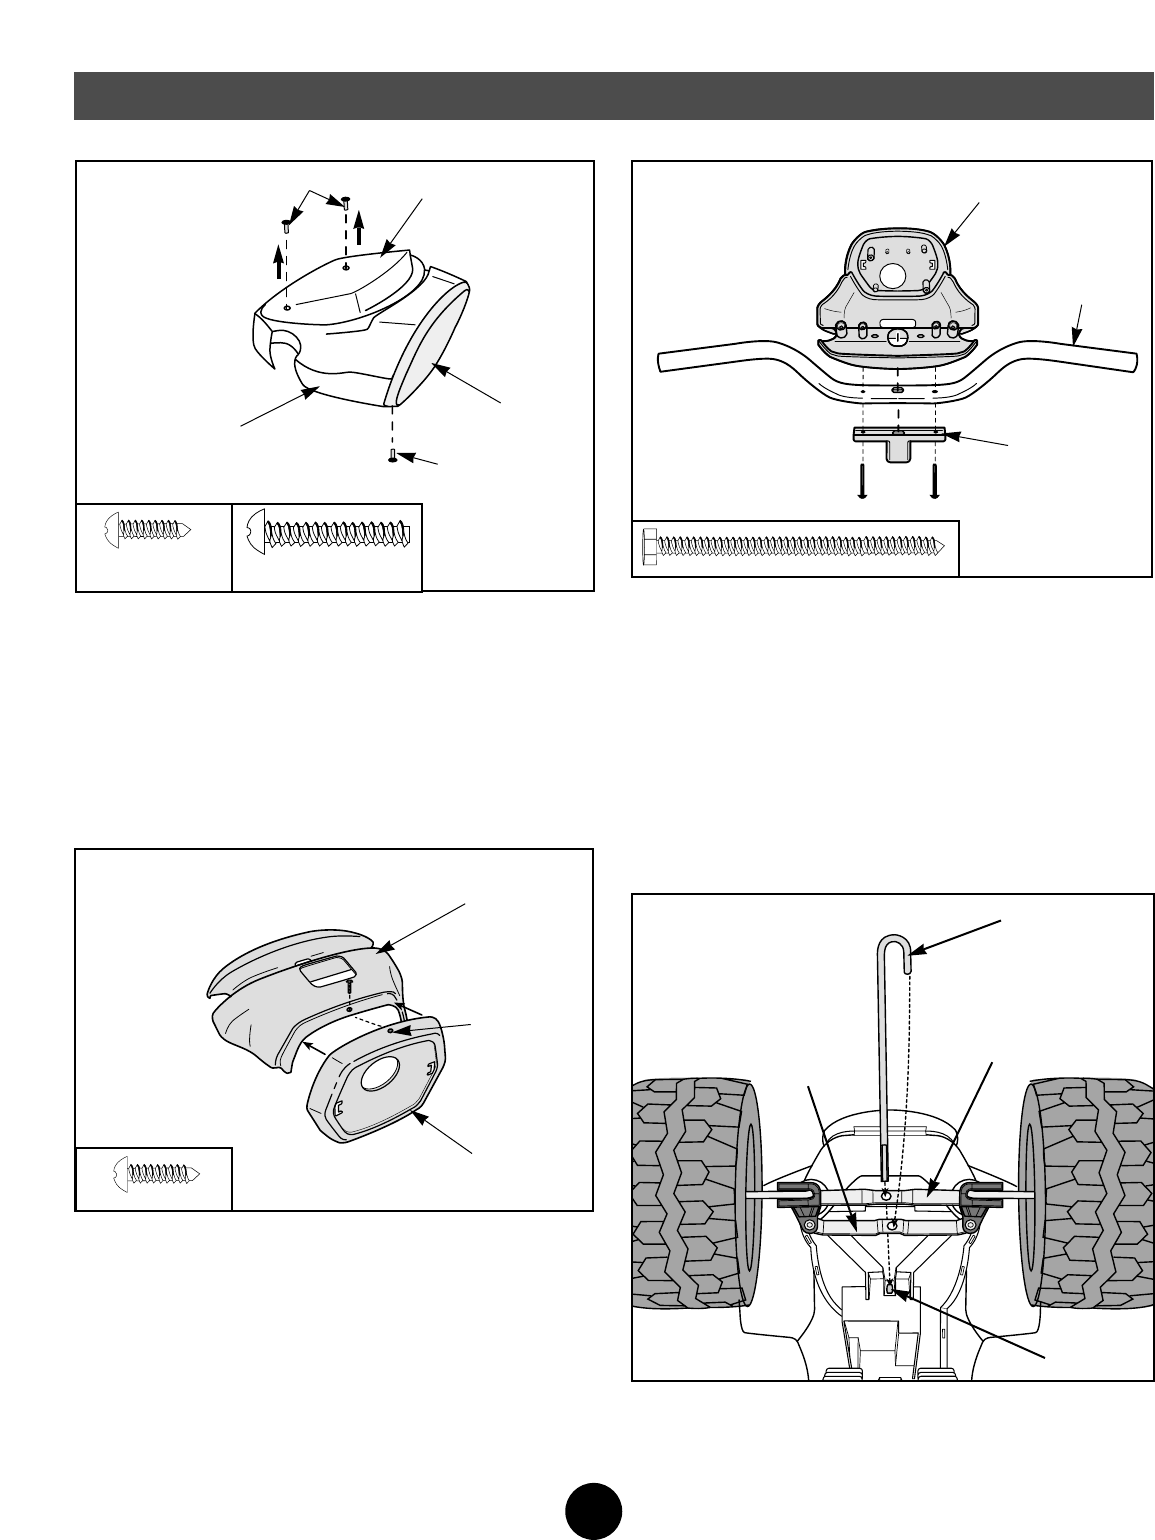
• Lift the front end of the vehicle.
• Slide the straight end of the steering column through the
hole in the upper steering linkage and out through the
hole in the vehicle body.
• Insert the curved end of the steering column into the
hole in the lower steering linkage.
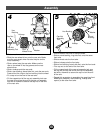
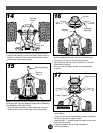
• To re-assemble the headlight to the lower console, fit the
lower rim on the headlight onto the open end of the lower
console. Make sure the screw hole in the rim of the
headlight and the lower console are aligned.
• Re-insert the #6 x
1
/
2
" screw into the hole in the bottom
of the headlight.
• Tighten the screw with a Phillips screwdriver. Do not
over-tighten.
• Set the #8 x 1" screws and upper console aside for
assembly step 17.
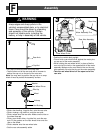
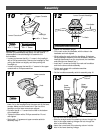
IMPORTANT! For packaging reasons, the console/headlight
has been pre-assembled at the factory.You will need to
disassemble the console/headlight to assemble it to
the handlebar.
• Loosen and remove the #6 x
1
/
2
" screw in the headlight
with a Phillips screwdriver. Remove the headlight by first
pulling the bottom out slightly and then pushing the
headlight up.
• Loosen and remove the two #8 x 1" screws in the upper
console with a Phillips screwdriver.
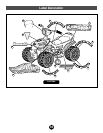
10
Upper Console
Lower Console
Headlight
13
Steering
Column
Lower
Steering
Linkage
Upper
Steering
Linkage
Hole
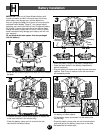
12
Assembly
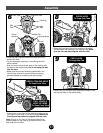
Handlebar
Lower Console/Headlight
Neck
• Position the handlebar upright.
• Fit the neck under the handlebar, with the holes in the
handlebar and neck aligned.
• While holding the neck under the handlebar, fit the lower
console/headlight assembly onto the handlebar. (When the
headlight faces away from you as pictured, the handlebar
ends should curve towards you.)
• Insert two 2" screws up through the neck and handlebar
and into the lower console assembly.
• Tighten each screw with a slotted screwdriver.
Do not over-tighten.
• Set the handlebar assembly aside for assembly step 16.
12
11
Hole
Lower console
Headlight
#6 x
1
/
2
" Screw
#6 x
1
/
2
" Screw
#8 x 1" Screws
#8 x 1" Screw