


Assembly
6
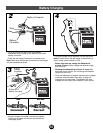
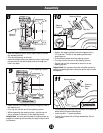
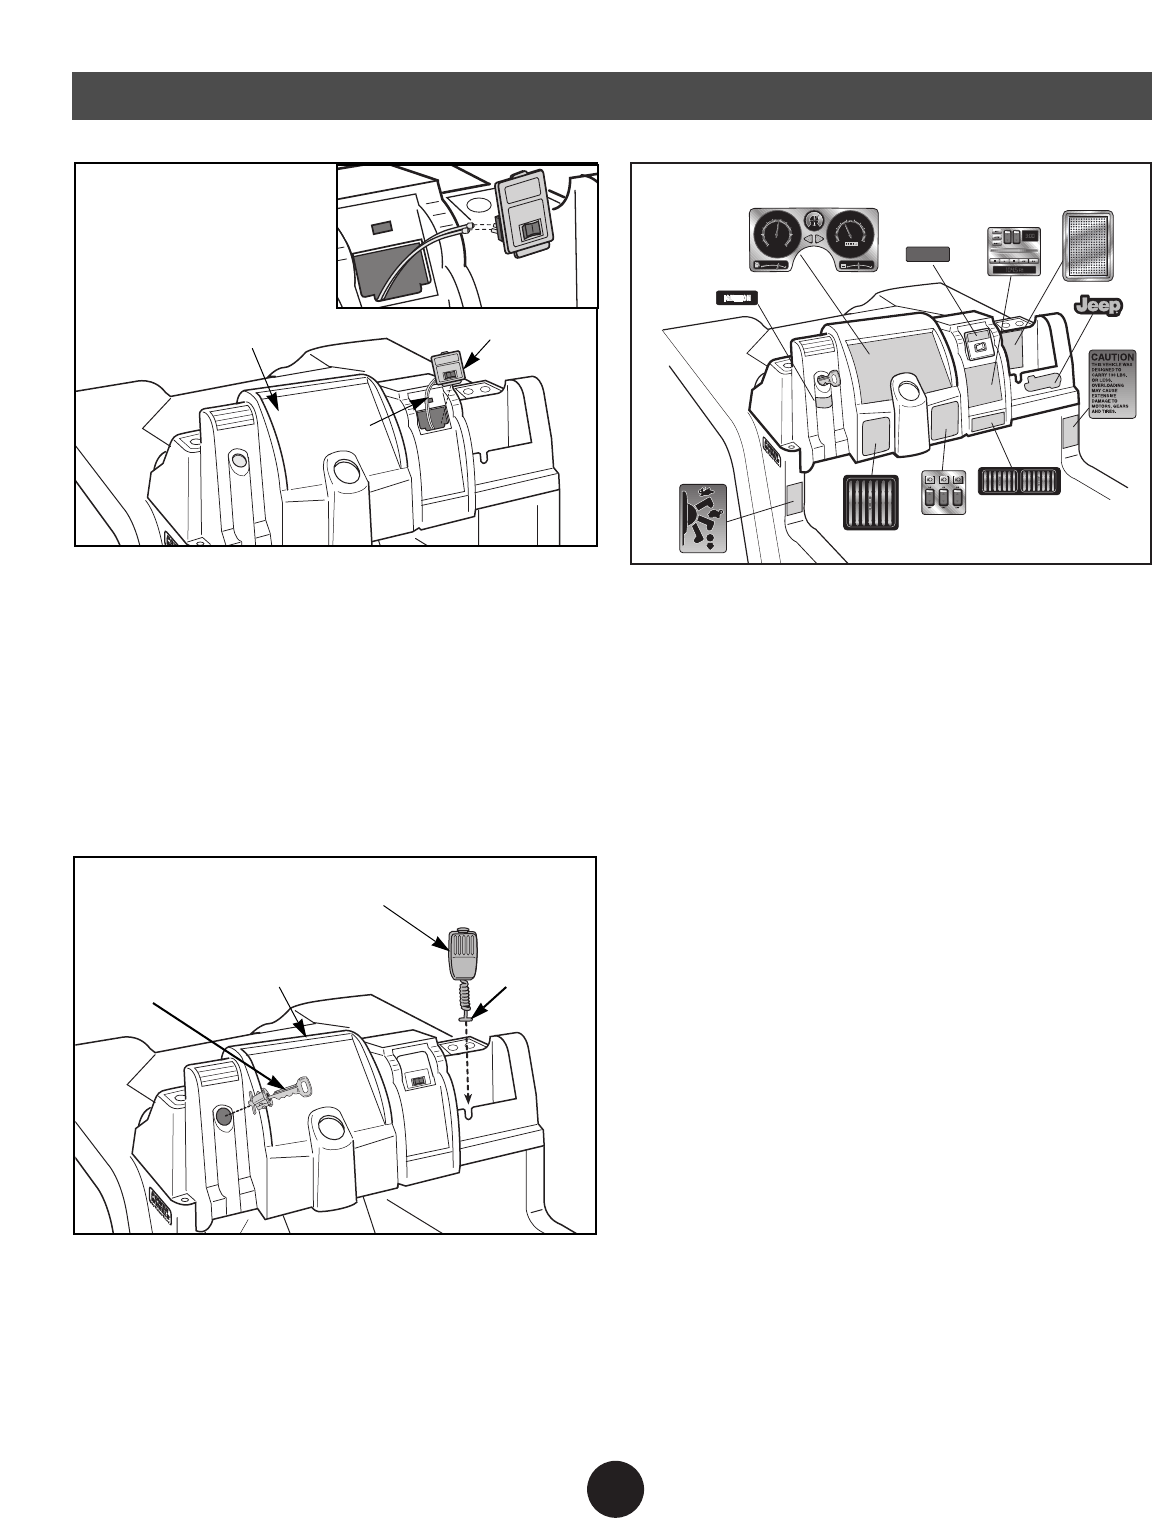
Microphone
“T” end
Key Assembly
Dash
• Snap the key assembly into the dash.
• Bend the plastic tip on the end of the microphone cord so
that it forms a "T".
• Fit the "T" end of the microphone cord down through the
hole in the dash pocket. Pull up gently on the microphone
cord to make sure the end is secured under the dash.
• To hang the microphone on the dash, fit the hook on the
back of the microphone onto the notch in the dash.
PLAY
STOP REV FWD
PAUSE
COMPACT DISC
TREB
HI LO KC
TEMP
90
80
70
60
50
40
30
20
10
0
RPM
x 100
110
100
90
80
70
60
50
40
30
20
10
0
MPH
EF
1/2
+
-
VOLT
7
9
8
276
R
ENGINE
ON / OFF
7
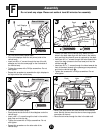
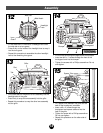
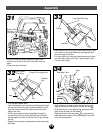
• Apply labels to the dash as shown.
Helpful Hint! Proper label application will help to keep the
labels looking their best! When applying labels, keep the
following guidelines in mind:
• Wash your hands before applying the labels.
• Before applying the labels, wipe the surface of the
vehicle with a clean, dry cloth to remove any dust or oils.
• Place the labels exactly as shown in the illustrations.
• For best results, avoid repositioning a label once it has
been applied to the vehicle.
• After applying a label, rub the label firmly with a
clean, dry cloth to make sure the label is adhered
to your vehicle. Start at the center of a label, and
smooth towards the outer edges to remove
air bubbles.
12
22
23
28
30
20
6
26
25
7
29
5
5
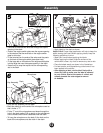
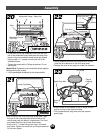
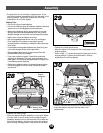
Dash
• Continue to route the two wires out through the square
opening in the dash.
• Position the engine switch plate near the square opening
in the dash so that the small tab on the engine switch
plate is at the top.
• Fit the terminals on the ends of the wires onto the posts
on the back of the engine switch plate (see inset).
• Fit the large tab on the bottom of the engine switch plate
into the large slot near the square opening in the dash.
• Press firmly to snap the top tab into the corresponding
slot in the dash.
Engine Switchplate
Wires