1035/El-O-Matic Actuator
Instruction Manual
Form 5417
February 2007
5
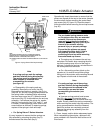
be used to mount the actuator to the yoke/mounting
actuator.
WARNING
Exceeding any torque requirement
may impair the safe operation of this
actuator by causing broken or
damaged parts. Refer to table 4 for
bolting torque requirements.
The LSP, if used, will also have to be attached to the
Type 1035. Use 4 screws for size P2500/P2505 and
8 screws for size P4000/P4005. The bolting torque
for these 5/8-inch screws will be 10.2 NSm (90 inSlb).
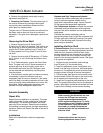
3. The P Series and a few E Series actuator
combinations require a coupler. Insert the square
end of the coupler into the drive shaft recess in the
actuator, making sure the coupler engages properly.
4. Lower the actuator, and coupling assembly onto
the valve, making sure that the male valve stem
engages into the coupler or insert.
a. Secure the mounting bracket to the valve
using cap screws and lock washers provided in
the mounting kit.
b. At this time, make sure that the actuator is in
the operation mode desired, and that the valve is
in the correct position required for your
application.
5. For E Series actuators with Type A41 valves,
insert the valve drive shaft end (double-D) into the
recessed insert.
6. Align the valve shaft with the actuator drive shaft
by changing the positioning on the mounting bracket
between them.
Operation
Units supplied from the factory as an assembly are
adjusted per specifications supplied to the factory on
the original order.
Unless the valve/actuator assembly has been
damaged during shipment, or the actuator removed
for maintenance, the assembly should be factory
adjusted and ready for service.
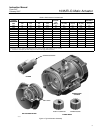
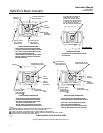
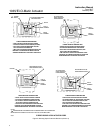
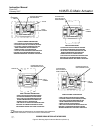
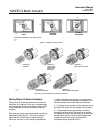
Actuator Orientation: The Type 1035 actuator is
normally installed with its major axis parallel to the
pipeline (see code A, figure 3). However, the
actuator can also be oriented 90 degrees to the
pipeline. See figure 3 for standard and optional
orientations. (Note: Code B is not available in the E
Series.)
The P or E Series actuator drive shaft turns a full 90
degrees and the stroke is adjustable for the valve
closed position. When necessary, refer to the
actuator adjustment steps in this manual.
Note
The Type A41 High Performance
Butterfly valve should not be turned by
the power actuator more than 90
degrees of rotation. Pre-adjust
actuator stops to limit travel to 90
degrees or less until adjustment steps
are completed.
A double acting actuator can be changed in the field
to a spring return unit, or vice-versa (requires
different end caps). Code A actuators can be
converted to a code D unit by turning the pistons 180
degrees from the position shown for code A (See
figure 3 for piston and shaft orientation).
Adjustments
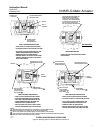
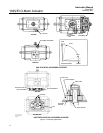
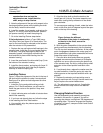
E Series actuators provide end cap adjustment
screws to limit outward travel of the piston. The
inward movement of the piston is limited by the
housing stop (see figure 4).
P Series actuators have a Limit Stop Plate option
(LSP) which is used with standard actuator
constructions. The LSP is not used when a Type
1080 is used. The LSP, or the Type 1080, limits
travel in either direction for any construction. Refer
to figure 4.
To adjust the travel stops, refer to the valve
instruction manual for open and closed positions of
the valve. Upon assembly, ensure that the power
actuator does not drive the valve past 90 degrees of
rotation. Valve component parts can be damaged if
high actuator air pressure is applied past 90
degrees. Travel limits must be set in the actuator,
not in the valve. It is recommended that the valve be
out of the pipeline when adjusting travel limits.


