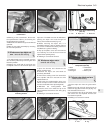
13 Stake the lower end of the tube to retain
the bush.
14 Reassembly is a reversal of removal,
noting that the universal joint coupling
pinch-bolts should pass smoothly through the
grooves in the steering shaft.
15 Fit the steering wheel when the
roadwheels are in the straight-ahead position.
16 Tighten all nuts and bolts to the specified
torque. Reconnect the battery.
6 Steering rack -
removal and refitting
4
1 Set the steering in the straight-ahead
mode.
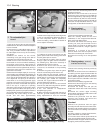
2 Working inside the car, disconnect the
steering shaft lower coupling by unscrewing
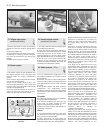
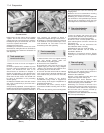
and removing the pinch-bolt (photo).
3 Disconnect the tie-rod end balljoints from
the steering arms as described earlier in this
Chapter.
4 Unscrew and remove the rack clamp
mounting bolts and withdraw the steering
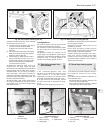
gear from the car crossmember (photo).
5 Refitting is a reversal of removal, but on
completion check the front wheel alignment
as described in Section 8.
7 Steering gear - overhaul
4
1 A worn steering gear should not be
overhauled, but a new or factory
reconditioned unit fitted.
2 After a high mileage, the following
adjustment may be needed however.
Rack damper - adjustment
3 The slipper in the rack housing presses the
rack into mesh with the pinion. This cuts out
any backlash between the gears. Also, due to
its pressure, it introduces some stiffness into
the rack, which cuts out excessive reaction
from the road to the steering wheel.
4 In due course, wear reduces the pressures
exerted by the slipper. The pressure is
controlled by the cover plate and a spring.
5 The need for resetting of the slipper is not
easy to detect. On bumpy roads, the shock
induced through the steering will give a feeling
of play, and sometimes faint clonking can be
heard. In extreme cases, free play in the
steering may be felt, though this is rare. If the
steering is compared with that of a new rack
on another car, the lack of friction damping is
quite apparent in the ease of movement of the
steering wheel of the worn one.
6 Centralise the steering rack. Do this by
counting the number of turns lock-to-lock and
then turning the steering wheel from one lock
through half the number of turns counted.
7 Take the cover plate off the damping
slipper, remove the spring and shims, and refit
the cover plate.
8 Screw in the cover plate bolts just enough
to hold the slipper against the rack.
9 Measure the gap between the cover plate
and the rack housing using feeler blades.
10 Select shims from the thicknesses
available (0.10, 0.125 and 0.30 mm) to provide
a shim pack thicker than the gap by between
0.05 and 0.13 mm.
11 Remove the cover plate, fit the spring and
bolt on the cover plate with the selected shims.
8 Steering angles and front
wheel alignment
4
1 Accurate front wheel alignment is essential
to provide good steering and roadholding char-
acteristics and to ensure slow and even tyre
Steering 10•3
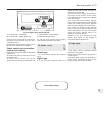
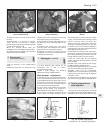
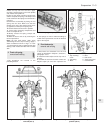
Fig. 10.4 Renewing steering shaft bushes
(Sec 5)
Fig. 10.3 Unscrewing combination switch
clamp nuts (Sec 5)
Fig. 10.2 Removing steering column
shroud screws (Sec 5)
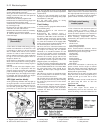
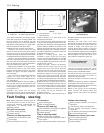
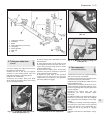
Fig. 10.6 Camber angle (Sec 8)
A Vertical line B Camber angle (positive)
Fig. 10.5 Sectional view of rack damper
(Sec 7)
6.4 Steering rack housing at pinion end
10
6.2 Steering shaft coupling


