


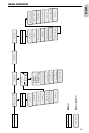

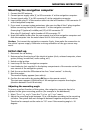
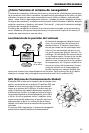

Mounting the navigation computer
1. Connect the GPS antenna.
2. Connect power supply cable 6 to ISO connector A’ at the navigation computer.
3. Connect signal cable 5 to ISO connector B’ at the navigation computer.
4. Insert yellow plug C1 of the monitor cable into the left chamber of ISO connector C1’
at the navigation computer.
5. If you want to connect system extensions, take care to slide all the C plugs together
before connecting them to ISO connector C’ at the navigation connector.
Green plug C2 (optional): middle part (C2) of ISO connector C2’
Blue plug C3 (optional): right chamber of ISO connector C3’.
6. Screw the rubber buffer onto the rear support stud of the navigation computer and
slide the computer into the metal sleeve until it clicks into position.
Caution: First mount the navigation computer firmly, then make the connection to
the vehicle’s power supply. Otherwise a wrong calibration of the gyro sensor may
result.
Initial start-up
1. Reconnect the car battery.
2. Restore perfect functioning of the electrical system (clock, onboard computer, alarm
system, airbag, immobilizer, radio coding, etc.).
3. Switch on the ignition.
4. Insert map CD into the navigation computer.
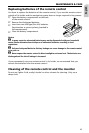
5. Insert batteries (not supplied) in the battery compartment of the remote control (see
user manual of the navigation system).
6. Park the car so that the GPS antenna has free “visual contact” to the sky.
7. Start the engine.
The monitor display appears (user advice).
8. Confirm the user advice by pressing OK key on the remote control.
The start menu appears, initialization of the navigation computer then begins
(duration between 2 and 10 minutes).
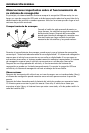
Adjusting the mounting angle
To ensure a perfect function of the system, the navigation computer has to be
adjusted to the given mounting position (for example in the dashboard).
1. Select “Mounting angle” from the “System settings” menu.
2. Adjust the mounting angle between -10 to +30 degrees according to the mounting
situation. The system does not distinguish between negative and positive values.
Therefore for example set the value to “10” even if the mounting angle is -10
degrees.
MOUNTING INSTRUCTIONS
49
English