


3
WARNING
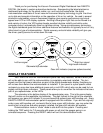
The vacuum fluorescent displays are made of glass and should be handled with care. Use
extreme care around the glass evacuation tubes (small tubes at the bottom of each
display) as bumping them may cause breakage and render the display useless.
MOUNTING DISPLAY SYSTEMS WITH SUBPANELS
When mounting instrumentation systems mounted to a Lexan subpanel, begin by
removing the subpanel from the aluminum. Cut an opening in the dash just smaller than the
outer dimensions of the aluminum panel. Remove all nuts and washers from the studs on the
back side of the panel and insert into the hole. Next, install four washers or clips and secure
with a nut on each. This is what holds the panel to the dashboard. Now, install a nut on each
stud and set the display panel in place over the studs. If the studs were bent slightly inward
from securing the aluminum panel, you may have to bend them outward to line up with the holes
on the lectern subpanel. Always lay the display panel aside when not in use to avoid
accidentally damaging the displays. Once aligned, secure it with an additional four nuts. Leave
a gap of no less than 1/8" between the display glass and the front lens material. Be careful not
to compress the glass against the front lens. Again, note that the displays are glass and should
be handled with care. Use extreme care around the glass evacuation tubes (small tubes at the
bottom of each display) as bumping them may cause breakage and render the display useless.
MOUNTING SYSTEMS WITH DISPLAYS MOUNTED TO ALUMINUM
When mounting year specific aluminum panel, cut an opening into the dashboard if
necessary and secure the entire panel with the instrumentation using the appropriate mounting
hardware. Some panels are set into the front of the dash while others are installed from the rear
of the dash. The exact mounting configuration will depend on what year car and panel you are
installing.
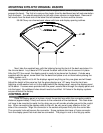
MOUNTING SINGLE LENS SYSTEMS
Your DAKOTA DIGITAL single lens system will come to you with a single plexiglass lens
and instrumentation that is mounted in an aluminum case. The lens and the instrumentation
have corresponding mounting holes. After you have affixed the mounting studs of your choice
to the backside of your dash, the lens piece should be slid over the studs followed by the display
system. The lens can be secured with either washers and nuts, or by a bead of RTV around the
back side of the lens and case. If RTV is used, the system will need to be held in place until it
has had time to cure. The lens should be tight against the aluminum display case.