MAN# 650280:D
SignaL
SignaLSignaL
SignaL Tach signal setup
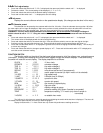
• Press and release the switch until “SignaL” is displayed, then press and hold the switch until “ - “ is displayed.
• Release the switch. The current setting will be displayed (12 HI or 5 LO).
• Press and release the switch until the desired setting is displayed.
•
Press and hold the switch until “ - ” is displayed to save the setting.
InFO
InFOInFO
InFO Info menu
Displays the current software revision on the speedometer display. (No changes can be done in this menu)
odoMK
odoMKodoMK
odoMK Odometer preset
The odometer can be preset by the customer within the first 100 miles. Once the odometer has more than 100 miles
the menu option will no longer be displayed. Make sure you have correctly selected the units to be either MPH or km/h first.
The odometer will be set in the selected units. Once you have preset the miles you cannot change it again.
WARNING!!: This only allows setting odometer to the nearest mile. Do not use tenths! For example a mileage of
65432.1 should be set to “065432” using this method. If the tenths digit is used, the odometer will read 10 times too
high.
• Press and release the switch until “-odoMK” is displayed, then press and hold the switch until “ - “ is displayed.
• The current miles will be displayed with the left most digit flashing.
• Press and release the switch to increment the digit. Press and hold the switch to move to the next digit to the right.
• Continue until the right most digit has been set. Press and hold the switch and the speed display will show “No“.
• Press and hold the switch while “no” is displayed to go back and continue changing the odometer display. Turn the key off
to cancel any changes.
• Press and release the switch to change to speed display to “yes”. Press and hold the switch while “yes” is displayed to
save the current odometer reading.
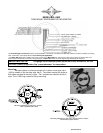
FUNCTION SWITCH
The function switch on the side of the dash panel allows access to all of the mileage, rpm, and performance
information. Pressing and releasing the function switch toggles through the different displays. Press and holding
the switch will reset the current display. The display sequence is as follows:
CLOCK > 12:00 12 hour clock
ODOMTR > 000000 odometer mileage
TRIP A >
A
000.0 trip meter mileage A
TRIP B >
B
000.0 trip meter mileage B
SERVIC > S 0000 miles since last service (if programmed)
KPH > ++++++ metric speed conversion (to mph if metric unit is selected)
* HI SPD > HI 00 high speed recall
* 0-60 T > 60 00.0 0-60mph time (0-100kph)
* QUARTR > 25 00.0 quarter mile time
* QT MPH > 25 00 quarter mile speed
RPM > 0000
RPM
rpm reading in alpha display
* HI RPM > H 0000 high rpm recall
VOLTS > 00.0
V
displays voltage to gauge
PRESSURE > 00
P
pressure reading (only shown if sender is connected)
TEMP > 000 F temperature reading, “C” if metric (only show if sender is
connected)
* HOURS > HR 0.0 re-settable hour meter
The 0-60 and ¼ mile timers are zeroed by pressing and holding the switch while that timer is displayed. The timer will
not restart until the speed reaches zero and you start riding again.
Display functions with a ‘*’ in front of them are only shown with performance readings turned on.


