Nothing Comes Close to a Cobra
®
51
4.3.1. Selecting existing and Naming new Routes
To select the Route operations follow the procedure:
1. Press the MENU button from one of the CHART Pages, select
“ROUTES” and press the ENTER button.
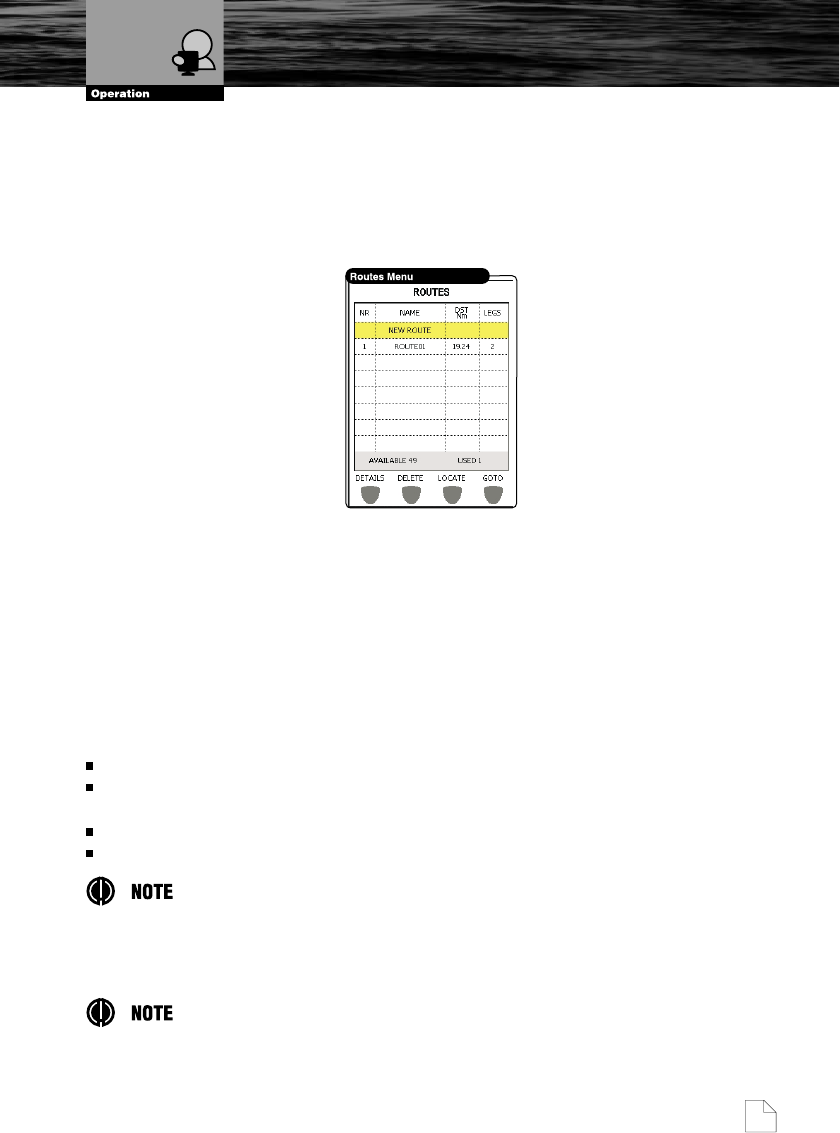
2. The Route table is shown on the screen.
Use the UP or DOWN CURSOR button to select the desired row.
3. The “NEW ROUTE” option is highlighed, press the ENTER button to
activate it. Another row is added for a new Route: press the E
DIT
software
button to modify the Route details and the A
CCEPT
software button to
accept the Route name.
4.3.2. Basic Route List Operations
After the table activation on a display, the software buttons appear on a
bottom of a screen with the following options. Select the desired row and use
these software buttons:
“D
ETAILS
”: Shows the Route info, you may change the name......
“D
ELETE
”: Deletes the Route: Route legs and Waypoints are deleted. If the
destination is placed on the Route, that Route cannot be deleted.
“L
OCATE
”: Displays the selected Route on the CHART Page.
“G
OTO
”: Sets the destination.
Pressing the MENU button from the Route list gives various options specific to the
highlighted Route or the entire list. From these commands you can Change Color,
Invert, Sort, etc.
Have you created many Routes? Using the ZOOM+ and ZOOM- buttons will quickly
scroll through your Route list.
Route Operations
