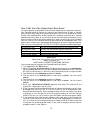
How to Adjust Sensitivity of the Optional OmniSensor
You can easily increase or decrease the sensitivity of the optional OmniSensor any
time, any place, without tools and without even knowing where to sensor is mounted.
To change sensitivity of the optional OmniSensor, use the following procedure:
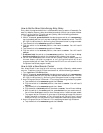
1. Turn ignition to the ON position.
2. Within 10 seconds, press and hold the valet/program switch to its momentary
(spring-loaded) position until you hear 1 chirp, then release the switch. The LED
will light in red and stay lit, confirming that the system is now in program mode.
3. Tap the switch to its momentary position 1 time.
4. Flip the switch to its latched position, then back to center. You will hear 1 chirp.
5. Tap the switch to its momentary position 1 time.
6. Flip the switch to its latched position, then back to center. You will hear 1 chirp.
7. Flip the switch to its latched position, then back to the center position. You will
hear 3 chirps.
8. Turn the ignition off (you will hear 3 chirps and the LED will turn off).
9. When the beeping stops, gently “thump” the windshield with your fist (DO NOT
strike the windshield from inside the car). Strike gently for high sensitivity, harder
for low sensitivity (a gentle strike is recommended). You will hear 1 chirp to
confirm the impact characteristics have been registered.
10. Arm the system with the remote control, wait at least 5 seconds, then strike the
vehicle again with somewhat more force. The alarm should sound. If it does not,
carefully repeat steps 1 through 10.
How to Enable/Disable FACT
FACT eliminates recurring false alarms (see page 5). FACT is factory enabled, and
we highly recommend you leave it that way. To disable or re-enable the FACT feature,
use the following procedure:
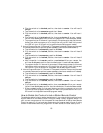
1. Turn ignition to the ON position.
2. Within 10 seconds, press and hold the valet/program switch to its momentary
(spring-loaded) position until you hear 1 chirp, then release the switch. The LED
will light in red and stay lit, confirming that the system is now in program mode.
3. Tap the switch to its momentary position 2 times.
4. Flip the switch to its latched position, then back to center. You will hear 2
chirps.
5. Tap the switch to its momentary position 1 time.
6. Flip the switch to its latched position, then back to center. You will hear 1 chirp.
a. To enable: Flip the switch to its latched position, then back to center.
b. To disable: Tap the switch to its momentary position, then release.
7. You will hear 3 chirps to confirm you’ve enabled or disabled FACT. Either proceed
to
step 3
of the next feature you wish to program, or turn the ignition off to exit
program mode (you will hear 3 chirps and the LED will turn off to confirm that
the system has exited program mode).
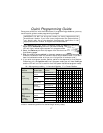
13


