


1-6 2000 cadillac deville
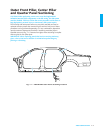
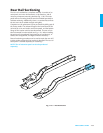
Quarter Panel Sectioning
Removal Procedure
The service part comes with lower quarter panel
extension and taillamp pocket attached. These
parts can be left on the vehicle if not damaged.
Drill out factory welds on the car and service part
and use the outer panel only.
IMPORTANT: When replacing panels that
involve servicing stationary glass, refer to GM
Service Bulletin 43-10-48 before performing any
priming or refinishing.
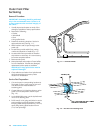
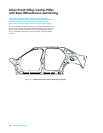
IMPORTANT: Sectioning should be performed
only in the recommended areas (Fig. 1-8).
Failure to do so may compromise the structural
integrity of the vehicle.
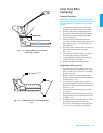
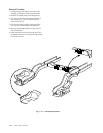
IMPORTANT: It may be necessary to unplug
and remove one end of the body wiring harness
that runs through quarter pillar lower extension
if it is necessary to replace extension.
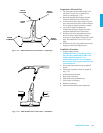
1. Visually inspect and restore as much of the
damage as possible to the factory
specifications.
2. Remove all related panels and components.
3. Remove all sealers, sound deadeners and anti-
corrosion materials as necessary.
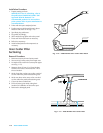
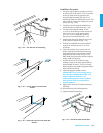
4. Determine sectioning locations in rocker area
(Fig. 1-8).
5. Mark a line and cut in approved sectioning
areas of rocker.
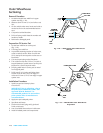
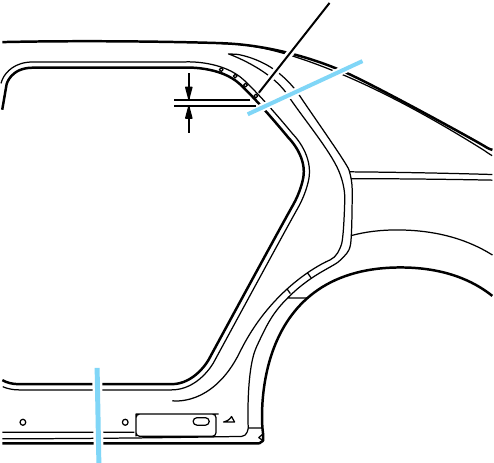
6. In upper quarter panel door opening, locate
the fourth weatherstrip hole (1).
7. Measure down 25␣ mm (1␣ in) and mark a line.
8. In back-glass opening, locate rear edge of roof
panel.
9. Measure down 25␣ mm (1␣ in), and scribe a
second line. Connect marks at both locations
to create a cut line.
10. Cut part at marked locations.
11. Locate, mark and drill out all factory welds.
Note the number and location of welds for
installation of the service assembly.
12. Remove damaged panel. Note placement and
number of foam baffles for new installation. If
baffles are damaged, replacement service parts
are available.
25 MM (1 IN)
1
Fig.␣ 1-8 — Outer Rear Pillar Sectioning