2000 cadillac deville 1-11
Preparation of Service Part
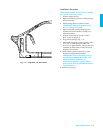
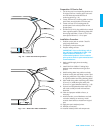
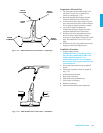
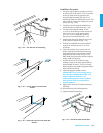
1. Cut center pillar at laser weld location. This
will allow a 25␣ mm (1␣ in) overlap to the
vehicle for welding (Fig. 1-16).
2. Notch the weather strip flange to prevent
excessive metal thickness in these areas.
3. In front and rear door rocker areas of service
part, scribe vertical cut lines to allow a 50␣ mm
(2␣ in) overlap of original cut lines on vehicle.
4. Cut on the scribed lines. Notch the
weatherstrip and lower flanges to prevent
excessive metal thickness in these areas.
5. Drill 8␣ mm (5/16␣ in) plug weld holes every
40␣ mm (1-5/8␣ in) along rocker overlaps,
25␣ mm (1␣ in) from edge of overlap. On center
pillar, drill weld holes 13␣ mm (1/2␣ in) from
edge.
6. Drill 8␣ mm (5/16␣ in) plug weld holes on weld
flanges as noted from original panel.
Installation Procedure
1. Prepare mating surfaces.
IMPORTANT: Prior to refinishing, refer to
the publication GM4901M-D-2000 “GM
Approved Refinish Materials” for
recommended products. Do not combine
paint systems. Refer to paint manufacturerís
recommendations.
2. Prime repair areas with two-part catalyzed
primer.
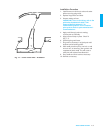
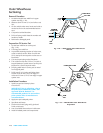
3. Clamp part in position. Check for proper fit
(Fig.␣ 1-17).
4. Spot blast plug weld areas.
5. Plug weld as necessary.
6. Stitch weld along sectioned areas.
7. Finish seams as necessary.
8. Refinish as necessary.
9. Install all related panels and components.
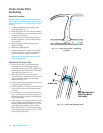
Fig.␣ 1-16 — 2000 DeVille Inner Center Pillar – Preparation
Fig.␣ 1-17 — 2000 DeVille Inner Center Pillar – Installation
NOTCH
FLANGES
NOTCH
FLANGES
NOTCH
FLANGES
NOTCH
FLANGES
LASER
WELD


