


2000 cadillac deville 1-9
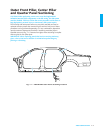
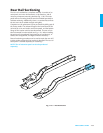
Inner Front Pillar
Sectioning
Removal Procedure
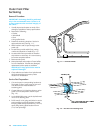
IMPORTANT: Sectioning should be performed
only in the recommended areas. Failure to do so
may compromise the structural integrity of the
vehicle.
1. Visually inspect and restore as much of the
damage as possible to factory specifications.
2. Remove outer panel according to specified
directions in Outer Panel Removal procedure.
3. Remove all necessary components to allow
access to repair area.
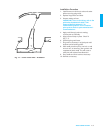
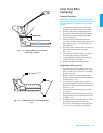
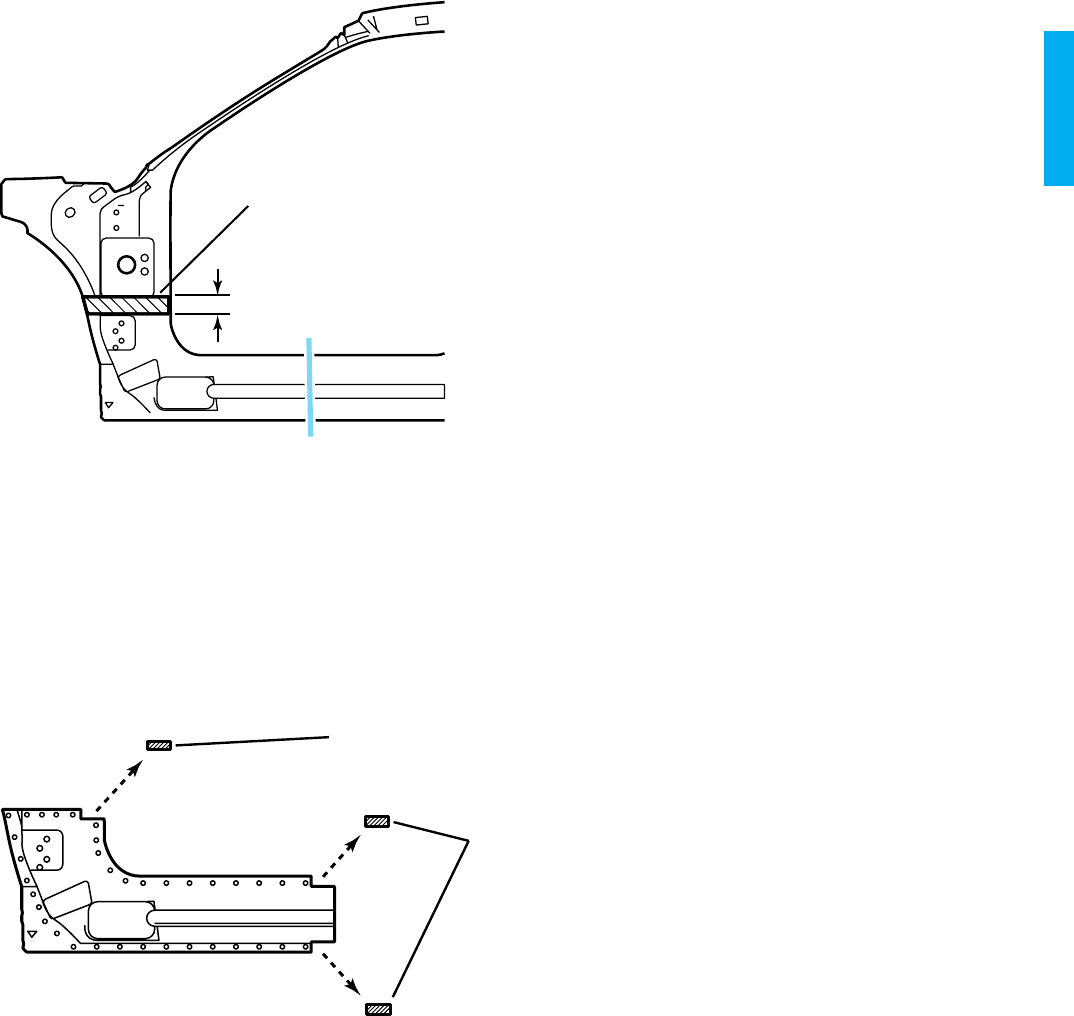
4. Locate and mark a horizontal line 50␣ mm
(2␣ in) down from the raised, square portion of
the hinge pillar (Fig. 1-12). This will be your
cut location (1).
5. At rocker panel, locate and mark a vertical cut
line in the approved sectioning location
(Fig.␣ 1-12).
6. Cut at the two marked locations. Use caution
to cut through one layer of metal only.
7. Locate and drill out factory welds noting the
number and location of welds.
8. Remove damaged section from vehicle.
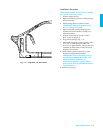
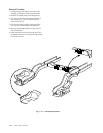
Preparation of Service Part
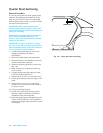
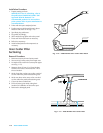
1. On hinge pillar, scribe a cut line 25␣ mm (1␣ in)
below the raised, square portion of the hinge
pillar. This will create a 25␣ mm (1␣ in) overlap
on the service part.
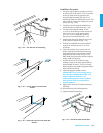
2. Notch the panel on the door weather-strip
flange (1) to prevent excessive metal thickness
in this area (Fig. 1-13).
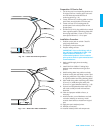
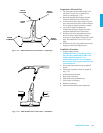
3. In rocker area, locate and mark a cut line in
the recommended sectioning area. Allow for a
50␣ mm (2␣ in) overlap to the vehicle sectioning
areas (Fig. 1-13).
4. Cut along marked sectioning lines to create
service part.
5. Notch upper and lower edges of service part
(2) to prevent excessive metal thickness in this
area (Fig. 1-13).
6. Drill plug weld holes spaced 40␣ mm (1-5/8␣ in)
apart along overlap flanges. Place holes
25␣ mm (1␣ in) from edge on rocker panel and
13␣ mm (1/2␣ in) from edge on hinge pillar.
Fig.␣ 1-12 — 2000 DeVille Inner Front Pillar
Sectioning Locations
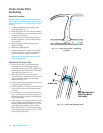
Fig.␣ 1-13 — 2000 DeVille Inner Front Pillar Service
Part
50 MM (2 IN)
1
1
2