


Mounting instructions
50
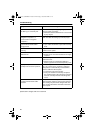
Further signals (ISO connector A):
1. Connect the white/yellow cable (A2) to a suitable connecting point of the back up
lights (positive pole of the reversing lamp).
2. Connect the grey cable (A6) to a suitable connecting point of the low beam (do
not connect to dashboard illumination!).
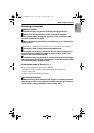
Installing loudspeaker mute function (optional)
Connect the white/brown cable (A3) to the mute input of the car radio.
Connecting system components (ISO connector B):
Connect the plug of the remote control cable (accessory) to the socket on the signal
cable harness (accessory).
Connect the loudspeaker (optional accessory) with the 3.5 mm jack to the 3.5 mm
plug of the signal cable harness (accessory).
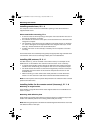
Mounting the navigation computer
1. Connect the GPS antenna.
2. Connect power supply cable
2
to ISO connector A’ at the navigation computer.
3. Connect signal cable (accessory) to ISO connector B’ at the navigation computer.
4. Connect monitor cable (accessory) to the monitor output of the navigation
computer.
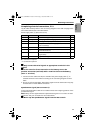
5. If you want to connect system extensions, take care to slide all the C plugs
together before connecting them to ISO connector C’ at the navigation connector.
Green plug C2 (optional): middle part (C2) of ISO connector C2’
Blue plug C3 (optional): right chamber of ISO connector C3’.
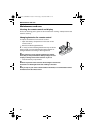
6. Screw the rubber buffer onto the rear support stud of the navigation computer
and slide the computer into the metal sleeve until it clicks into position.
Caution:
First mount the navigation computer firmly, then make the connection to
the vehicle’s power supply. Otherwise a wrong calibration of the gyro sensor may
result.
Audiovox_MS5000.book Seite 50 Donnerstag, 9. November 2000 3:41 15