Step 7 (Continued)Step 7 (Continued)
Step 7 (Continued)Step 7 (Continued)
Step 7 (Continued)
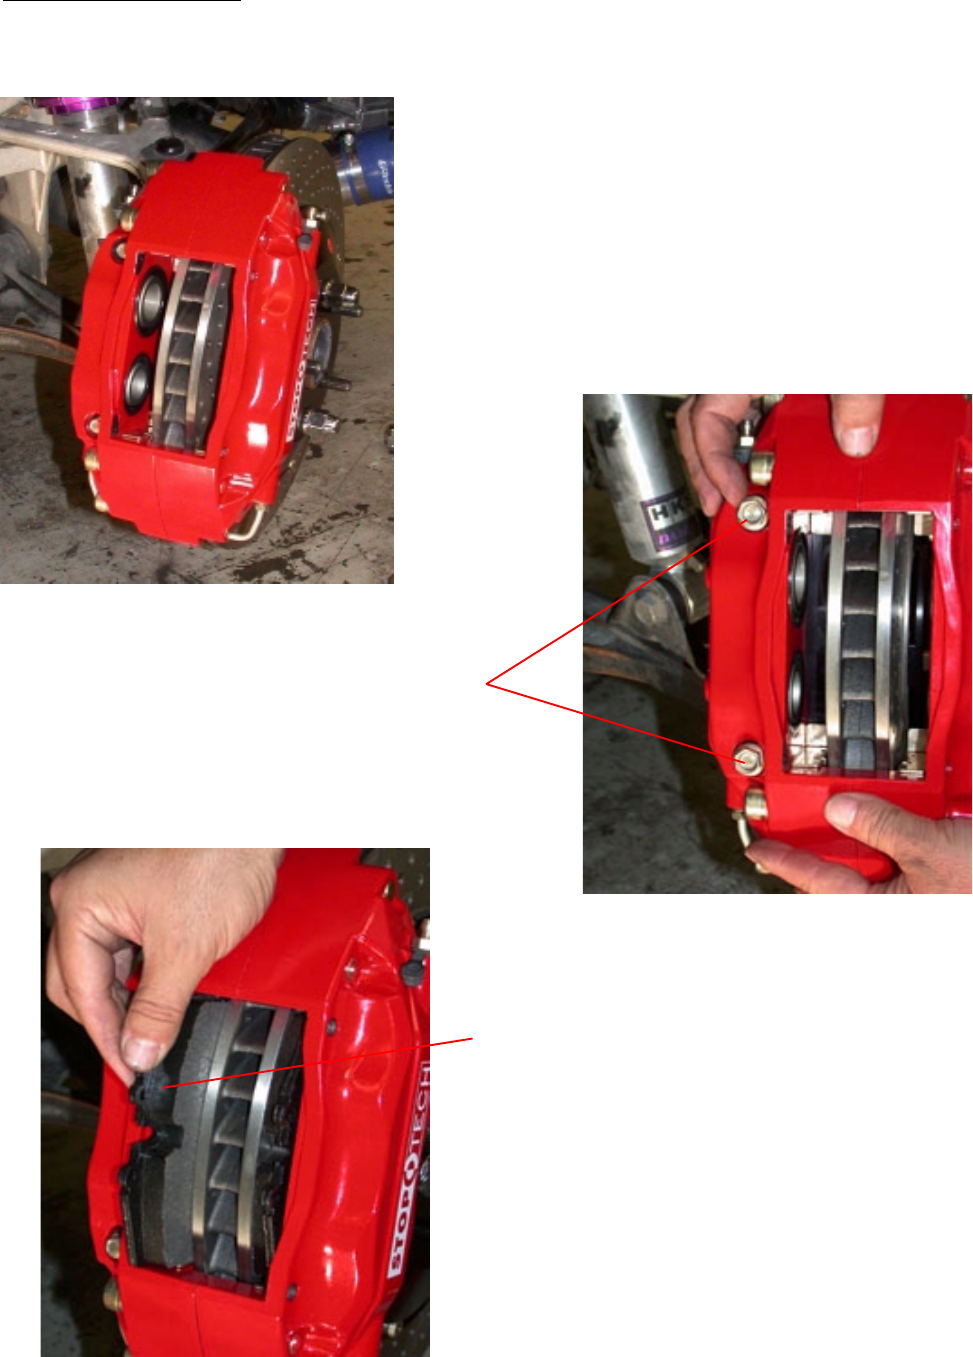
Install the caliper onto the adapter bracket studs with
the bleed screws on the top side of the caliper.
Slide the caliper over the mounting studs, making
sure it is square and evenly started on both studs. It
may necessary to gently tap the caliper into position
with a non-marring hammer or mallet.
Install the Jet nuts onto each stud with
one 12mm washer under each nut
Tighten the Jet nuts to
40-45 lb-ft40-45 lb-ft
40-45 lb-ft40-45 lb-ft
40-45 lb-ft
of torque using a 1/2” socket.
Slide the brake pads into position in the
calipers. Be sure the friction side of each
pad is facing the rotor.
3541 Unit A, Lomita Boulevard, Torrance, CA 90505 (310) 325-4799
www.stoptech.com 16
(Yes, they have been installed backward before!)
Note- Images on this and the following page may not be of the vehicle notedNote- Images on this and the following page may not be of the vehicle noted
Note- Images on this and the following page may not be of the vehicle notedNote- Images on this and the following page may not be of the vehicle noted
Note- Images on this and the following page may not be of the vehicle noted
however they are a proper represention of the correct installation.however they are a proper represention of the correct installation.
however they are a proper represention of the correct installation.however they are a proper represention of the correct installation.
however they are a proper represention of the correct installation.


