Step 5Step 5
Step 5Step 5
Step 5
Install Caliper Bracket (continued)Install Caliper Bracket (continued)
Install Caliper Bracket (continued)Install Caliper Bracket (continued)
Install Caliper Bracket (continued)
Torque caliper bracket bolts to
80-85 lb-ft80-85 lb-ft
80-85 lb-ft80-85 lb-ft
80-85 lb-ft.
Step 6Step 6
Step 6Step 6
Step 6
II
II
I
nstall Anstall A
nstall Anstall A
nstall A
erer
erer
er
oRoR
oRoR
oR
otor Aotor A
otor Aotor A
otor A
ssemblyssembly
ssemblyssembly
ssembly
Rotors
MUST MUST
MUST MUST
MUST be cleaned with soap and water prior to installation. Not doing so
will damage the rotors and pads and prevent the brakes from performing properly.
Even though it may not look like anything is washing off, the rust inhibitor is in
place and must be removed. Not cleaning the rotors will severely impact the perfor-
mance of your new brake system.
Scrubbing AeroRotor with ScotchBrite pad,
soap and water.
3541 Unit A, Lomita Boulevard, Torrance, CA 90505 (310) 325-4799
www.stoptech.com 10
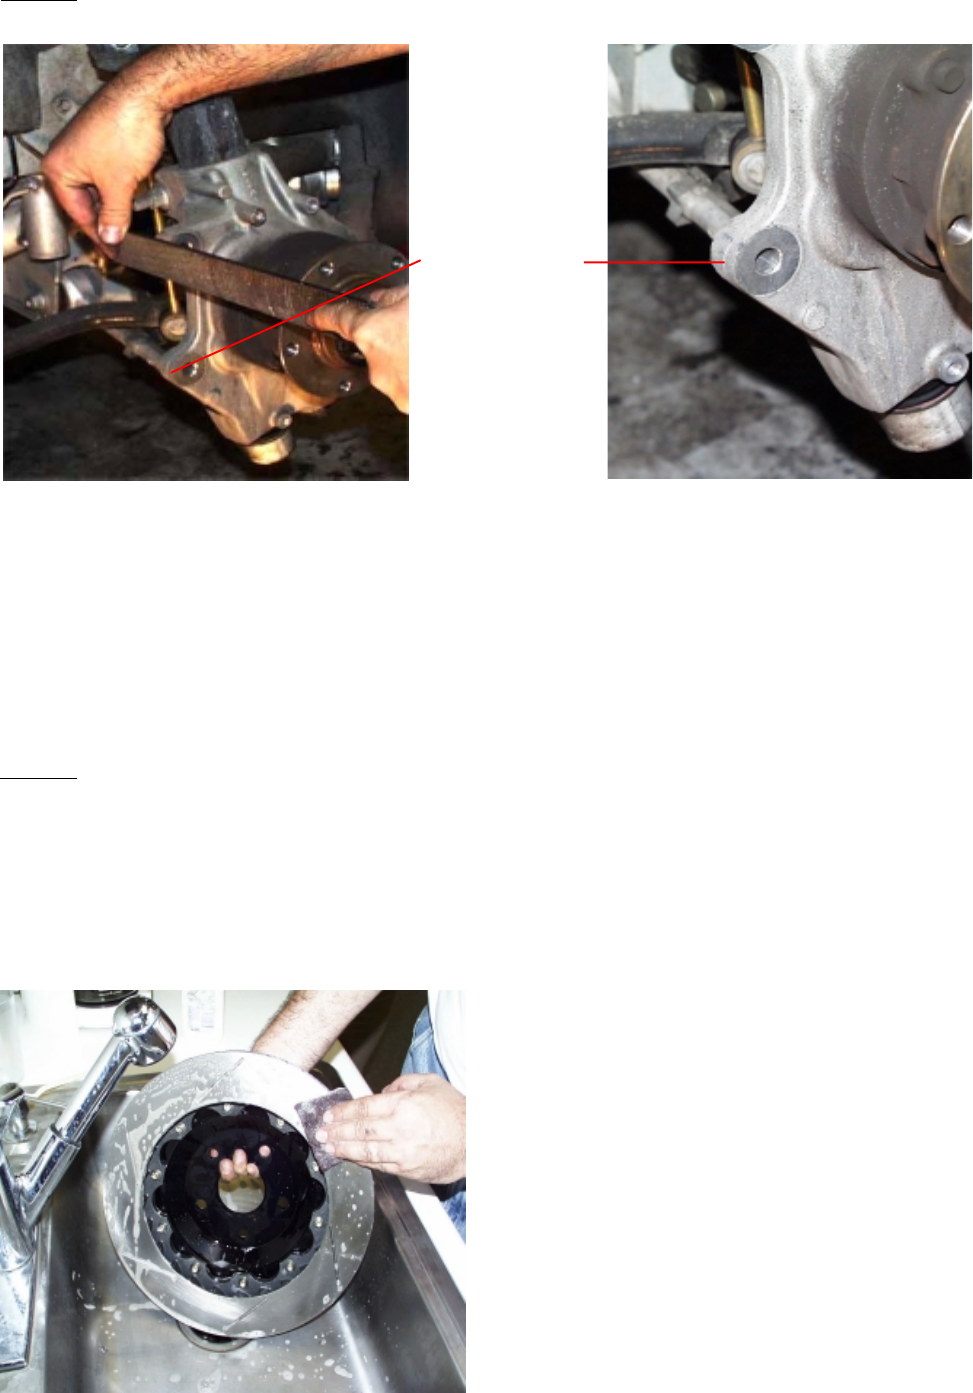
Do not skip this step!
If the caliper bracket does not sit flat and the bolts do not line up, it may be necessary
to file the outer edge of the mounting lugs as shown above. The image to the right
shows the lower lug noting where to file.
File this area
After proper fit of the bracket has been confirmed, install the caliper bracket as shown
on the previous page.


