


PERIODIC MAINTENANCE AND MINOR REPAIR
6-39
6
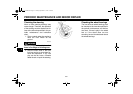
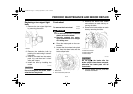
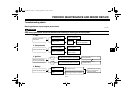
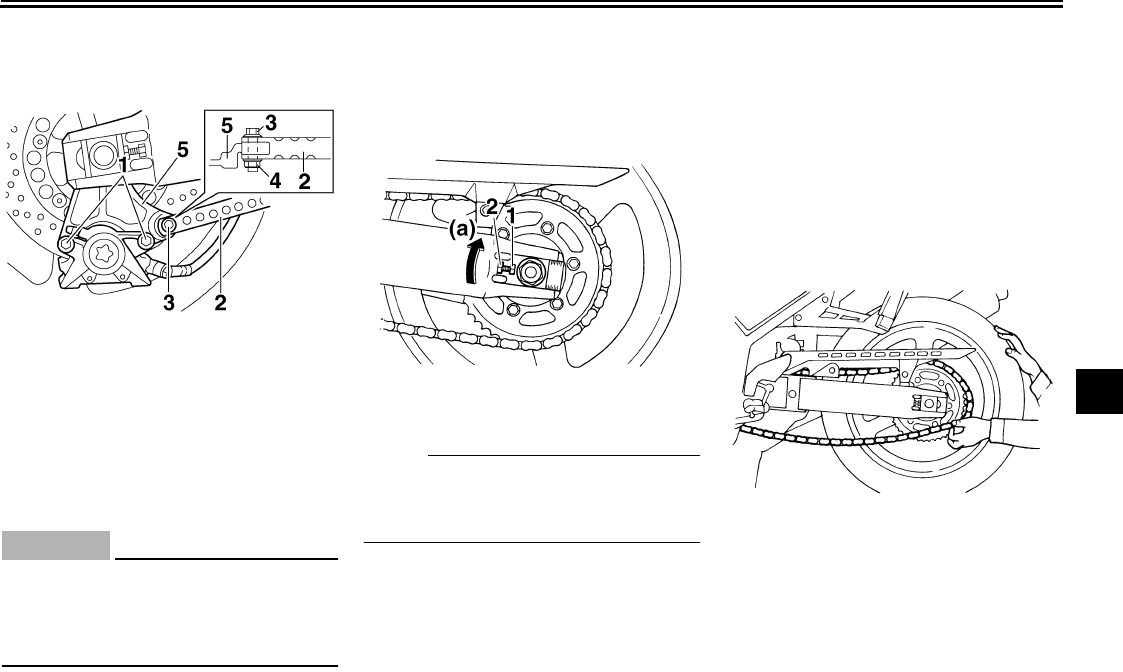
3. Disconnect the brake torque rod
from the brake caliper by removing
the nut and the bolt.
4. Remove the axle nut, then the
brake caliper by removing the
bolts.
CAUTION:
ECA11300
Do not apply the brake after the
brake caliper has been removed,
otherwise the brake pads will be
forced shut.
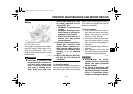
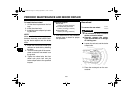
5. Loosen the locknut on each side of
the swingarm.
6. Turn the drive chain slack adjust-
ing bolts fully in direction (a).
7. Push the wheel forward, and then
remove the drive chain from the
rear sprocket.
NOTE:
The drive chain does not need to be
disassembled in order to remove and
install the rear wheel.
8. While supporting the wheel, pull
the wheel axle out.
9. Remove the wheel.
EAU25841
To install the rear wheel
1. Place the wheel and the brake cal-
iper bracket in the original position.
2. Insert the wheel axle through the
brake caliper bracket and wheel
from the right-hand side, and then
install the axle nut.
3. Install the drive chain onto the rear
sprocket, and then adjust the drive
chain slack. (See page 6-27.)
4. Connect the brake torque rod to
the brake caliper bracket by install-
ing the bolt and the nut.
5. Install the brake caliper by install-
ing the bolts.
1. Brake caliper bolt
2. Brake torque rod
3. Brake torque rod bolt
4. Brake torque rod nut
5. Brake caliper bracket
1. Drive chain slack adjusting bolt
2. Locknut
U1C210E0.book Page 39 Tuesday, September 21, 2004 1:28 PM