


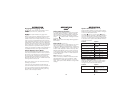

Windshield
Mounting
Rubber Bumper
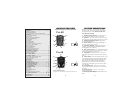
11. 7 Segment Icon Display – Provides intense
blue numeric signalstrength indicator and band identifi-
cation.
12. Power Jack – Provides connection for the power
cor
d.
13. Twin Alert Periscope - Provides an addi-
tional attention getting visual alert.
14. Menu Button - (Pro-68) Enters option select
mode. (Pr
o-58) Engages VG-2 .
15. Dim/Dark Button - Engages Dim/Dark dis-
play options.
INSTALLATION
Mounting Guidelines
• Mount the unit as low as possible near the
center of the windshield.
• Do not mount your unit behind wipers,
ornaments, mirrored sunscreens, etc. These
obstructions have metal surfaces which can
affect radar and laser signals and reduce
critical warning time. (Regular tinted glass
does not affect reception.)
• Some windshields have an Instaclear
™
or
Electriclear
™
type coating, which affect radar
signals. Consult your dealer or the owner’s
manual supplied with your vehicle to determine
if your windshield has this coating.
• Avoid placing unit in direct contact with wind
shield.
• To reduce the possibility of theft, conceal your
unit when not in use.
FEATURE DESCRIPTIONS
Windshield Mounting
• Install the two suction cups and rubber bumper
onto the bracket by fitting them into their holes.
• Press the suction cups onto the windshield at the
location you have chosen.
Important: Some newer cars have a plastic safety
coating on the inside of the windshield. The wind-
shield bracket may leave permanent marks on this
type of surface. To find out if your vehicle has this
type of windshield, check the owner’s manual or ask
your dealer. We recommend that you do not leave
the suction cup bracket on the window in direct sun-
light. If the detector is removed, this may cause
blistering of the dash in some vehicles.
• Slide the detector onto the bracket until it locks into
place.
•
If necessary, the unit may be leveled by bending the
windshield bracket. Press the bracket release button
and remove the detector before bending.
Power Cord Connection
• Plug the small end of the power cord into the
unit’s power jack.
• Plug the large end into the vehicle’s cigarette lighter.
N
N
o
o
t
t
e
e
:
:
Cord fits tightly into detector. When
installing the cor
d, expect some resistance.
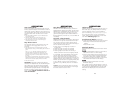
Fuse Replacement
The lighter socket plug is equipped with a
replaceable 2 amp 3AG fuse located behind the
silver tip. To replace the fuse, carefully unscrew
the tip of the plug.
I
I
m
m
p
p
o
o
r
r
t
t
a
a
n
n
t
t
:
:
Unscrew slowly. The tip contains a
spring which may fly out when disassembling.
Insert the new fuse with the spring and scr
ew on
the tip. With use, screw cap on plug may loosen.
Retighten occasionally.
Unscrew the tip of the lighter socket plug
carefully when replacing the 2 amp fuse.
INSTALLATION
56
Power On and Self-Test
Each time your Whistler detector is turned on, an
automatic self-test sequence confirms that the
speaker and visual displays are functional.
• Press Power. Display shows in order:
1. WHISTLER 2. X-Band 3. K-Band 4. Ka-Band
5. LASER 6. HIGHWAY
Setting Saver
Setting Saver saves your personalized settings so
that when the detector is turned off and then on
again, you do not have to re-enter them.
Feature Engaged Confirmation
Each time a button is pressed one beep confirms fea-
ture “on”, two beeps confirm feature “off”.
Audio Level Adjustment
The audio levels can be adjusted high to low or low to high.
P
P
r
r
o
o
-
-
5
5
8
8
:
:
• Press Volume up to increase audio level.
• Press Volume down to decrease audio level.
P
P
r
r
o
o
-
-
6
6
8
8
:
:
• Move Power/Volume button back to increase audio level.
• Move Power/Volume button forward to decrease audio level.
As audio level is adjusted, beeps are provided and
the display indicates volume level.
Self Test Mute
Simply press the Quiet button during the self-test
sequence to cancel the self-test audio. This will not
affect radar/laser alerts. To restore the self-test
audio, simply press the Quiet button during the next
self-test.
Quiet Mode
Quiet cancels audio during an alert and any new
alert within 20 seconds. After 20 seconds, approxi-
mately 2 beeps are provided on any new alert and
unit then remains quiet.
• Press Quiet to cancel the audio.
• Press Quiet a second time during an alert to restore
the standard audio alert pattern; or turn the unit off,
then on.
OPERATION
7