


70
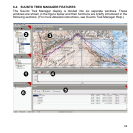
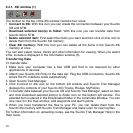
6.4.1. X9i window (1)
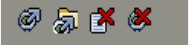
The toolbar on the top of the X9i window contains four icons:
• Connect to X9i: With this icon you can create the connection between your Suunto
X9i and STM.
• Download selected item(s) to folder: With this icon you can transfer data from
Suunto X9i to STM.
• Delete selected item: First select the items you want and then click on this icon to
delete them from the Suunto X9i memory.
• Clear X9i memory: With this icon you can delete all the items in the Suunto X9i
memory at once.
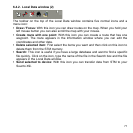
You can also select routes, tracks and other information for viewing. When you select
a file, its data is displayed in the Information window (5).
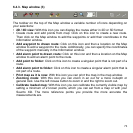
Transferring Data
To transfer data:
1. Make sure your computer has a free USB port that is not reserved by other
applications or devices.
2. Attach your Suunto X9i firmly to the data clip. Plug the USB connectors. Suunto X9i
enters the PC Interface mode automatically.
3. Open Suunto Trek Manager.
4. Click Connect to X9i icon on the bottom left window and Suunto Trek Manager
displays the contents of your Suunto X9i (Tracks, Routes, MyPoints).
5. To transfer data between your Suunto X9i and Suunto Trek Manager, select an item
and click Download selected item(s) to folder icon on the bottom left window. The
selected item is placed in the Downloaded folder in the Local Data Window. You can
now view it in the map window, add waypoints and alarm points.
6. When you have transferred the files to your PC, you can delete them from the
Suunto X9i memory with Suunto Trek Manager and make room for new log files.
For further information on uploading routes, see the Suunto Trek Manager Help in the
Help menu.