35
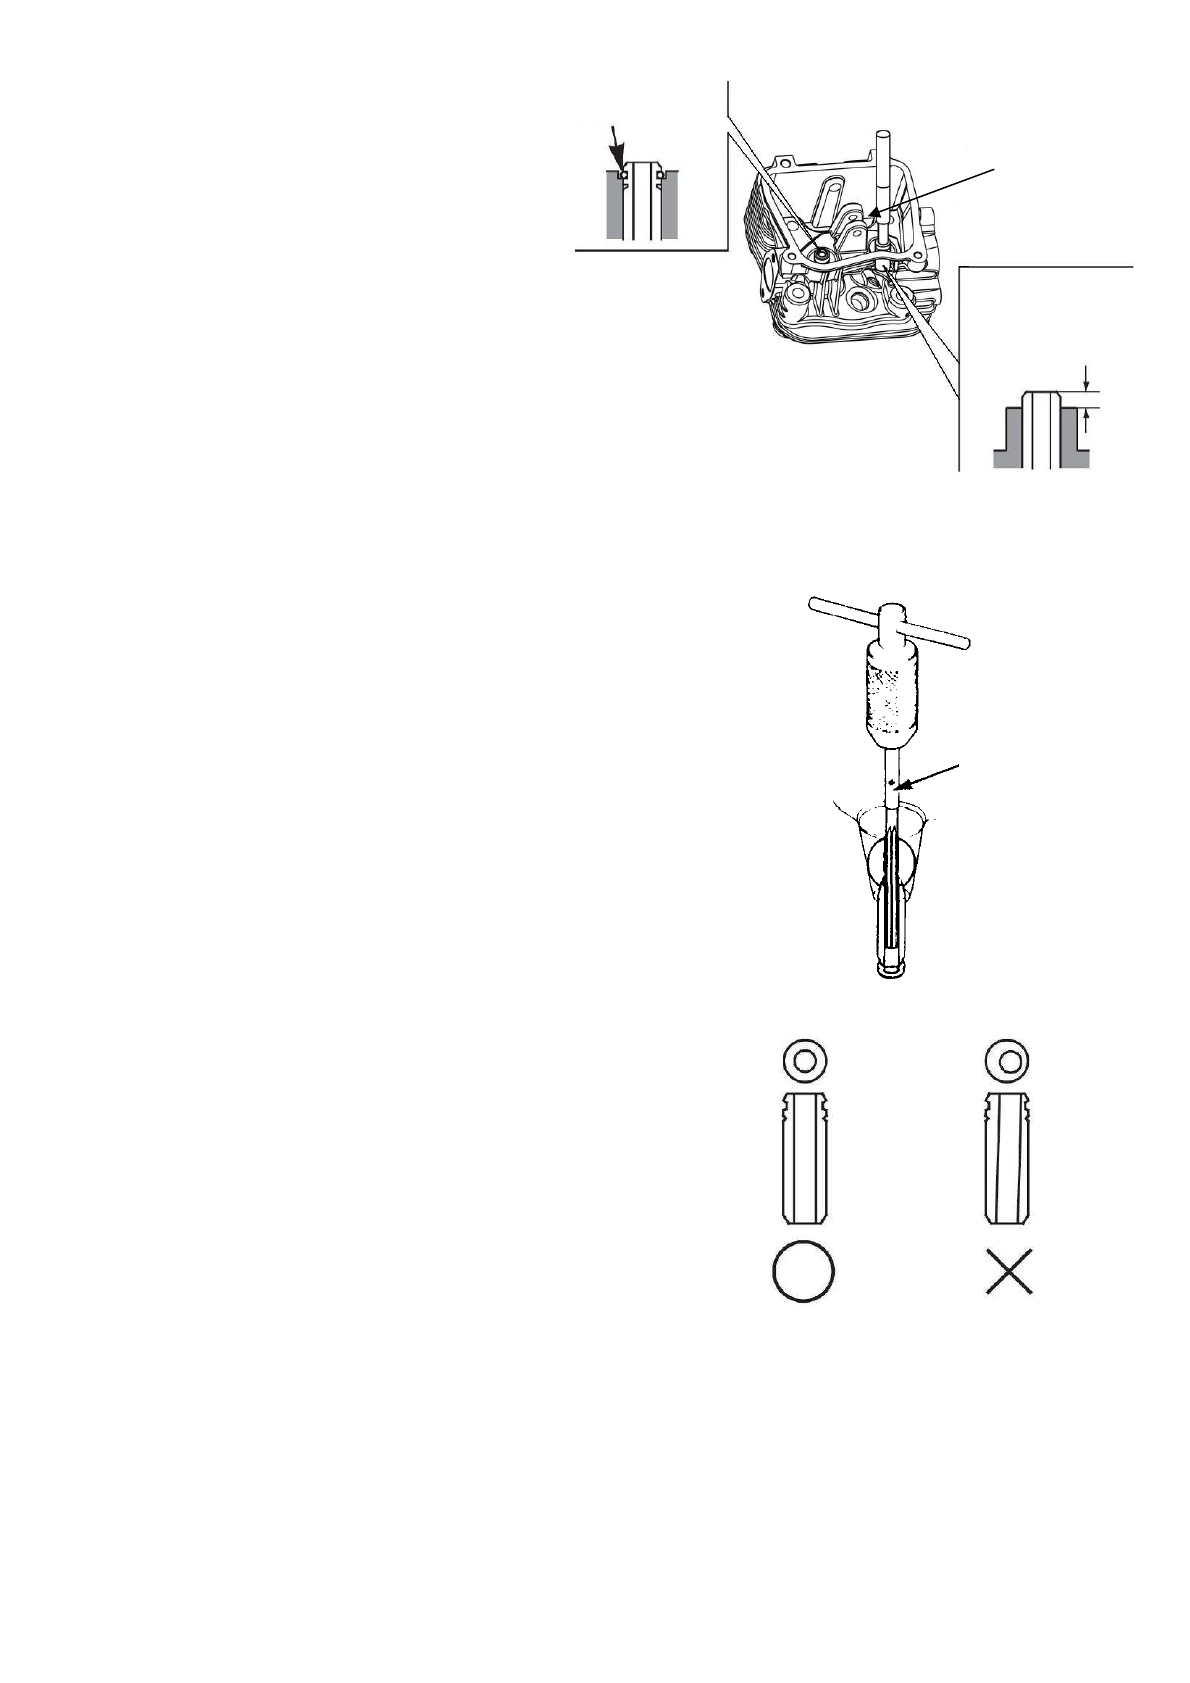
Correct
Incorrect
c) Install the new valve guides from the
valve spring side of the cylinder head.
Exhaust side: Drive the exhaust valve guide
until the clip is fully seated (as shown as
fig.)
Intake side: Drive the intake valve guide to
the specified height (measured from the top
of the valve guide to the cylinder cover as
shown as fig.)
d) After installation, inspect the valve guide for damage, if damaged,
please replace.
Reamer:
For best results, be sure the cylinder head is at room
temperature before reaming valve guides.
Coat the reamer and valve guide with cutting oil. Rotate the
reamer clockwise through the valve guide for the full length
of the reamer. Continue to rotate the reamer clockwise while
removing it from the valve guide.
Tools:Valve guide reamer
a) Thoroughly clean the cylinder head to remove
any cutting residue.
b) Check the valve guide bore, it should be
straight, round and centered in the valve guide, insert
the valve and check operation. If the valve does not
operate smoothly, the guide may have been bent
during installation. Replace the valve guide if it is
bent or damaged.
c) Check the valve stem-to-guide clearance
d) The valve stem-to-guide clearance:The valve guide bore detract the valve stem outside
diameter to get the clearance between the valve guide and valve stem.
Valve guide
Installation
height
1MM
Clip
Valve guide driver
Exhaust side
Intake side
Valve
guide
reamer


