


Instruments and controls 3-35
– CONTINUED –
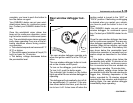
ton, the compass display is toggled on or
off. When the compass is on, an illuminat-
ed compass reading will appear in the
lower part of the mirror.
Even with the mirror in anti-glare mode,
the mirror surface turns bright if the trans-
mission is shifted into reverse. This is to
ensure good rearward visibility during re-
versing.
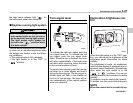
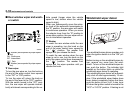
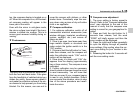
T Photosensors
The mirror has a photosensor attached on
both the front and back sides. If the glare
from the headlights of vehicles behind you
strikes the mirror, these sensors detect it
and make the reflection surface of the mir-
ror dimmer to help prevent you from being
blinded. For this reason, use care not to
cover the sensors with stickers, or other
similar items. Periodically wipe the sen-
sors clean using a piece of dry soft cotton
cloth or an applicator.
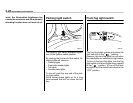
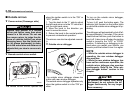
T Compass calibration
1. For optimum calibration, switch off all
nonessential electrical accessories (rear
window defogger, heater/air conditioning
system, spotlight, etc.) and ensure all
doors are shut.
2. Drive to an open, level area away from
large metallic objects or structures and
make certain the ignition switch is in the
“ON” position.
3. Press and hold the left button for 3 sec-
onds then release, and the compass will
enter the calibration mode. “CAL” and di-
rection will be displayed.
4. Drive slowly in a circle until “CAL” dis-
appears from the display (approximately
two or three circles). The compass is now
calibrated.
5. Further calibration may be necessary
should outside influences cause the mirror
to read inaccurately. You will know that
this has occurred if your compass begins
to read in only limited directions. Should
you encounter this situation, return to step
one of the above procedure and recali-
brate the mirror.
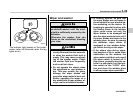
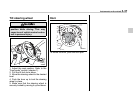
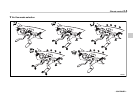
T Compass zone adjustment
1. The zone setting is factory preset to
Zone 8. Refer to the “Compass calibration
zone” map attached to the end of this
manual to verify that the compass zone
setting is correct for your geographical lo-
cation.
2. Press and hold the right button for 3
seconds then release, and the word
“ZONE” will briefly appear and then the
zone number will be displayed.
3. Press the right-hand button repeatedly
to cycle the display through all possible
zone settings. Stop cycling when the cor-
rect zone setting for your location is dis-
played.
4. Releasing the button for 3 seconds will
exit the zone setting mode.
300518