


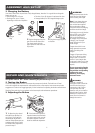
q Charging the Battery
Your electric motor bike may not have a fully charged battery; therefore it is a good idea to charge the
battery prior to use.
•Initialchargetime:18hours •Runtime:Up to 40 minutes of continuous ride time
•Rechargetime:upto12hours, •Averagebatterylife:250charge/dischargecycles
depending on the level of depletion
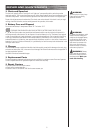
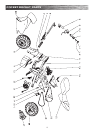
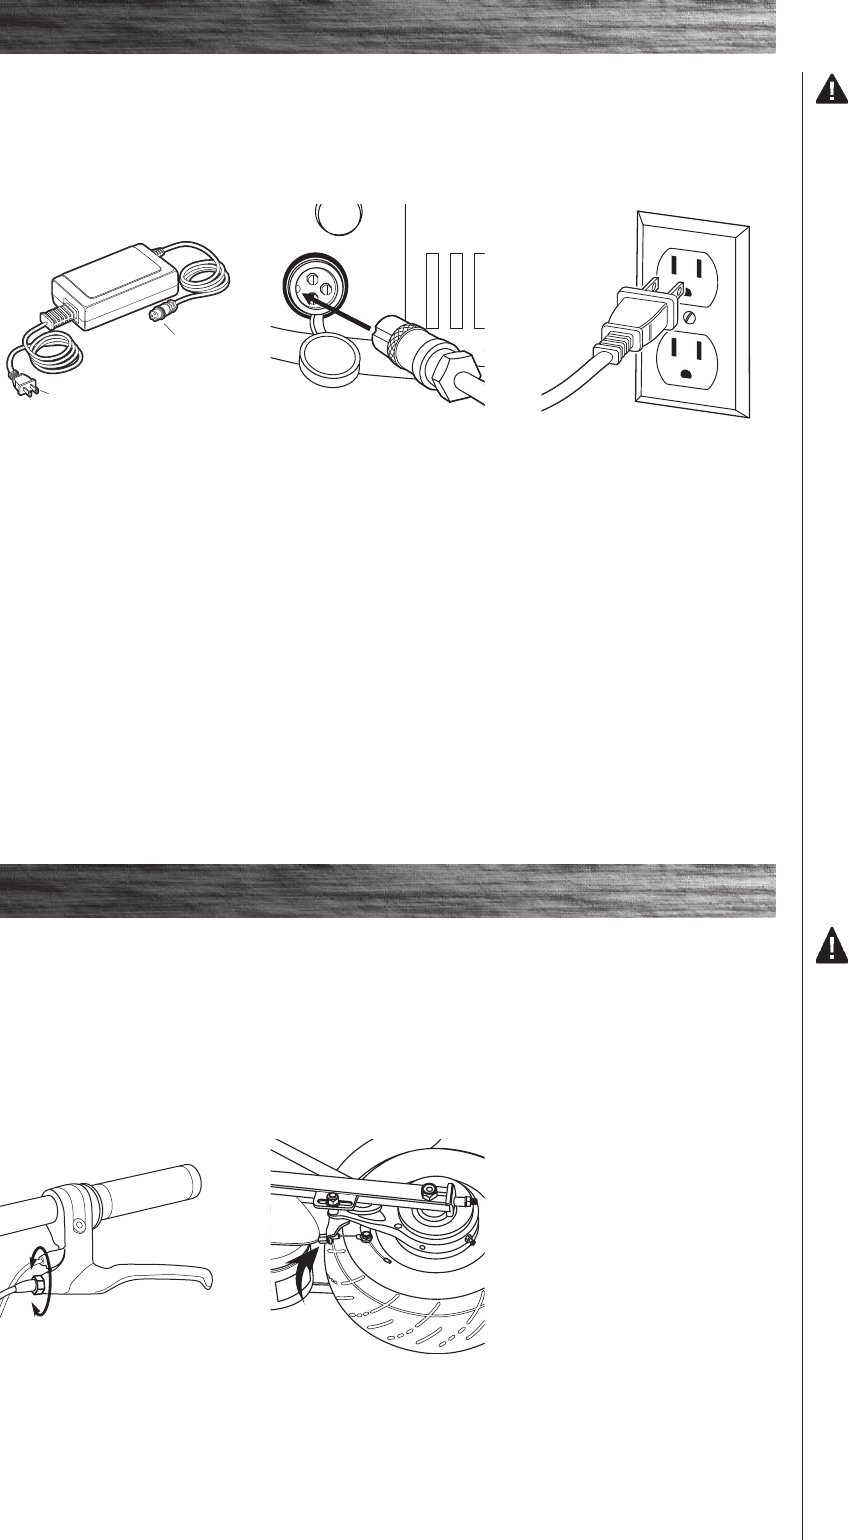
1 Plug the charger port into the
port on the electric motor bike.
The charger works with the
power switch in either the on or
off position.
2 Plug the charger plug into a
wall outlet.
WARNING:
Always disconnect your electric
motor bike from the charger
before cleaning with liquid.
Note: If your charger does not
look like the one illustrated,
your unit has been supplied
with an alternative charger.
The specifications and charging
procedure would not change.
The charger has a small window
with one LED or two LEDs to
indicate the charge status.
Refer to the illustration on
the charger unit for the actual
“charging” and “charged”
status indications for your
model charger.
Chargers have built-in over-
charge protection to prevent
battery from being over-
charged.
Charger will get warm during
use. This is normal for some
chargers and is no cause for
concern. If your charger does
not get warm during use, it does
not mean that it is not working
properly.
Be sure to properly align the
groove on the charger input
plug with the corresponding
socket on the case;
otherwise, no charging
action will occur.
Charger
Plug
Charger
Port
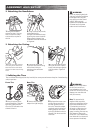
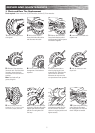
1 To adjust the play, thread
the brake lever adjuster in or
out 1/4 to 1/2 turn until the
desired brake adjustment is
attained. Most adjustments are
complete at this step. If brake
still needs further adjustment,
proceed to step 2.
2 If the brake lever adjuster is
threaded outward and the brake
still has too much slack, use the
back brake adjuster at the rear
brake for additional adjustment.
WARNING:
The brake is capable of
causing the electric motor bike
to skid the tire throwing an
unsuspecting rider. Practice
in an open area free from
obstacles until you are familiar
with the brake function. Avoid
skidding to a stop as this can
cause you to lose control or
damage the rear tire.
REPAIR AND MAINTENANCE
ASSEMBLY AND SET-UP
4
Check the Razor web site for any updates on the latest repair and maintenance procedures.
q Adjusting the Brakes
q Testing the Brakes
To use the brake, squeeze the lever to increase the pressure on the brake. The brake lever is fitted
with a cable adjuster to compensate for cable stretch and/or to fine-tune the lever movement to brake
engagement. If brake is not engaging properly, follow instructions for adjusting the brakes outlined below.
Turn power switch “OFF” before conducting any maintenance procedures.