


96
MAINTENANCE
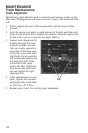
Clutch System
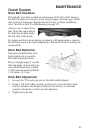
Drive Belt Removal
NOTICE: Do not attempt to remove the drive belt after operating in reverse. The
snowmobile must be stopped after forward motion to prevent damage
to components during belt removal. Rotate the driven clutch counter-
clockwise 1/4 turn by hand to ensure forward engagement before
attempting to remove the belt.
1. Stop the engine after operating in a forward motion. Turn the igni-
tion key off. Wait for the engine to come to a complete stop. Lock
the parking brake.
2. Remove the left side panel.
3. Rotate the driven clutch counter-clockwise 1/4 turn by hand to
ensure forward engagement.
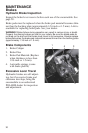
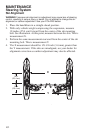
4. Locate the L-wrench in the tool kit. Install the wrench into the open
threaded hole in the outer sheave of the clutch.
5. Turn the wrench clockwise until the sheaves open far enough to
remove the belt. If the wrench does not turn readily, rotate the
driven clutch counter-clockwise an additional 1/4 turn by hand and
try again.
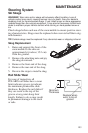
6. Remove the belt from the driven clutch.
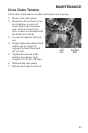
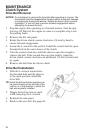
Drive Belt Installation
1. With the L-wrench inserted into
the threaded hole and the sheaves
in the open position, install the
drive belt.
TIP:Install the belt so that the numbers can
be read correctly on the left side of the
vehicle, or in the direction in which the
belt was originally installed.
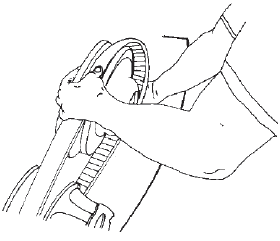
2. Wiggle the belt to remove slack
while removing the L-wrench.
3. Reinstall the side panel.
4. Break in the new belt. See page 64.