9
Appendix
Appendix
Handling and Care of the Disc
Some basic precautions are necessary when
handling your discs.
Discs you can use
• Do not use discs other than those intended for this
product. Use only discs approved by Pioneer.
DVD-ROM drive and care
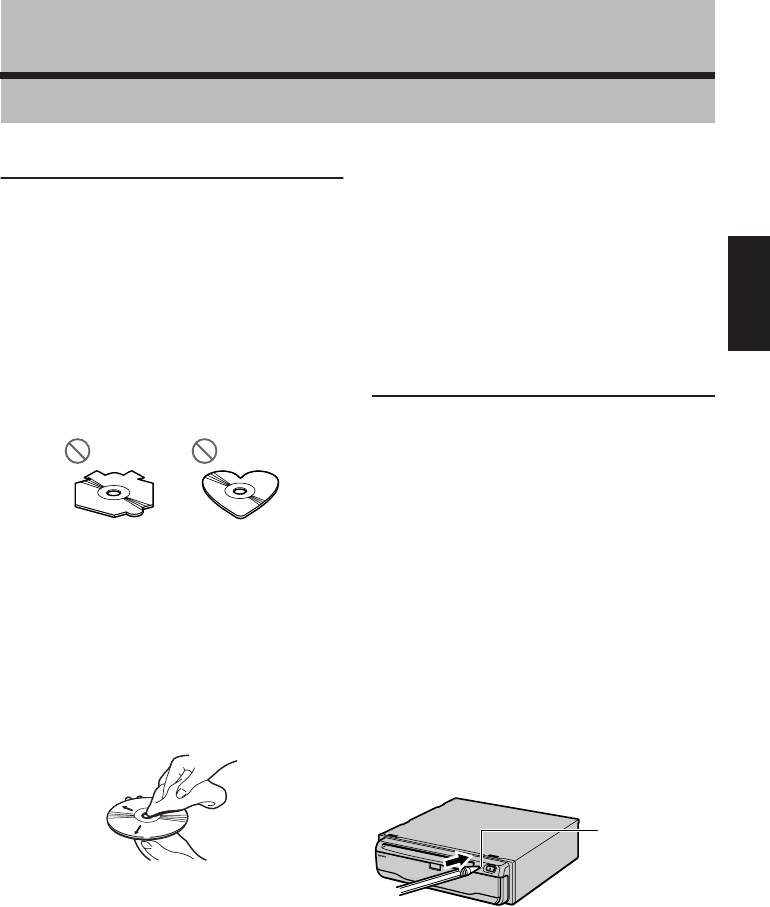
• Use only normal, round discs, if you insert irregular,
non-round, shaped discs they may jam in the DVD-
ROM drive or not play properly.
• Check all discs for cracks, scratches or warping before
playing. Discs that have cracks, scratches or are warp-
ing may not play properly. Do not use such discs.
• Avoid touching the recorded (non-printed side) surface
when handling the disc.
• Store discs in their cases when not in use.
• Keep discs out of direct sunlight and do not expose the
discs to high temperatures.
• Do not attach labels, write on or apply chemicals to
the surface of the discs.
• To clean dirt from a disc, wipe the disc with a soft cloth
outward from the center of the disc.
• If the heater is used in cold weather, moisture may
form on components inside the DVD-ROM drive. Con-
densation may cause the DVD-ROM drive to not oper-
ate properly. If you think that condensation is a
problem turn off the DVD-ROM drive for an hour or so
to allow the DVD-ROM drive to dry out and wipe any
damp discs with a soft cloth to remove the moisture.
• Road shocks may interrupt disc playback.
Ambient conditions for playing disc
• At extremely high temperatures, a temperature cutout
protects the Navigation System by switching it off
automatically.
• Despite our careful design of the product, as a result
of mechanical wear, ambient conditions for use, or
handling of the disc, small scratches that do not affect
actual operation may appear on the disc surface. This
is not a sign of the malfunction of the unit. Consider it
to be normal wear and tear.
Resetting the System
On occasion, you may need to reset your Naviga-
tion System.
➲ For details, refer to “About the Data being
Deleted” in “Operation Manual”.
When a reset is necessary
You should reset the system in the following situations:
• After installation of this unit in your vehicle.
• If there appear to be problems with the operation of
the system.
• If there are problems with the display.
• When changing the combination of the equipment.
Using the reset button
The reset button is recessed in the front of the main unit
to prevent it being pressed accidentally. Look for it at the
top right-hand corner of the front panel.
Insert a pointed implement such as a ballpoint pen into
the small hole and push.
If you have connected other equipment (for example, a
display or AV Head Unit) to this by cable, be sure to reset
that equipment too.
Reset button


