128-7405
22 of 28
22
TEMPERATURE START:
When Temperature Start, Bank 3 feature #13 is selected on, the temperature start mode can be activated
from the transmitter. See owners manual for turning this feature on from the transmitter. Once activated,
the unit will start 1 time if the vehicle temperature reaches "0* " and then will run the allotted time.
NOTE: When selecting Diesel operation, (Bank 3 Feature #11), over gasoline, the only change is to the
ignition circuits. When Diesel is selected, the ignition circuits will power up 10, 15, or 20 seconds
before the start circuit. The intent of this feature is to allow the glow plug warming required by some
diesel engines. If your vehicle is a instant start diesel, it is not necessary to activate this feature.
NOTE: When selecting Diesel mode, be certain that the intended vehicle has a true tach reference and be
certain to connect the tach input wire. Also note, if the "Diesel Wait to Start" input is connected,
(Green/Yellow) this wire will take precedence over the Diesel selection of bank 3 feature 11.
Programming Tach Rate:
NOTE: All applications require that tach be programmed.
The unit will not operate unless tach is programmed. If an attempt is made to start the vehicle via the remote start
without first programming tach, the unit will flash the parking lights 7 times indicating tach has not been learned
and stored. If the tach rate is not properly programmed to the specific vehicle, the unit may not realize that the vehicle
is running in certain instances reengage the starter motor.
The Remote Start Unit will learn the tach rate of most vehicle's single coil, multiple coil packs, or single
injector. To learn tach.
1. Turn the ignition key to the On position.
2. Press and release the valet/program push button switch 3 times.
3. Immediately turn the ignition key Off.
4. Press and hold the valet/program push button switch, then start the vehicle using the key.
5. When the unit senses the tach signal, the parking lights will begin to flash.
6. Release the valet/program pushbutton switch. The parking lights will turn on for three seconds to
indicate that the learned tach signal is stored and the unit is out of the tach learn mode.
NOTE: If the unit fails to learn tach rate due to an improper tachometer connection or a poor tach source,
the parking lights will not flash. To correct this situation, locate and connect the Green/Orange wire to the
proper tach signal, and then repeat the tach learn routine.
Diagnostics:
Enter Bank 3 and turn on selectable feature # 9 as described on the front pages of this manual.
NOTE: Diagnostic mode is a temporary mode. Once you have accessed the diagnostic mode, the unit will
pause for two seconds then begin to flash the last stored shut down code. This code will be displayed
three times in succession, then the unit will automatically exit the diagnostic on mode.
The parking lights will flash a number of times indicating the reason for the last remote start shutdown. The
light flash indications are as follows:
1 Flash Run timer expired
2 Flashes Low or no tach signal (RPM)
3 Flashes Positive or Negative inhibit wire activation
4 Flashes Control switch moved to the off position
5 Flashes RF shutdown, Remote signal received, or manual start trigger wire reactivated.
6 Flashes High tach signal (RPM)
7 Flashes Tach signal has not been learned
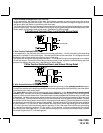
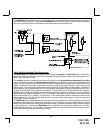
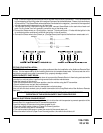
Multi Coil Pack Adaptor: (Optional)
The multi coil pack adaptor is designed for use with vehicles having multiple ignition coils where a single
point tach signal is unavailable, or non responsive. P/N 136B1400
To use the adaptor, the Green/Black wires must connect to the negative side of the ignition coil(s).
1. For vehicles utilizing independent coils per cylinder, connect the three Green/Black leads to alternate


