


Page 23
9 CUSTOMIZATION
9.1 Menu settings
REGATTA 2 can carry out a series of settings in order to personalize the transceiver
to your requirements and to insert the necessary data to its operation.
9.2 Navigation in the menu of settings
To access the menu of setting use the functions keys.
All programmed settings are stored in non-volatile memory.
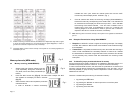
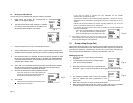
9.3 List of settings
Following find the possible settings:
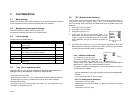
Menu Items Description Par.
Log
Call directory of stored DSC calls type individual or
distress calls.
9.4
Dir
Directory of MMSI owner names, MMSI codes and
their details.
9.5
Posn
Manual programming of co-ordinates and the UTC
time setting (in the absence of GPS).
9.6
LCD
Display contrast adjustment. 9.7
Beep
Adjustment of keypad beep 9.8
ZONE
Local and UTC time deviation settings. 9.9
MMSI
Entry of your individual MMSI code and you MMSI
group code.
9.10
9.4 “Log” (list of registered calls)
With this menu you can consult a directory of the latest registered calls, in
analogous way to the registrers of calls on a cellular phone.
- Press the function key “DSC”.
- Press the buttons “DSC” and “Log”. It will be shown the latest registered message.
- By pressing the function key corresponding to “Back” all the other registered
messages will be shown.
- Using the function keys corresponding to the symbol “▼” you will get some more
information: co-ordinates and time.
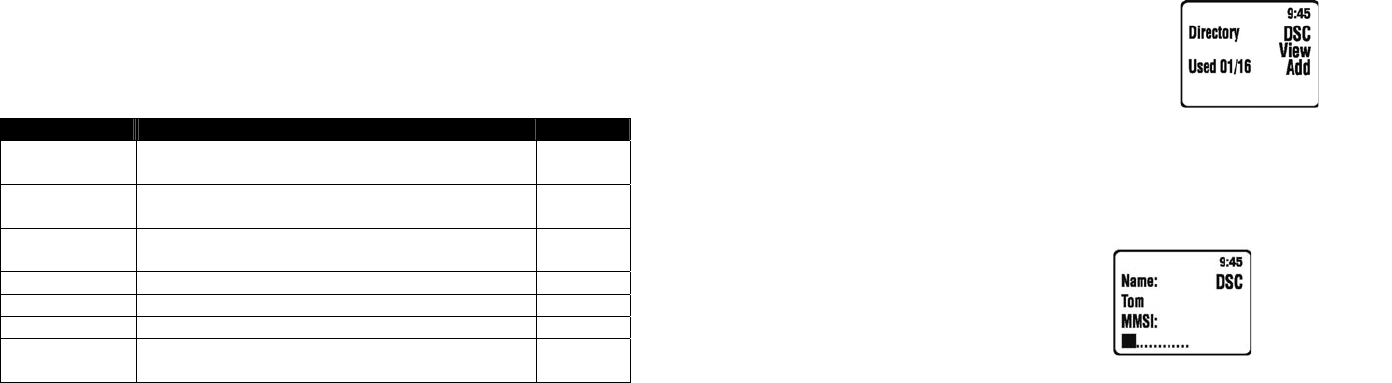
9.5 “Dir” (Entries in the directory)
You can insert into the directory the MMSI codes from frequently called stations, by
giving them a name (e.g. vessel or owner). Then you can search and use them
more comfortably. When receiving a call, MMSI owner name and MMSI code will be
displayed.
1. Press the function key “Menu”.
2. Press the function key “More”.
3. Press the function key “Dir”.
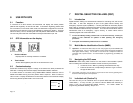
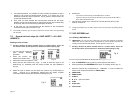
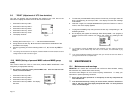
4. At this point you enter to the directory pages. If no
MMSI owner address was stored, the display will show
“Empty”, throughout it has been stored one or two MMSI
owner addresses, the type of indication will appear as
follows:
5. By pressing the function key “Add” you will have the possibility to add further
MMSI addresses. Pressing the function key “VIEW” you will have the possibility
to modify/cancel the address shown on the display.
9.5.a Addition of addresses
9.a.1 Press the function key “Add”.
9.a.2 With the alphanumerical keypad (the
keys are associated with letters like on a
cellular phone) you are able to write the name you want to associate with the
MMSI code (f.e. TOM), then press the E-button to confirm.
9.a.3 After the pressure to the E-button, on the display appears the cursor in
correspondence to “MMSI”
Write the identification code using the alphanumerical keypad (obligatorily
9 digits
)
9.a.4 Press the E-button in order to confirm.
9.5.b To modify/cancel addresses
1 Press the function key “View”.
2 Select with the function keys “Next “ or “Back” the address you desire to
modify/cancel.
3 Press the function key “Edit”.
Fig. U
Fig. V