


Page 11
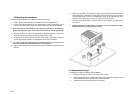
3.3 Mounting the transceiver
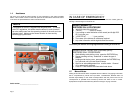
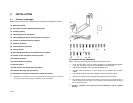
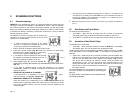
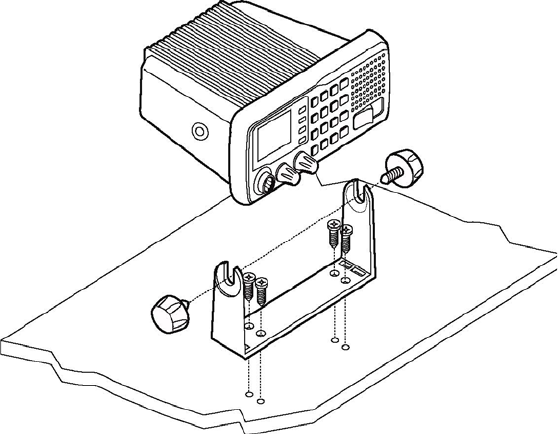
To mount the transceiver to your vessel (see following picture):
1. Choose an appropriate location, as explained in the paragraph above.
2. Position the mounting bracket on the surface upon which it will be fixed, use a
pencil to draw the position of the four holes where the screws will be inserted.
, Ensure that the surface intended for the transceiver mounting can be drilled into
without damaging other parts of the vessel and be careful to not drill right through
it.
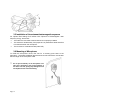
3. Remove the bracket, drill four holes smaller in diameter than the screws, and
reposition the mounting bracket, aligning it with the four holes.
4. Screw in the mounting screws and ensure the bracket is fixed firmly, using the
screws, the grained washers, the flat washers and the nuts supplied.
, If you are not able to reach the back part of the bracket surface to fix the nuts onto
the screws, use wood or sheet-metal screws to fix the bracket.
5. Tighten the screws with a screwdriver so that the bracket is firmly fixed to the
surface.
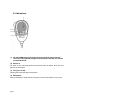
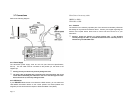
6. Align the transceiver on the bracket, ensuring the holes of the internal part of
the bracket line up with those on both sides of the transceiver (you can choose
the preferred notch in order to best adjust the angle of the transceiver’s front
panel for ease of viewing and use (15
0
of variation for each notch).
7. Attach the mounting knobs on the two sides of the bracket to soundly fix the
transceiver.
, Keep the transceiver and microphone at a distance of at least 3 feet from all other
magnetic devices (e.g. compass) on your vessel.
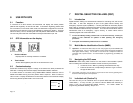
3.4 Adjustment of angle
To change the angle of inclination after installation:
1. Loosen the mounting knobs on the sides of the bracket.
2. Adjust the transceiver to a better angle, lining up the holes of the internal part
of the bracket with those on both sides of the transceiver.
3. Tighten the knobs to fix the transceiver into place.