


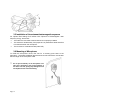
Page 16
5 SCANNING FUNCTIONS
5.1 Channel scanning
REGATTA 2 can automatically search for signals throughout the marine band by
scanning, or selecting the channels in rapid sequence. When a signal is detected,
the scanning pauses on that channel and remains blocked until the signal ends.
Before the scanning automatically starts again, REGATTA 2 waits for a few seconds
in case the user wishes, if necessary, to respond to a call even if in truth you will see
the channels being scanned.
The REGATTA 2 scanning happens with a minimum of 2
channels to a maximum of 56 channels on the INT band
(channel 70 is not selectable).
• In order to execute the scanning of the marine
channels, it is necessary to create a list of channels
for scanning. Operate in the following way:
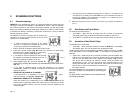
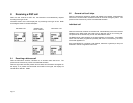
1. Select a channel you desire to insert into the scanning list.
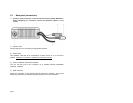
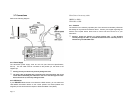
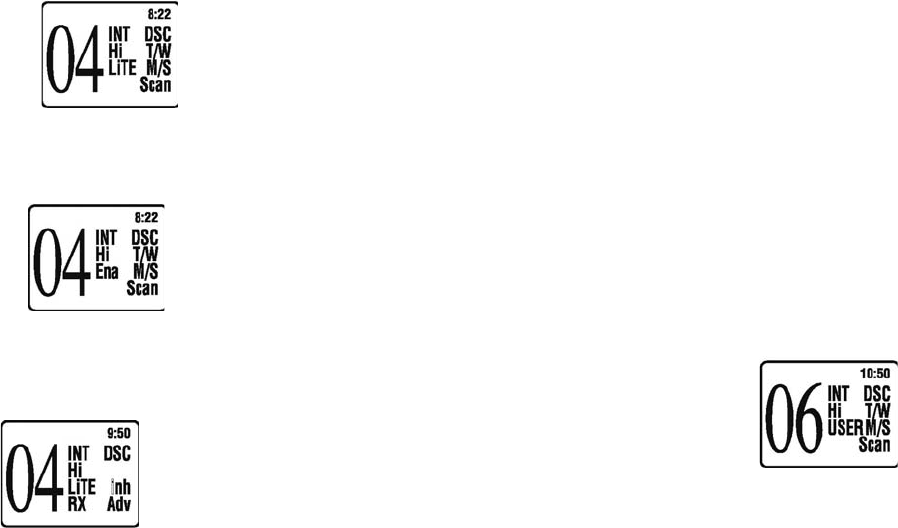
2. Press and hold the “SCAN” (Fig. B); button for 2 seconds; the radio beeps
twice and on the display appears for a short time,
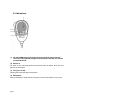
then the words “Scan Ena” (Fig. C) appear.
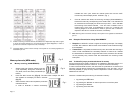
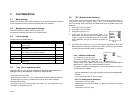
3. If you desire to cancel a channel from the scanning
list, repeat the procedure as described at point 2. In
that case the display is showing “Scan Inh”.
4.
Once created your list, you can activate the
scanning by pressing the function key corresponding to the word
“Scan”
(Fig. C).
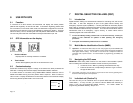
• If you want to eliminate (useful if there are distortions) or to exclude
momentarily (useful for undesired conversations) a channel during scanning,
operate as follows:
• DEFINITIVE EXCLUSION OF A CHANNEL:
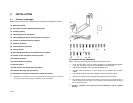
If your REGATTA 2 is operating on a busy
channel, press the “Inh” (Fig. D) . function key.
• TEMPORARY REMOVAL OF A CHANNEL:
Press the function key corresponding to the written “Adv” to advance the
scanning and to temporarily remove this channel from the scanning list. At the
end of the complete scanning cycle, the channel previously jumped will be
monitored again.
• The scanning can be stopped by pressing the “C” button, or “16” button on the
microphone or by sending out a DISTRESS call. Your transceiver will stop on
the current channel (if you pressed the “C” button) or on channel 16 (if you
pressed 16 or PTT on the microphone).
Note: Scanning does not function correctly if the squelch is not regulated as described in
par.4.3.
5.2 Dual Watch and Triple Watch
The meaning of these terms are:
• Dual Watch – allows the user to remain tuned to a channel of choice while
periodically performing an automatic verification of signals on channel 16.
• Triple Watch – as written above, including a third channel chosen by the user.
5.3 Activation of Dual Watch/Triple
To activate Dual or Triple watch:
• Dual watch - Select a desired channel and press the D/W-button. The Display
will indicate “D/W” and you will see the two monitored channels.
The Dual Watch function can be stopped in 5 different modes: by pressing the PTT-
or the “16” buttons on the microphone, “D/W”- or “C”-buttons or by sending out a
DSC-call.
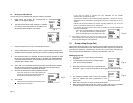
• Triple watch – select one of the 2 channels you desire to monitor together with
channel 16. Hold pressed the function key corresponding to the indication T/W
until you hear two beeps. Now “User” appears on the display. (Fig. F). Move
now to the second channel you desire to monitor, press the function key
corresponding to T/W. Now you will see all three channels sliding on the
display with indication T/W. “Adv” appears too, that, similar to SCAN function,
has the aim to exclude momentarily the monitoring of
the current channel.
The Triple Watch function can be stopped by pressing the
“C” button, the PTT- or the 16-buttons or by sending out a
DSC call.
For both modes, the operation can be resumed with
the following diagram:
Fig. B
Fig. C
Fig.D
Fi
g
. F