


12
ALL VEHICLES
4
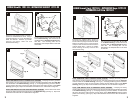
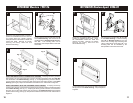
IF THE LOWER PORTION OF THE RADIO HOUSING HAS BEEN REMOVED FOR
POCKET RETENTION: Mount the Brackets to the Radio Housing with (2) clips and (2) #6 x
¼" Phillips Flat-head Screws supplied. (see Fig. A)
IF THE LOWER PORTION OF THE RADIO HOUSING HAS NOT BEEN REMOVED
(EXCLUDING DIAMANTE and GALANT): Mount the Brackets to the Radio Housing with
(4) clips and (2) #6 x ¼" Phillips Flat-head Screws supplied. (see Fig. B)
DIAMANTE: Mount the Brackets to the Radio Housing with (2) clips and (2) #6 x ¼" Phillips
Flat-head Screws supplied. (see Fig. C)
GALANT: Mount the Brackets to the Radio Housing with (4) clips and (2) #6 x ¼" Phillips
Screws supplied. Slide the factory cupholder onto the mounted Brackets until the locater pins
engage and mount with (2) screws previously removed. (see Fig. D)
Fig. B
Fig. A
Fig. C
Fig. D
13
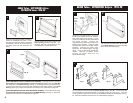
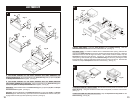
2-SHAFT HEAD UNITS: Snap the Shaft Supports into the Radio Housing. Slide the
aftermarket head unit into the kit and secure with shaft nuts. (see Fig. A).
DIN HEAD UNITS: For dash trim bezels with an UNDIVIDED radio opening, slide the DIN
cage into the Radio Housing and secure by bending the metal locking tabs down. Slide the
aftermarket head unit into the cage until secure. With the side notches DOWN, snap the
Faceplate onto the front of the Housing. (see Fig. B). For dash trim bezels with a DIVIDED
radio opening, slide the DIN cage into the Radio Housing and secure by bending the metal
locking tabs down. Slide the aftermarket head unit into the cage until secure. With the side
notches UP, snap the Faceplate onto the front of the Housing. (see Fig. C)
5
Fig. A
Fig. C
Fig. B
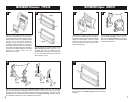
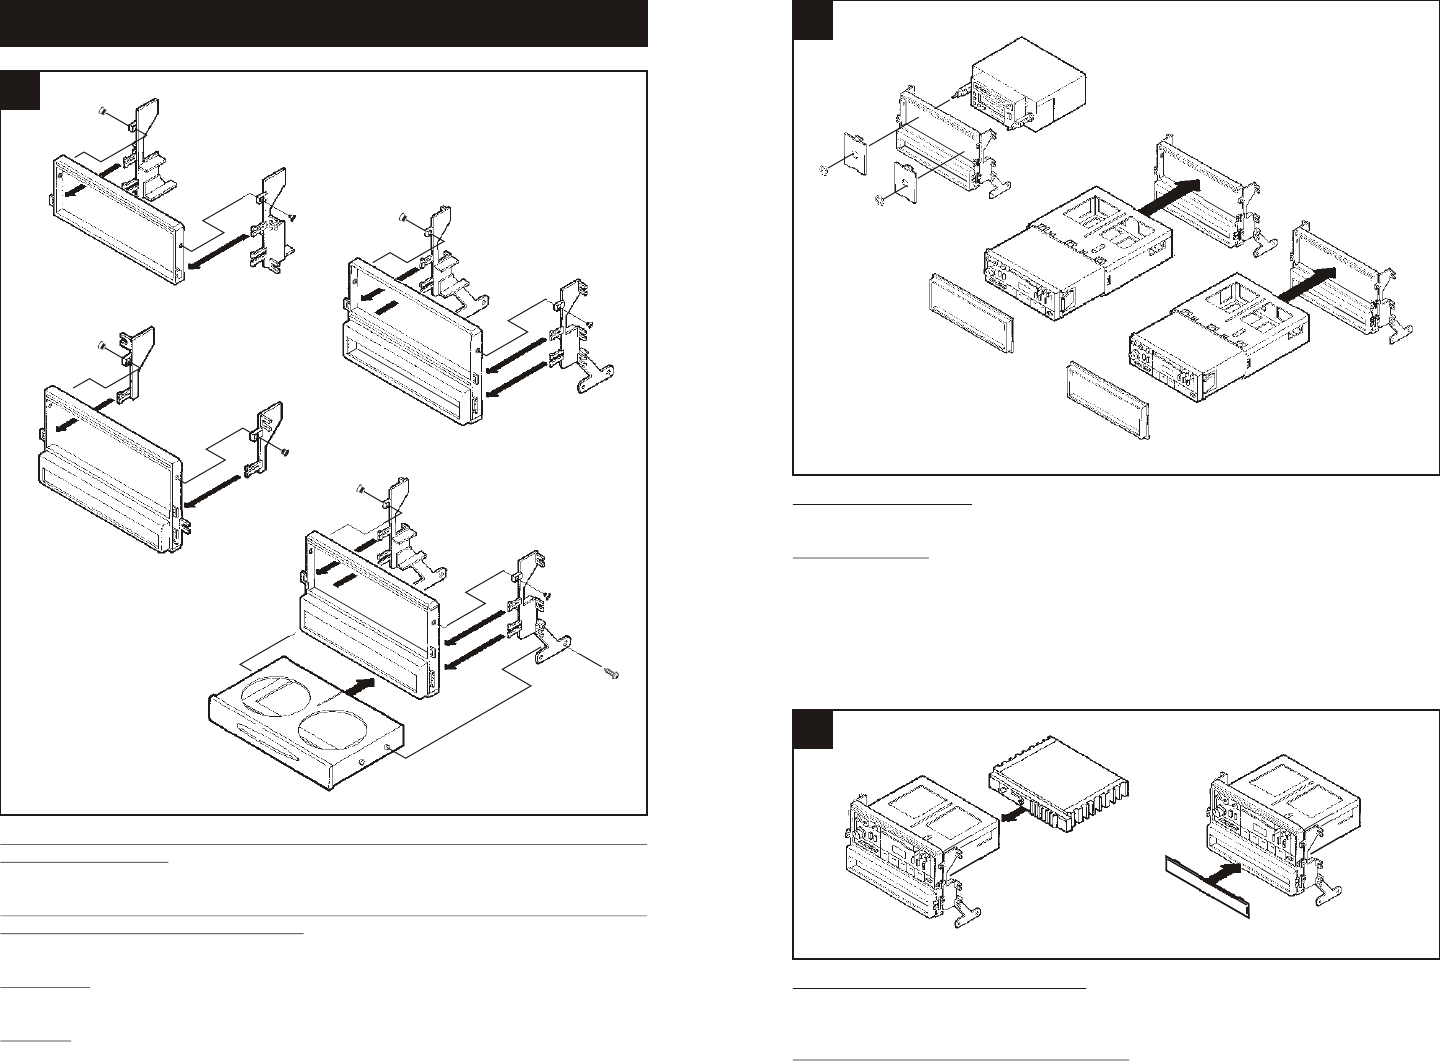
IF AN EQUALIZER WILL BE INCLUDED: Slide the aftermarket equalizer into the back of the
Radio Housing. Using the hardware included with the equalizer, mount the unit to the kit.
(see Fig. A)
IF AN EQUALIZER WILL NOT BE INCLUDED: Snap the Equalizer Dummy Plate into the
Radio Housing. (see Fig. B)
6
Fig. A
Fig. B