17
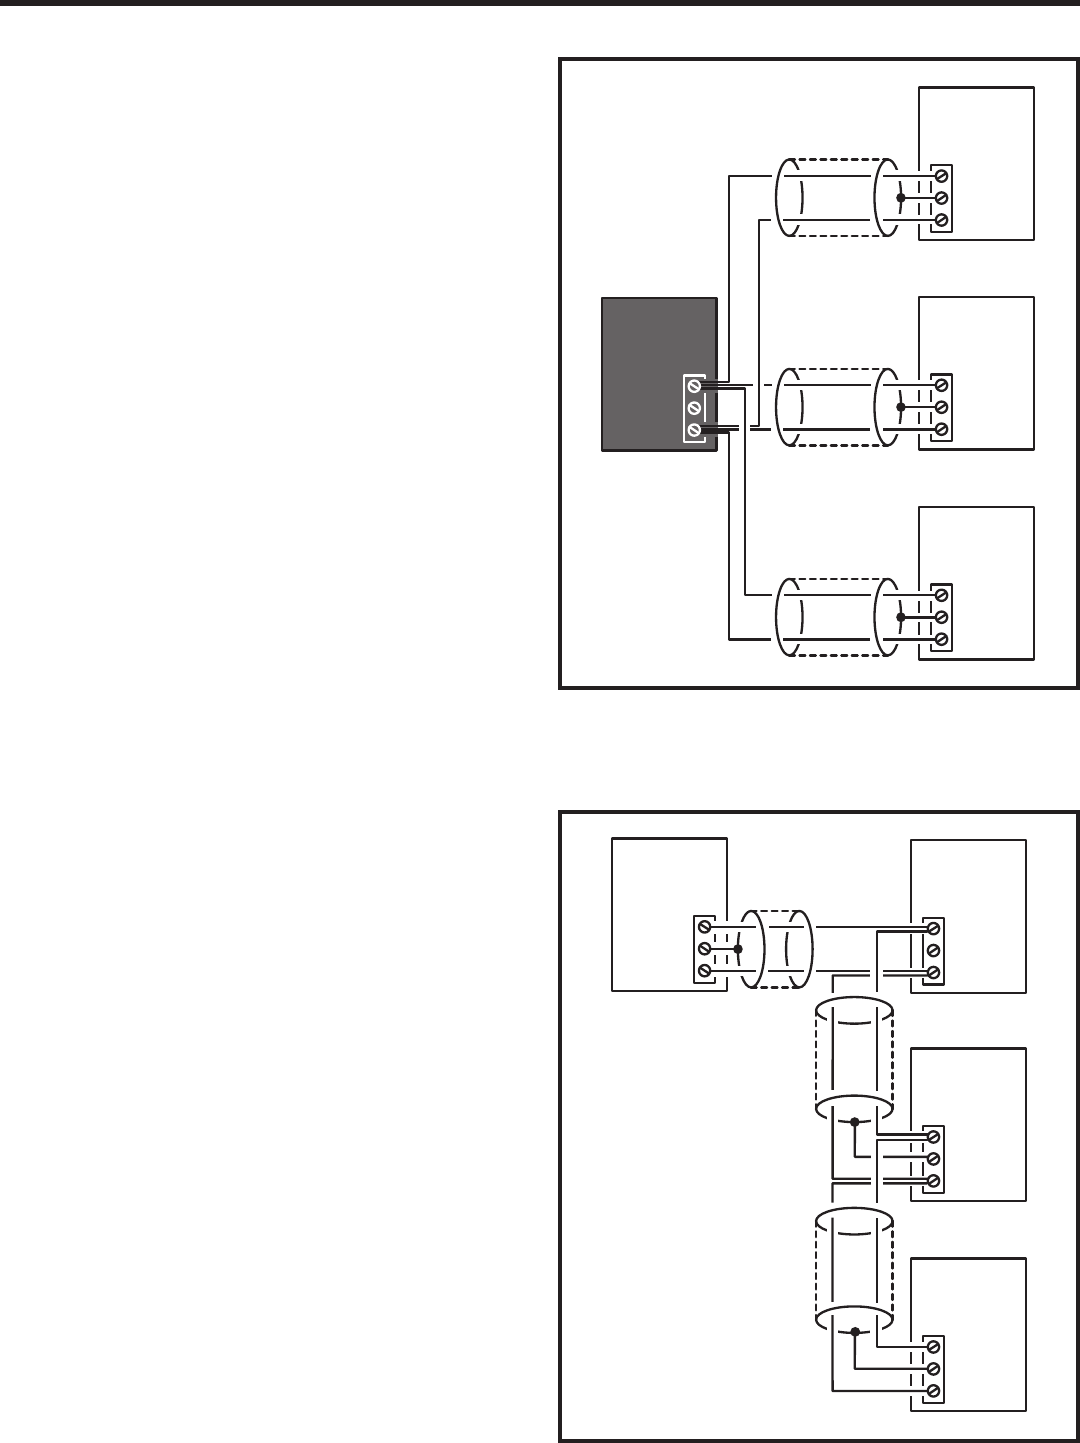
NET-A
GND
NET-B
NETWORK
UNIT "3"
NET-A
GND
NET-B
NETWORK
UNIT "4"
NET-A
GND
NET-B
NETWORK
MASTER
UNIT "1"
NET-A
GND
NET-B
NETWORK
UNIT "2"
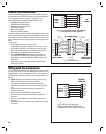
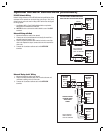
ACCESS CONTROL HOMERUN NETWORK
USING ONE UNIT AS A NETWORK MASTER
NOTE: GROUND
CABLE SHIELDS
ONLY AT ONE END
SHIELD
SHIELD
SHIELD
NET-A
GND
NET-B
NETWORK
UNIT "3"
NET-A
GND
NET-B
NETWORK
UNIT "4"
NET-A
GND
NET-B
NETWORK
MASTER
UNIT "1"
NET-A
GND
NET-B
NETWORK
UNIT "2"
ACCESS CONTROL
NETWORK USING
"DAISY CHAIN"
WIRING
SHIELDSHIELD
SHIELD
NOTE: GROUND
CABLE SHIELDS
ONLY AT ONE END
Optional Network Connections (Continued)
RS-485 Network Wiring
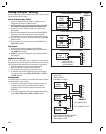
Network wiring conforms to 3-wire RS-485 electrical specifi cations. Units
connected in the network can be wired using one unit as a “hub” or by
wiring from one unit to the next in “daisy-chain” fashion. See the fi gures
for wiring options.
• Use Belden 9925 or Carol C0600 shielded cable or equivalent.
Maximum wire run distance is 4000 feet.
✦ NOTE: Be sure to connect the cable’s shield to one of the GND
terminals.
Network Wiring with Hub
1. Mount and install the units for the network.
2. Choose one unit to be the Network Hub. Usually this would be a
centrally located or “master” unit.
3. Route 3-conductor shielded cable from the hub unit to one of the
other units. Repeat this step to connect the hub unit to each of the
other units.
4. Connect the 3-conductor cable to each unit’s NETWORK
terminals.
Network “Daisy-chain” Wiring
1. Mount and install the units for the network.
2. Route 3-conductor shielded cable from one unit to the next unit
until there is cabling run to all of the units.
3. Connect the 3-conductor cable to each unit’s NETWORK
terminals.


