9
8
Climate control and exterior lighting
Climate control
Recommended mode
Select AUTO as the normal operating mode.
This will help prevent window misting.
Operating note
It is not possible to achieve a temperature
differential of more than 4°C (7°F) between
left and right.
External water deposits
The air conditioning system removes moisture
from the air and deposits excess water
beneath the vehicle. Puddles may form, but
this is normal and no cause for concern.
2
1 1
3
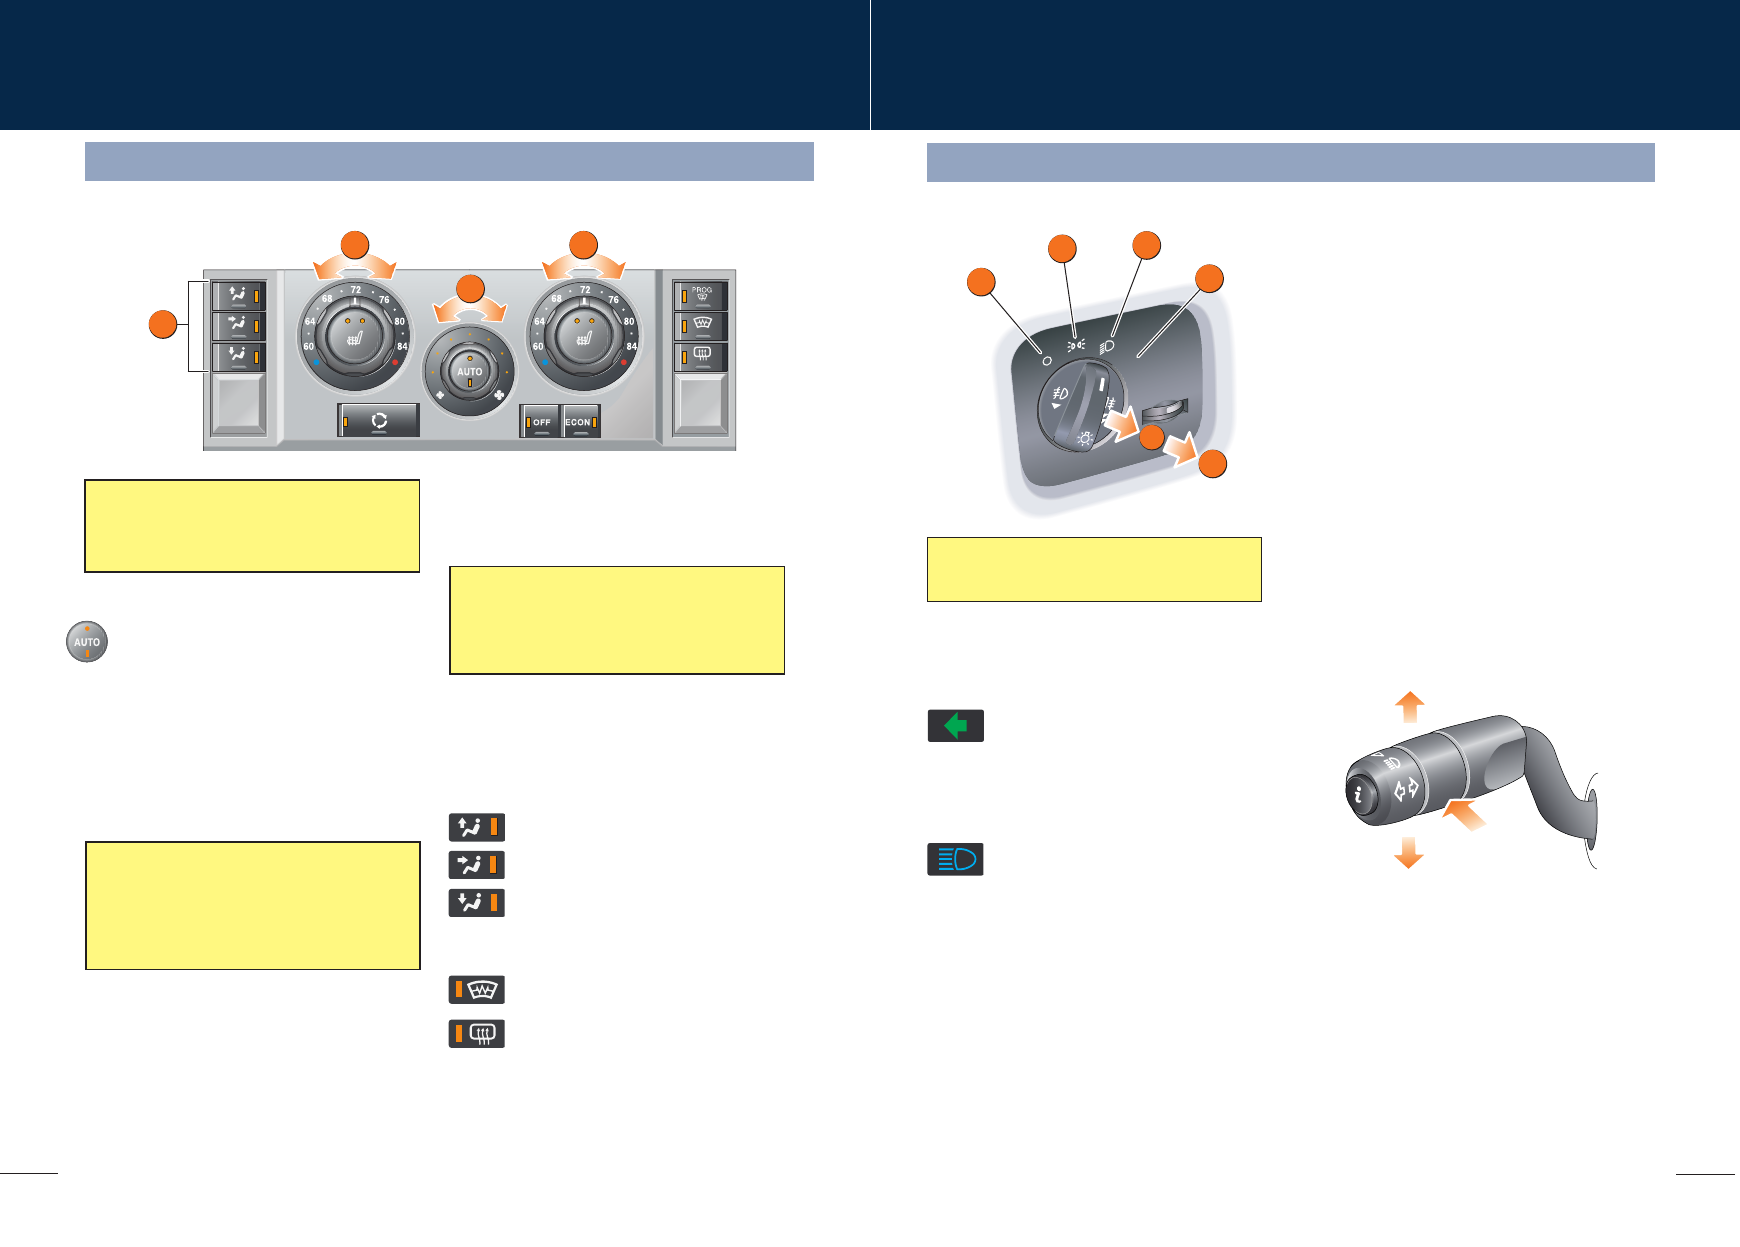
These are the primary functions of the heating and ventilation system.
AUTO (automatic) MODE
Press AUTO to select automatic operation of
the system, both LEDs in the switch will
illuminate.
The system will adjust the heat output, blower
speed, air intake and airflow distribution to
maintain the selected temperature(s) and
reduce misting without further adjustments.
The air distribution and blower controls can be
operated to override the automatic settings.
This will extinguish the appropriate LED in the
AUTO control.
1. Temperature selection
Rotate the controls to adjust the temperature for
the respective side of the passenger
compartment.
2. Blower speed
Rotate the blower control 2 to adjust airflow
through the vents.
3. Air distribution control
Press to select the desired distribution setting.
Windshield and side window vents
Face level vents
Foot level vents
More than one setting can be selected to
achieve the desired distribution.
Heated windshield (when fitted)
Heated rear window
AUTO
1
2
3
4
B
A
Fog lamps cannot be operated if the lamps
master switch is in AUTO.
Exterior lighting
1. Exterior lamps off
2. Side lamps
3. Headlamps
4. Autolamps
In AUTO mode and the starter switch in
position II, a sensor monitors the exterior
light levels and will automatically switch the
side lamps and dipped headlamps ON and
OFF as required.
A. Front fog lamps
Pull the switch to position A to switch on the
front fog lamps.
B. Rear fog lamps
Pull the switch to position B to switch on the
rear fog lamps.
Exterior lamps master switch
Direction indicators
Move the lever up or down to activate the
direction indicators.
Moving the lever up or down against spring
pressure and then releasing will flash the
indicators three times. Useful for lane changing.
Headlamp high beam
Push the lever away from you to select
headlamp high beam. A warning indicator
will illuminate on the instrument pack.
To flash the headlamps, pull the lever towards
the steering wheel and then release.


