


ENGLISH
22
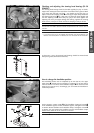
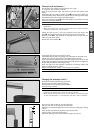
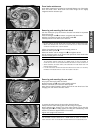
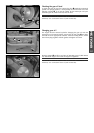
Checking front brake pads
Inspect the brake pads from in front of the vehicle. The linings must be at
least 1 mm (0.04 in) thick.
ƽ
WARNING
ƽ
AT THEIR MOST WORN POINT BRAKE PAD LININGS SHOULD NOT BE THINNER THAN 1 MM
(0.04 IN), OTHERWISE THEY COULD LEAD TO BRAKE FAILURE. FOR YOUR OWN SAFETY
DON
’T PUT OFF HAVING YOUR BRAKE PADS CHANGED.
!
CAUTION
!
I
F THE BRAKE PADS ARE REPLACED TOO LATE SO THAT THE LINING IS PARTLY OR ENTIRELY
WORN
, THE STEEL COMPONENTS OF THE BRAKE PAD WILL RUB AGAINST THE BRAKE DISC,
THEREBY IMPARING THE BRAKING EFFECT AND DESTROYING THE BRAKE DISC.
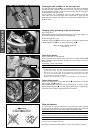
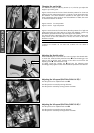
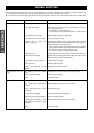
Replacing the front brake pads *
Remove the front wheel (see front wheel chapter).
Press brake shoes apart with a suitable screwdriver to put the brake pistons
in their basic position.
Remove the lock washer
1 from the screw as well as fixing screw 2 and
take the brake shoes out of the brake caliper. Clean brake caliper thoroughly
with compressed air.
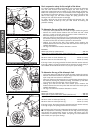
Mount the right brake shoe and fix with screw. Mount the left brake shoe
and tighten the screw to 6 Nm. Mount the lock washer. Align brake shoes,
mount front wheel (see chapter: Mounting the front wheel).
ƽ
WARNING
ƽ
–ITISVERY IMPORTANT TO KEEP THE BRAKE DISK FREE FROM OIL AND FATTY MATTERS.
O
THERWISE, THE BRAKING EFFECT WOULD BE STRONGLY REDUCED.
–A
FTER ASSEMBLY, CHECK IF CIRCLIPS HAVE BEEN FITTED CORRECTLY.
–D
O NOT UNSCREW ANY OTHER SCREWS ON THE BRAKE CALIPER OR YOU WILL HAVE
TO BLEED THE BRAKE SYSTEM
.
–A
FTER WORKING ON THE BRAKE SYSTEM ALWAYS OPERATE THE HAND BRAKE LEVER
TO APPLY THE BRAKE PADS TO THE BRAKE DISK AND CREATE A POINT OF PRESSURE
.
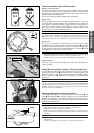
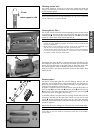
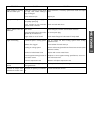
Changing the basic position of the foot brake lever
The basic position of the foot brake lever can be changed by unscrewing
screw 3 and then turning the retainer 4.
Afterwards, check the setting of the rear wheel brake.
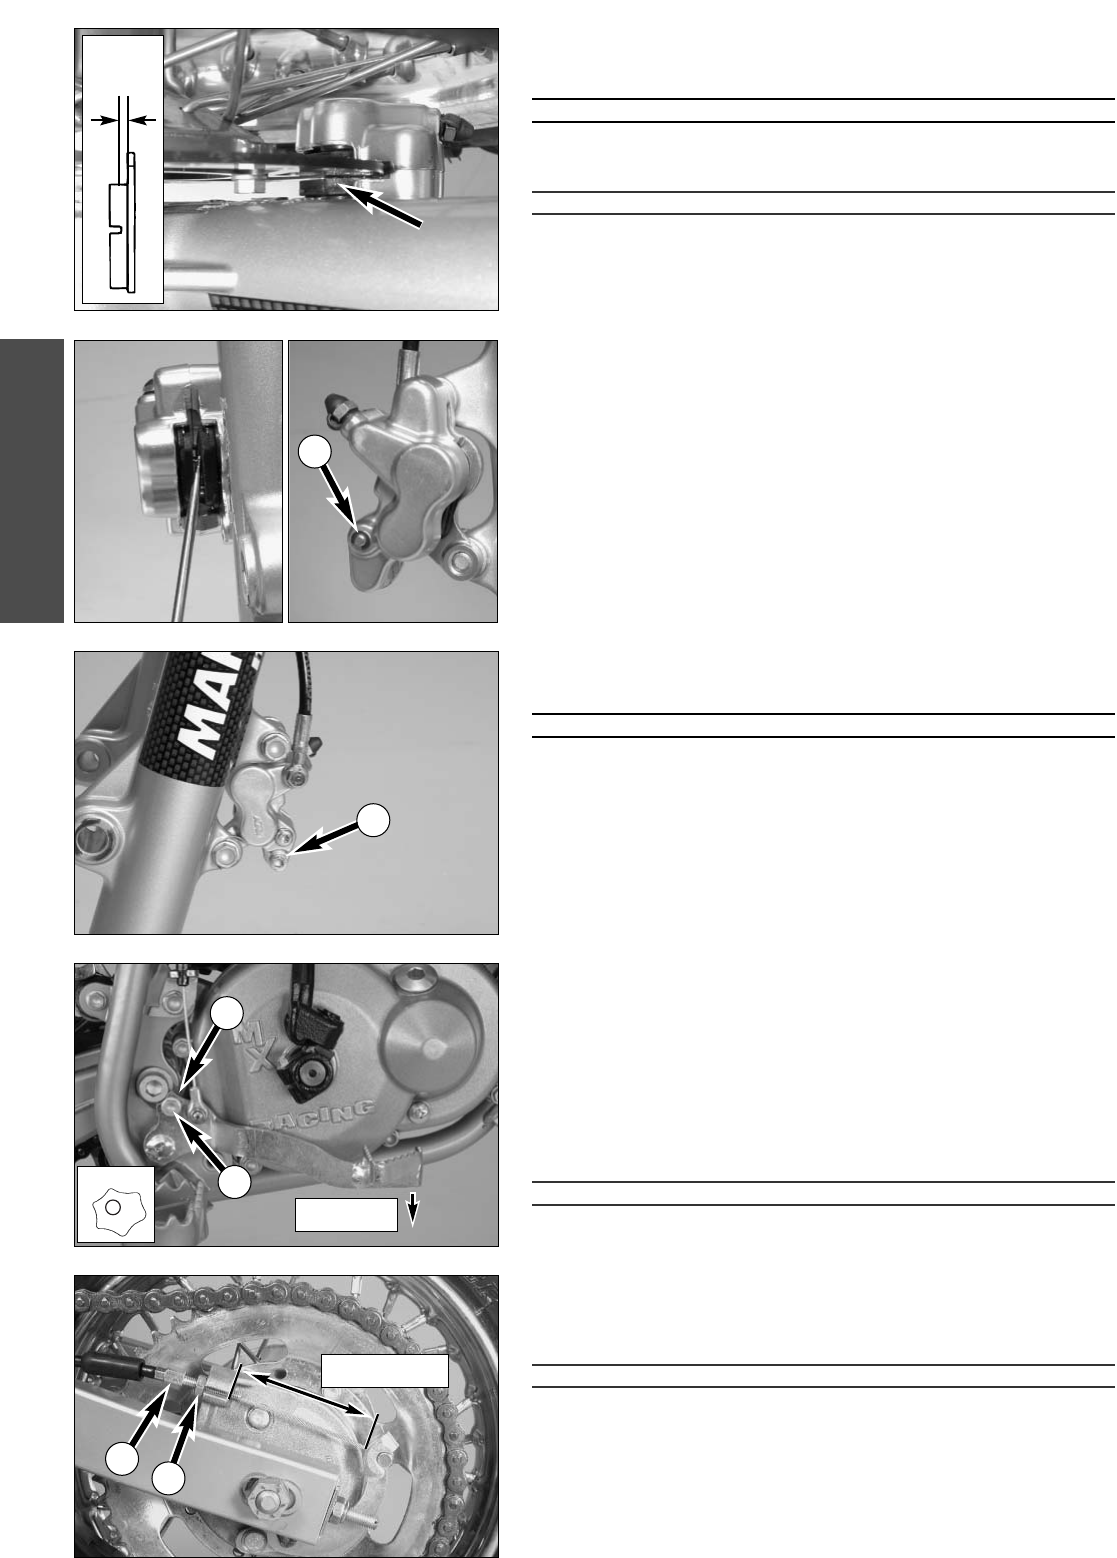
Adjusting the control cable on the rear wheel
You should be able to press the foot brake lever 5 to 10 mm (0.2-0.4 in)
before the rear wheel begins to brake.
The brake control cable is adjusted with adjusting screw
5 on the brake
anchor cover. First loosen lock nut
6 and then tighten again.
!
CAUTION
!
A
FTER MAKING ADJUSTMENTS, ALWAYS MAKE SURE THE WHEEL TURNS FREELY.
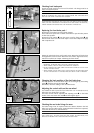
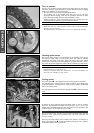
Checking the rear brake linings for wear
The brake linings must be replaced when the distance between the hub
brake lever and the cable support, measured with the brake lever squeezed,
is less than 50 mm (2 in) (see illustration).
!
CAUTION
!
I
FTHE BRAKE LININGS ARE REPLACED TOO LATE, I.E. WHEN THE LINING IS PARTLY OR
FULLY WORN AWAY
, THE METAL SHOES WILL RUB AGAINST THE BRAKE DRUM, THUS
REDUCING THE BRAKING EFFECT AND DESTROYING THE BRAKE DRUM
.
min 50 mm
6
min.
1 mm
5
1
2
5-10 mm
4
4
3