


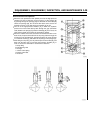

DISASSEMBLY, REASSEMBLY, INSPECTION, AND MAINTENANCE 3-37
Piston and Connecting Rod
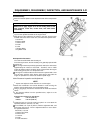
Disassembly
•
Drain the engine oil into an appropriate container.
•
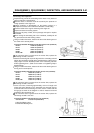
Remove the retaining bolts from the crankcase cover. Using a
wooden or a plastic mallet, gently tap on the crankcase cover at
the area where the cover is fastened to the crankcase, and remove
the crankcase cover. (Refer to the section on Crankcase Cover
Disassembly.)
•
Refer to the section on Camshaft Disassembly and remove the
camshaft and the tappet. * When working on the FE170 that is
equipped with a uniaxial rotation balancer, remove the balancer.
•
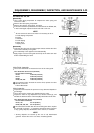
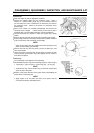
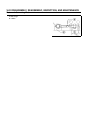
Turn the crankshaft to a position in which the cap bolt [A] is easily
visible.
•
Remove the two cap bolts and remove the connecting rod cap [B].
•
Push the big end of the connecting rod towards the cylinder head and
push out the piston and connecting rod assembly.
NOTE
Clean off the carbon from the cylinder bore before pushing out the
piston and connecting rod assembly.
•
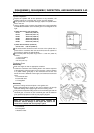
Remove the snap ring from the piston, pull out the piston pin, and
take out the piston.
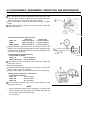
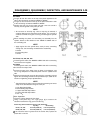
•
Using your fingers, open the piston ring [A] at the area where its ends
meet, and push up the piston ring at the opposite end to remove it
from above the piston.
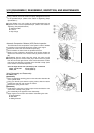
Reassembly
The reassembly is the opposite of the assembly.
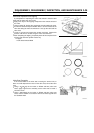
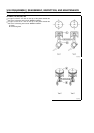
•
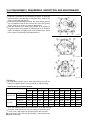
Reassemble the piston rings in the following sequence: lower rail [A1]
spacer [B] upper rail [A2] second ring [C] top ring [D]
NOTE
Install the top ring and the second ring so that their marked side
faces the top of the piston.
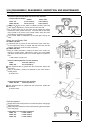
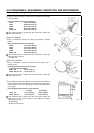
•
Beware of the proper direction of the piston when reassembling the
piston with the connecting rod.
NOTE
Apply engine oil to the piston pin holes of the piston and the
connecting rod before assembling them.