KK-XXX-03_INST_10-07
2
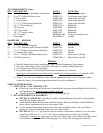
40” COMPARTMENT (cont):
QTY DESCRIPTION PART # USED FOR:
40 #10 x 1” Phillips pan head sheet metal screw GSM33196 Floor, wall to ceiling
25 #8 x 3/8” Phillips flat head screw GSM33179 Vent plates/dome lights
5 ½” Flat washer GSM31009 Grab straps/seat belts
5 ½” Lock washer GSM31030 Grab straps/seat belts
5 ½” x 1 ¼” Socket button head bolt GSM33310 Grab straps/seat belts
5 3/8” x 2” Hex head bolt GSM33032-1 Bulkheads
5 3/8” Hex nut GSM30008 Bulkheads
5 3/8” Lock washer GSM31028 Bulkheads
5 3/8” x 2” Fender washer GSM31022 Bulkheads
2 A/C Vent plate KKM0403-001 Ceiling (vent adapter kit)
1 Dome light KK-DOME-2 Ceiling
HARDWARE – DIVIDER:
QTY DESCRIPTION PART # USED FOR:
28 ¼” x 1 ½” Hex head lag bolt GSM33062 Divider to floor
14 ¼” x 5/8” Stainless socket button head bolt GSM33308 Divider
7 ¼” x ¾” Stainless socket button head bolt GSM33309 Divider
14 ¼” Stainless flat washer GSM31048 Divider
10 #10 x ½” Phillips flat head machine screw GSM33072 Door frame to divider
10 #10 Thin nylock nut GSM330015-1 Door frame to divider
Always!
Read all instructions before installing any Havis-Shields Equipment Corp products.
Check for obstructions (Wire, brake lines, fuel tank, etc.) before drilling any holes!
Use hardware provided with install kit
For product support, visit the Install Instructions Section of our website at
http://havis.com/Installation/Installation.html, email technicalsupport@havis.com or call 1-800-
524-9900.
If this is your first time installing a Havis Shields Equipment Corp Prisoner Transport, please
contact the factory for tips and suggestions that will ease the installation.
VEHICLE PREPERATION:
1. STEPS, HVAC, VAK, OPTIONS, ETC:
•
••
•
Refer to the specific install instructions. Installing the steps prior to installing the Kwik Kit will
ease installation and must be done on Chevy side step.
•
••
•
Installing options may be necessary prior to installing the kit.
2. SOUND DEADENING & FLOORING:
•
••
•
OPTION #1: KK-RFM A self-adhesive rubber sound deadening floor mat is sold separately
and will help deaden road noise.
•
••
•
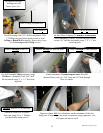
Install optional rubber flooring onto van floor. Rubber floor mat should go under OEM floor
mat in drivers compartment to cover sheet metal floor.
•
••
•
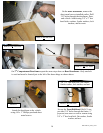
Excess material can be placed onto walls of the van, around the wheel wells, inside door
panels, etc. This will also help deaden the echo in the vehicle.
•
••
•
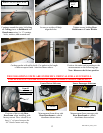
OPTION #2: 3/8” to ½” plywood can also be used as an alternative solution. Cover the entire
cargo floor of the van. (1 ½) – 48” x 96” sheets of plywood are needed. Havis Shields
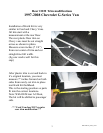
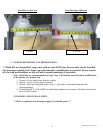
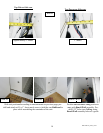
Equipment Corp does not supply plywood floor kit. Draw a line on the rubber/wood floor from
rear doorframe as shown on the following page. This will be the starting point of the kit.


