


Page 14SKU 94564 For technical questions, please call 1-800-444-3353.
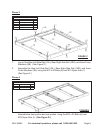
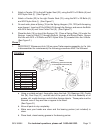
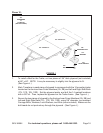
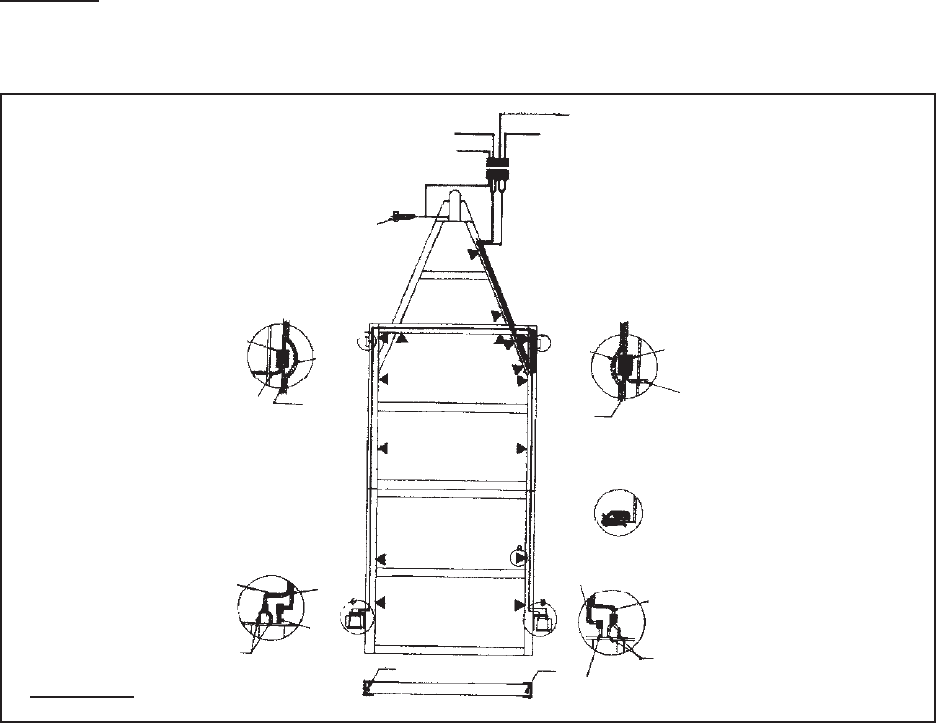
Attach the License Plate Bracket (27) with the Left Tail Light (28L) to the Rear Left
Side Rail (1RL), using the M10 x 20 Bolts (A) and M10 Nylon Nuts (I).
NOTE: The Left Tail Light has a clear window at the bottom. (See Figure H.)
Attach the Right Tail Light (28R) to the rear of the Right Side Rail (1RR), using the
M10 x 20 Bolts (A) and M10 Nylon Nuts (I). (See Figure H.)
Open the Lens of the Side Running Lights (24). Run the Wire Lead of a Side Run-
ning Light through the center hole located at the front end of the Front Left Side
Rail (1FL). Then attach the Side Running Light to the Front Left Side Rail, using
the 4mm Self Tapping Screws (P). (See Figure H .)
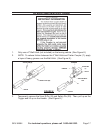
Run the Wire Lead of the remaining Side Running Light (24) through the center
hole located at the front end of the Front Right Side Rail (1FR). Then attach the
Side Running Light to the Front Right Side Rail, using the Self Tapping Screws (P).
(See Figure H.)
Re-install the Lens on the two Side Running Lights (24). (See Figure H.)
Phase 9:
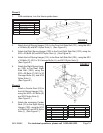
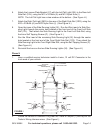
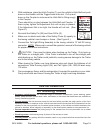
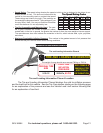
Have a qualied service technician install a 4-wire, 12 volt DC Connector in the
trunk area of your vehicle.
TAIL LIGHT IL-
RUNNING LIGHT
GROUND (WHITE)
GROUND (WHITE)
U
CONNECTOR
YEL-
F
BROWN
WIRE
(FROM LIGHT)
C
F
BROWN
YEL-
RED
BLACK
C
D
L.H. STOP &
R.H. STOP & TURN
GREEN
E
E
CONNECTOR
WIRE
(FROM LIGHT)
BROWN
WIRE CLIP
D
GREEN
BROWN
BLACK
RED
B
B
A
A
FIGURE I
Locate the vehicle’s Connector Plug near the Trailer’s Coupler (7) and lay out the
Trailer’s Wiring Harness wires. (See Figure I.)
6.
7.
8.
9.
10.
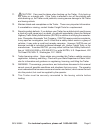
1.
2.