


Page 10SKU 92174
For technical questions, please call 1-800-444-3353.
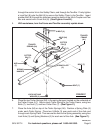
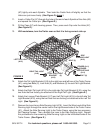
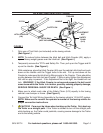
(A7) tightly onto each Spindle. Then back the Castle Nuts off slightly so that the
Hubs can just move freely. (See Figure D, above.)
Insert a Cotter Pin (A7) through the hole at the end of each Spindle of the Axle (A6)
and spread the Cotter pin. (See Figure D.)
Fill the Caps (A7) with bearing grease. Then, press each Cap onto the Hubs (A7).
(See Figure D.)
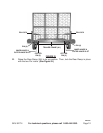
With assistance, turn the Trailer over so that it is facing correct side up.
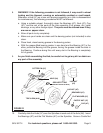
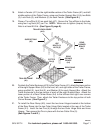
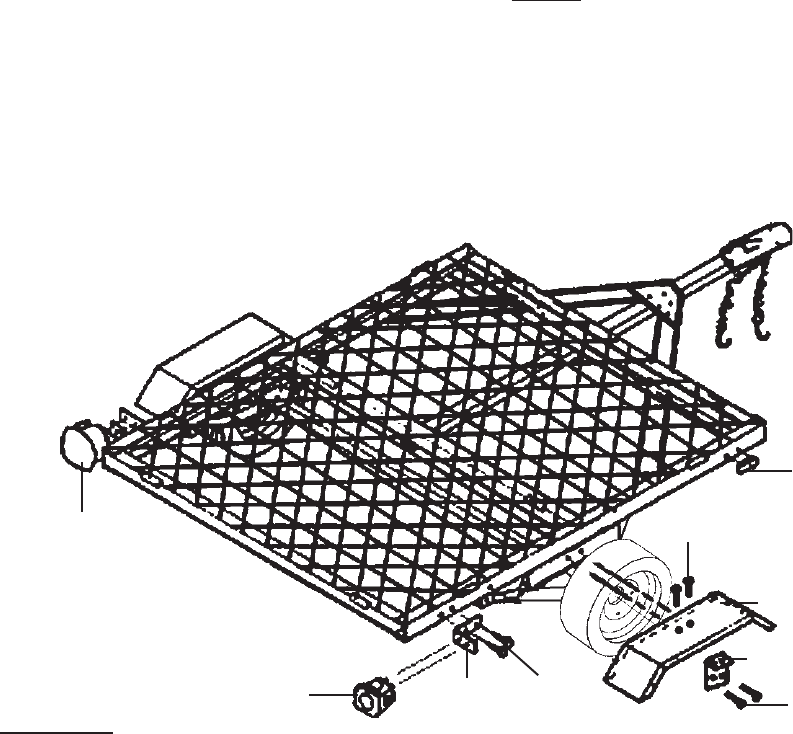
LEFT TAIL LIGHT
(A15)
RIGHT TAIL LIGHT
(A16)
TAIL LIGHT
BRACKET
(A18)
BOLT
(2)
SIDE
RUNNING LIGHT
(A19)
FENDER
SUPPORT BAR
(A14)
FENDER (A11)
BOLT (2)
BOLT (2)
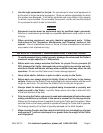
FIGURE E
Attach the Tail Light Brackets (A18) to the right/rear and left/rear of the Trailer Frame
(A1), using two Bolts (2), Lock Nuts (2), and Washers (2) for each Tail Light Bracket.
(See Figure E.)
Attach the Right Tail Light (A16) to the right side Tail Light Bracket (A18), using the
two Nuts that are factory pre-attached to the Right Tail Light. (See Figure E.)
Attach the License Plate Bracket (A17) and Left Tail Light (A15) to the left side Tail
Light Bracket (A18), using the two Nuts that are factory pre-attached to the Left Tail
Light. (See Figure E.)
Remove the Lens from a Side Running Light (A19). Insert the Wire Lead of the Side
Running Light through the center hole in the right/forward side of the Trailer Frame
(A1). Attach the Side Running Light to the Trailer Frame, using the two accessory
Self Tapping Screws. Then, reattach the Lens to the Side Running Light. Repeat
this procedure for the remaining Side Running Light on the left/forward side of the
Trailer Frame. (See Figure E.)
11.
12.
13.
14.
15.
16.
17.