


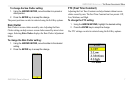


GMR 20/40 Owner’s Manual 11
GMR 20/40 OPERATION > THE RADAR ADJUSTMENT MENU
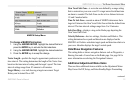
To move the center location of the VRM:
1. Using the ARROW KEYPAD, highlight Move and press the
ENTER key.
2. Using the ARROW KEYPAD, move the center point of the
VRM to the desired location.
3. Press the ENTER key to set the new location.
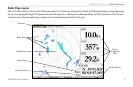
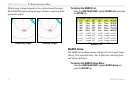
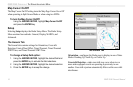
To use the VRM/EBL, expand the diameter of the VRM so that the
outer edge touches the target. Rotate the EBL until it intersects the
VRM at the target location. The measured range and bearing are
displayed in the lower left corner of the screen.
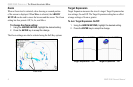
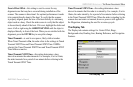
MARPA
The Mini Automatic Radar Plotting Aid or MARPA function is used
to aid in collision avoidance. MARPA can track up to ten designated
targets. Detailed information including Bearing, Range, Course,
Speed, Closest Point of Approach, and Time to Closest Point of
Approach for each target is displayed in the MARPA list.
Note: The MARPA function requires the use of a heading sensor.
The heading sensor must output the NMEA sentence HDM or
HDG at format 0183, v2.30 or higher.
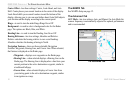
MARPA relies on a Heading Sensor to provide accurate own vessel
heading information. Accurate heading data enhances MARPA’s
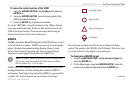
performance. Each target being tracked by MARPA is represented by
a symbol. The symbols indicate the current state of the target.
Acquiring Target
Target is Safe
Target is Dangerous
Lost Target
For each target, a number and Vector Line is displayed with the
symbol. The number is the MARPA List ID Number. The Vector Line
is a visual reference of the target’s course and speed.
To designate a MARPA target:
1. Using the ARROW KEYPAD, highlight Acquire Target and
press the ENTER key.
2. On the Radar page, using the ARROW KEYPAD, move the
pointer to the desired target and press the ENTER key.
continued