


Phone Notifications
NOTE: Phone notifications require an Apple
®
iPhone
®
equipped with Bluetooth 4.0 wireless technology and iOS
®
7 or
later.
When your phone receives messages, it sends notifications to
your device.
Viewing Notifications
Before you can view notifications, you must connect to your
paired phone (Connecting to a Paired Phone).
1
Select > Notifications.
2
Select a notification.
3
Select or to scroll through the contents of the
notification.
Wi-Fi Connected Features
This device has several Wi‑Fi connected features. The Garmin
Connect Mobile application is not required for you to use Wi‑Fi
connectivity.
Data uploads to Garmin Connect: Automatically sends your
data to Garmin Connect as soon as you finish recording your
round.
Software and course updates: Your device downloads the
latest software and course updates when a Wi‑Fi connection
is available. The next time you turn on the device, you can
follow the on-screen instructions to install the software and
course updates.
Setting Up Wi‑Fi Connectivity
Before you can upload data wirelessly, you must have a round
saved to your device.
1
Go to www.garminconnect.com/, and download the Garmin
Express application.
2
Follow the on-screen instructions to set up Wi‑Fi with Garmin
Express.
TIP: You can register your device at this time.
Your device now attempts to upload your saved data to
Garmin Connect after each round.
Connecting to a Wireless Network
Before you can connect to a wireless network, you must set up
Wi‑Fi connectivity (Setting Up Wi‑Fi Connectivity) and enable
Wi‑Fi technology.
1
Select Setup > Wi-Fi > Add Network.
2
Select a wireless network.
3
If necessary, select to enter the network SSID and
password.
The device stores the network information and connects
automatically when you return to this location.
Appendix
Calibrating the Compass
NOTE: You must calibrate the electronic compass outdoors. Do
not stand near objects that influence magnetic fields, such as
cars, buildings, or overhead power lines.
Your device was already calibrated at the factory, and the
device uses automatic calibration by default. If you experience
irregular compass behavior, for example, after moving long
distances or after extreme temperature changes, you can
manually calibrate the compass.
1
Select Setup > Calibrate PinPointer.
2
Follow the on-screen instructions.
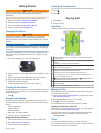
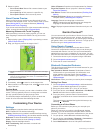
Installing a Memory Card
You can install a microSD™ memory card for additional storage
or pre-loaded maps.
1
Pull up the weather cap
À
from the microSD card slot
Á
.
2
Press in the card until it clicks.
Device Care
NOTICE
Do not store the device where prolonged exposure to extreme
temperatures can occur, because it can cause permanent
damage.
Never use a hard or sharp object to operate the touch screen,
or damage may result.
Avoid chemical cleaners and solvents that can damage plastic
components.
Secure the weather cap tightly to prevent damage to the USB
port.
Cleaning the Screen
Before you can clean the screen, you should have a soft, clean,
lint-free cloth and water, isopropyl alcohol, or eyeglass lens
cleaner.
Apply the liquid to the cloth, and gently wipe the screen with the
cloth.
Cleaning the Device
1
Wipe the device using a cloth dampened with a mild
detergent solution.
2
Wipe it dry.
Using the Backlight
• At any time, tap the touchscreen to turn on the backlight.
NOTE: Alerts and messages also activate the backlight.
• Select to turn on the backlight and adjust the brightness.
• Change the backlight timeout (Settings).
Specifications
Battery type Rechargeable, built-in lithium-ion battery
Battery life 15 hours, typical usage
Operating temperature range From -4º to 140ºF (from -20º to 60ºC)
Charging temperature range From 32º to 104ºF (from 0º to 40ºC )
Water resistance IEC 60529 IPX7
Clearing User Data
NOTE: This deletes all user-entered data.
1
Hold to turn off the device.
2
While holding green view, turn on the device.
3
Select Yes.
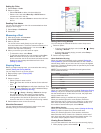
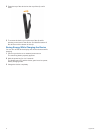
Using the Clip
NOTE: Your clip may look slightly different from the image.
You can use the clip to attach the device to your belt, pocket, or
bag.
1
Slide the bottom of the device into the bottom of the clip.
NOTE: If you place the device into the clip upside-down, it
does not lock into place and could fall out of the clip easily.
Appendix 5