


32
picture.
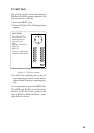
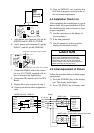
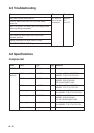
3) Press the [ECHO] key. The following
display appears.
AUTO 1 2 3
MAN
AUTO 1 2 3
MAN
GAIN
STC
A/C RAIN 00
A/C AUTO OFF ON
12
ECHO KEY
TO EXIT
Current
level
Item selected
for adjustment
Figure 4-4 Display for adjustment of gain,
STC (A/C SEA), A/C RAIN
4) Press the cursor pad to select GAIN-
AUTO, if it is not already selected.
5) Select minimum range. Press the
[ECHO] key and press the cursor pad to
select STC-AUTO, if it is not already
selected.
Note: When the unit is connected to the radar
having a linear amplifier, the radar picture may
not be adjusted through the menu.
4.6 Displaying the Installation
Menus
Two sets of installation menus, Installation
Setup 1 and Installation Setup 2 enable en-
try of initial settings and adjustment of the
radar picture.
Procedure
1) Turn on the power while pressing and
holding down the [HM OFF] key.
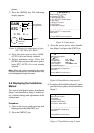
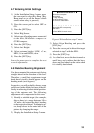
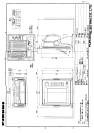
2) Press the [MENU] key.
MAIN MENU
Select item by keys
and press ENT key.
1. Backlight/Brilliance
2. P/L, IR, NR & Radar Mode
3. Nav Data
4. Mode & Function
5. Self Check
6. Installation Setup 1
Press HM-OFF to temporarily
hide menu.
<Press MENU key to escape.>
. . . . . . . . . . . . . . . . .
Figure 4-5 main menu
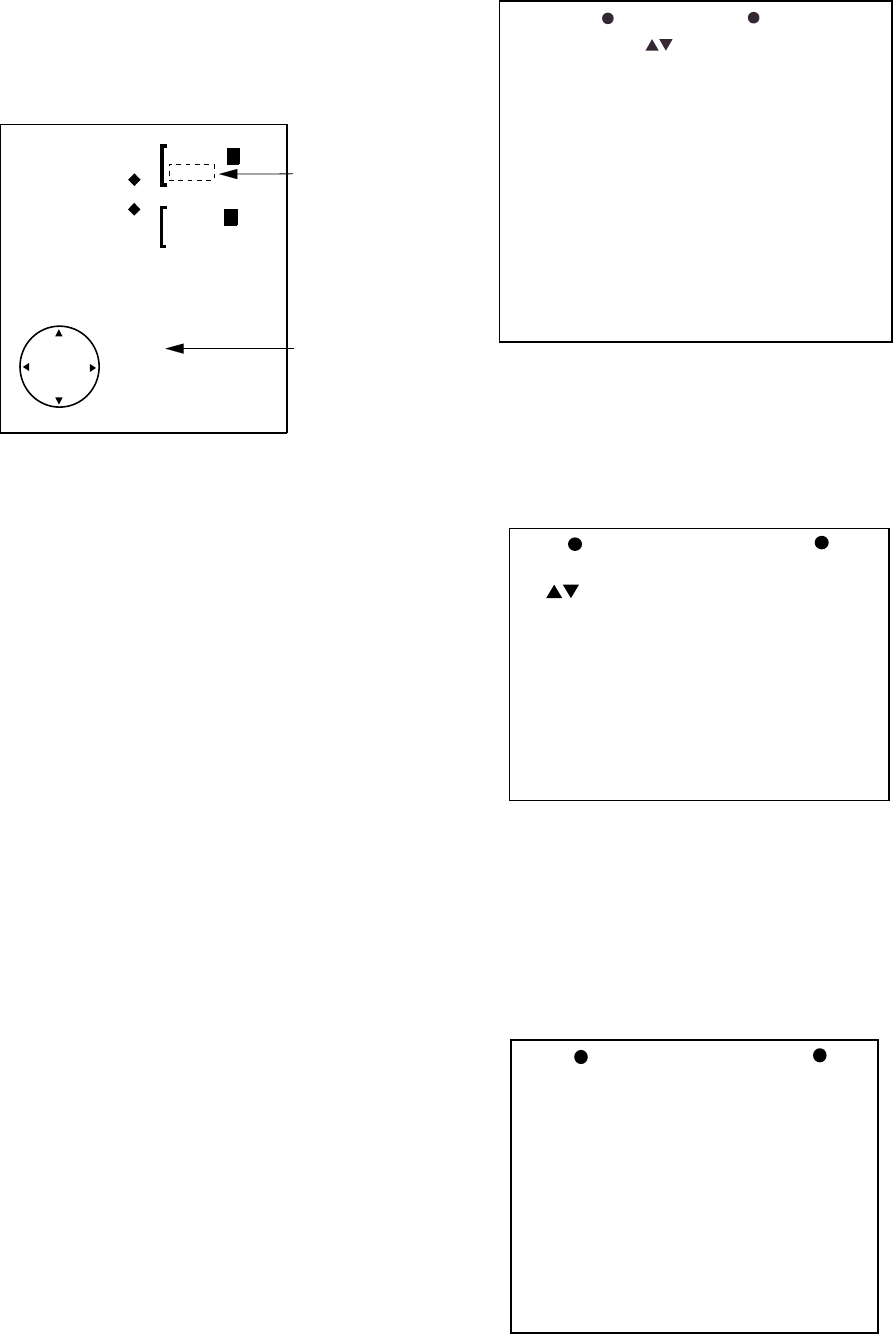
3) Press the cursor pad to select Installa-
tion Setup 1 and press the [ENT] key.
INSTALLATION SETUP 1
Select item and option
by keys.
1. Key Beep
2. Hdg Sensor
3. Demo Display
4. Ant. Height
5. Installation Setup 2
. . . . . . . . . . . . . . . . .
Press HM-OFF to temporarily
hide menu.
<Press MENU for main menu.>
OFF ON
MAG GYRO
OFF ON
LOW MED HIGH
Figure 4-6 Installation setup menu 1
4) To display the Installation Setup 2 menu,
press the cursor pad to select Installation
Setup 2.
INSTALLATION SETUP 2
Select item and option
by trackball.
1. Align Heading
2. Adjust Sweep Timing
3. On Hours 000019.8 H
. . . . . . . . . . . . . . . . .
Press HM-OFF to temporarily
hide menu.
<Press MENU for main menu.>
Figure 4-7 Installation setup 2 menu