


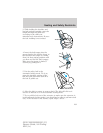
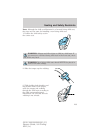

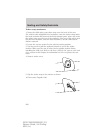


8. Remove remaining slack from the
belt. Force the seat down with extra
weight, e.g., by pressing down or
kneeling on the child restraint while
pulling up on the shoulder belt in
order to force slack from the belt.
This is necessary to remove the
remaining slack that will exist once
the additional weight of the child is
added to the child restraint. It also
helps to achieve the proper
snugness of the child seat to the
vehicle. Sometimes, a slight lean
towards the buckle will additionally
help to remove remaining slack from the belt.
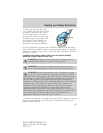
9. Attach the tether strap (if the
child seat is equipped). Refer to
Attaching child safety seats with
tether straps later in this chapter.
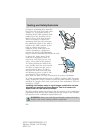
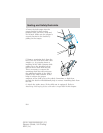
10. Before placing the child in the
seat, forcibly move the seat forward
and back to make sure the seat is
securely held in place. To check
this, grab the seat at the belt path
and attempt to move it side to side
and forward. There should be no
more than one inch (2.5 cm) of movement for proper installation.
11. Ford recommends checking with a NHTSA Certified Child Passenger
Safety Technician (CPST) to make certain the child restraint is properly
installed. In Canada, check with your local St. John Ambulance office for
referral to a CPST.
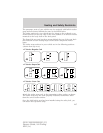
Installing child safety seats in cinch tongue combination lap and
shoulder belt seating positions (Regular Cab front center and
Super/Crew cab rear center positions)
The belt webbing below the tongue is the lap portion of the combination
lap/shoulder belt, and the belt webbing above the tongue is the shoulder
belt portion of the combination lap/shoulder belt.
WARNING: Always use both lap and shoulder safety belt in the
Regular Cab center seating position if applicable.
Seating and Safety Restraints
202
2010 F-250/350/450/550 (f23)
Owners Guide, 1st Printing
USA (fus)